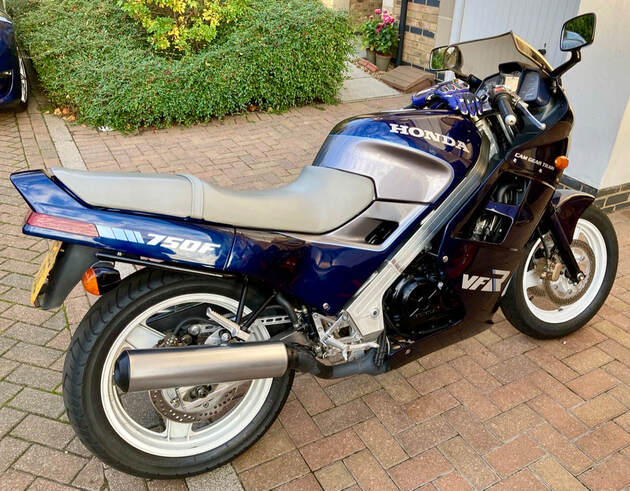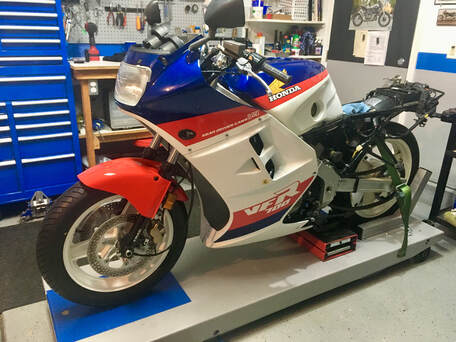
This is a very low-mile bike with no apparent prior damage so things are fitting well, with minimal massaging needed. The fuel tank interior was restored with a basic vinegar soaking. The mirrors will need repainting and one fairing will require a decal replaced followed by clear coat. The light at the end of the tunnel is clearly visible.
Progress continues on Project 30, a 1986 VFR750F, and now that the front forks, brakes and wheel/tire are back in place it's time to begin refitting the bodywork.
This is a very low-mile bike with no apparent prior damage so things are fitting well, with minimal massaging needed. The fuel tank interior was restored with a basic vinegar soaking. The mirrors will need repainting and one fairing will require a decal replaced followed by clear coat. The light at the end of the tunnel is clearly visible.
0 Comments
It's Thanksgiving Day in America.
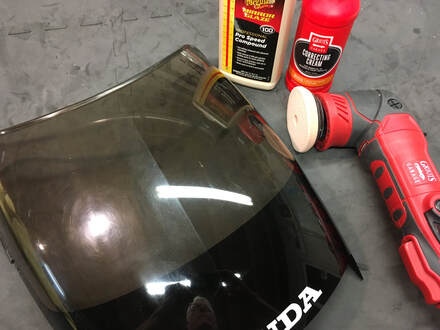
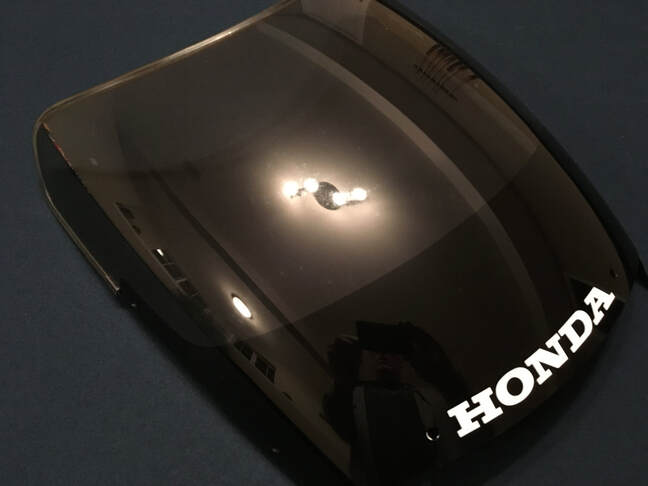
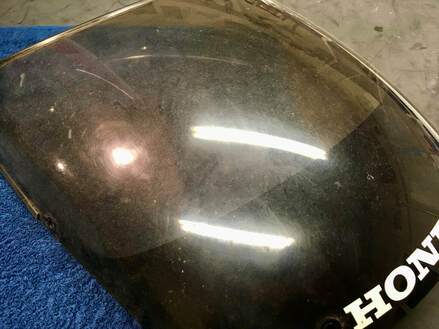
In this Year of COVID there are many who will strain to find anything to give thanks for — loved ones lost, isolation, families kept apart. But this will end, and we will return to the open road and all the freedoms this great country offers those of us lucky enough to know the special feeling that our two-wheeled passion brings to our lives. Hang in there, riders. As Project 30 progresses through the reassembly stage I'm beginning to piece the body together, and today was the windscreen's turn. The screen looked pretty bad at first blush but no severe damage, like gouges or cracks. I normally would begin the process by a light wet sanding with 3000 or 5000-grit, followed by buffing with two grades of compound. The sandpaper route can be a risky go, however, as just a bit too much sanding can often remove an invisible coating, just like clearcoat on paint — in this case likely an anti-scratch coating. Because this screen had no physical damage, I elected to forego the sandpaper, instead substituting a faster cutting compound — Meguiar's Mirror Glaze #100, which looks to be their most aggressive compound, followed by Griot's Correcting Creme. The entire process took about 30 minutes. This proved to be a very effective alternative to sanding. I taped off the left half of the screen to show the change. The camera doesn't really pick up the full effect, but suffice to say it worked. The finished screen will really compliment this low mileage, original Interceptor.
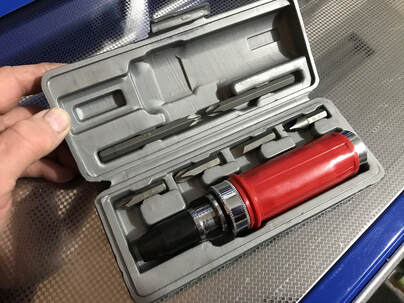
In response to the global pandemic, declining show attendance and general malaise in the motorcycling world, International Motorcycle Shows has made the decision to change its format from a winter indoor event to a summer outdoor convention-style show encompassing an expanded emphasis on outdoor powersports in general. I agree that our annual Chicago show in February has become repetitive, but it was still a nice mid-winter break for those of us entrenched in the cold, snow and ice of a midwest winter. Guess we'll just have to take a little trip to Key West instead. Show locations and dates will be announced in December. Here's a little promo video from IMS: I was recently reminded of how a tool that we easily take for granted can be such a lifesaver in a mechanical pinch. I came across a corroded master cylinder reservoir screw that was simply not going to budge, even with all the pressure I could muster by hand. Time to reach for the impact screwdriver kit. I was browsing "Inside the Garage," which is a sub-feature of "Continue The Ride," which is a sub-feature of IMS (International Motorcycle Shows), if I'm following the progression correctly. In any case there's a short video on the lowly impact screwdriver, which we may not think of as an essential tool...until that moment comes where a couple of whacks on this thing will save the fastener, possibly save the part and save a boatload of time removing a trashed screw head. And, if you don't have a kit like this in your tool collection, it might be a great suggestion for that understanding significant other as a holiday gift. Here's Steve Knoble at Skidmark Garage with a demonstration (and check out their other YouTube videos): I recently received an email from Peter H. with his story of acquiring and saving a blue/silver 1986 VFR750F. The bike shows only 3600 miles and looks to be a pristine, original-condition example. In his own words: Hi Joe,
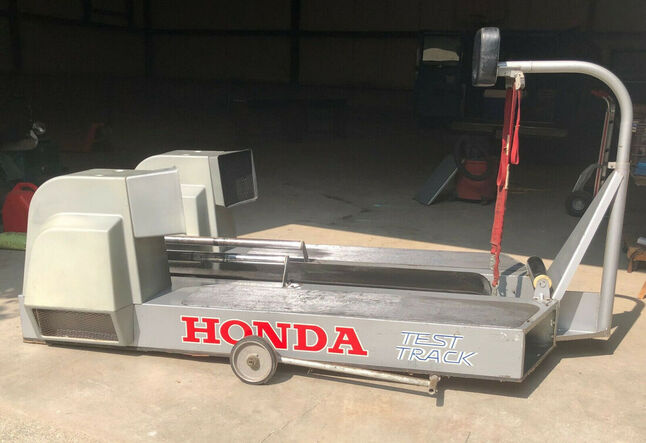
Back in the early 90s, I had a white and gold F-J model (with fuel gauge IIRC) which was such a great experience that I went looking for a COVID project. I recently acquired a blue and silver 1986 RC24 with (at the time) only 3600 recorded miles. This bike was found in Japan (so actually showed 5800KM) and imported into the UK — sadly I have no back story to this 'find' and the mileage is not verified but seems believable from the condition. The condition of the bike is quite remarkable with original everything even down to the tyres (which were the first thing that had to be replaced being over 30 years old! 😀). There is very little degradation to most components and fittings including rubber parts, fasteners, etc but the engine cases and wheels do have some aluminium corrosion under the paint plus there is small amount of surface rust on parts of the subframe. It even has the original toolkit which I don’t think had ever been used. Given the remarkable state of preservation, only a battery plus service items (plugs, filters and liquids) were needed to get the engine running well. After a few miles, carburettor problems (miss fire and fuel leak) showed that float valves needed replacing (plus a general carb clean). I have since performed a valve clearance check (all but one a little tight) and balanced the carbs. This has improved smoothness and idle no end. Other than this, the brakes have been dismantled and cleaned and that is about it. I was again surprised to see the forks hold air. [I know your articles don’t focus on service but I think some discussion of setting up the valves would be a great addition. To be honest, even discussion on removing the cam covers would have helped me]. I was able to recover the somewhat hardened carburettor to head rubbers (and some others) by soaking in Wintergreen Oil mixed with Isopropyl Alcohol (1:3) for 48 hours - I had read something on the web about this but was surprised to see it worked so well! SInce I didn’t have a right angle driver to adjust the carbs, I was able to just fit a flexible driver with small socket to make the necessary adjustments. Finally, since working on the bike, I have now covered a few hundred miles without issue and the engine is running really nicely, so well, in fact, that I have accidentally stumbled into a speed limiter at 190km/h. I have yet to investigate this but am guessing it must be implemented as a signal from the speedometer itself to the CDI unit. Anyhow, thanks once again for producing this great website! Kind regards, Peter H. Cambridge UK I'm not sure what to make of this item up for sale on eBay. It's listed as a Honda Test Track, which our seller speculates was an apparatus made available to dealers to use as some sort of treadmill for motorcycles. I'm having trouble visualizing how it was used, maybe as an indoor testing device after performing service? I also can't figure out which is the front and which is the rear, but the two large ducts, powered by the moving belt, apparently blow air for engine cooling, which would make that the front end. The large center pad would then be used by the "rider's" back to help steady the bike as the rear tire did its best to slide sideways off the belt? I have no idea, but this looks like a lawsuit waiting to happen.
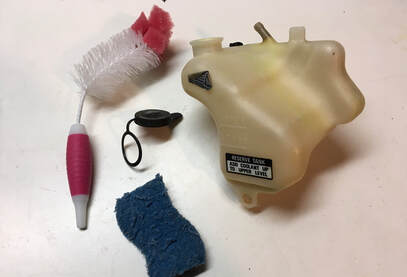
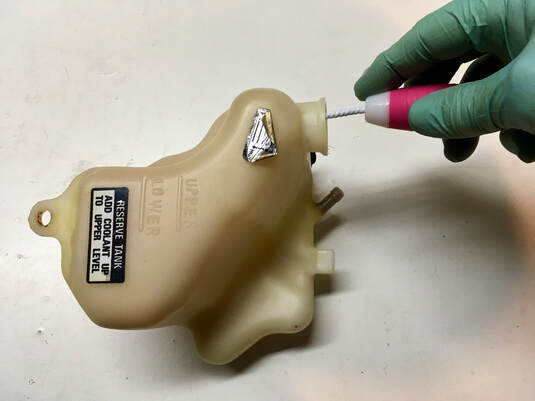
In any case, it can be yours for $1750 or Make Offer. Shipping is on you, or pick it up in Leveret, Massachusetts. For reasons unknown, one of the nastiest cleaning jobs I come across on these old bikes is the coolant overflow bottle. The exterior is bad enough, as a rule, but the interior is more often than not a mixture of dark sludge and stained plastic. To address this, I use a water-based degreaser inside and out. The exterior gets a good scrubbing with a cleaning pad, but the interior is more of a challenge. For this I use a flexible baby bottle brush from the dollar store with a strong solution of degreaser and hot water. Keep at it, and you'll soon have it looking its best. If those stickers have lost their sticky, a little rubber cement or all-purpose glue will put them back in place. |
THE SHOP BLOG
|