Honda's V4 Interceptors
V4 Dreams
  • Home
  • Shop Blog
  • Maintenance
  • Products
  • My VFRs
  • Historical

Installing Cooling System Components

1/21/2025

0 Comments

 
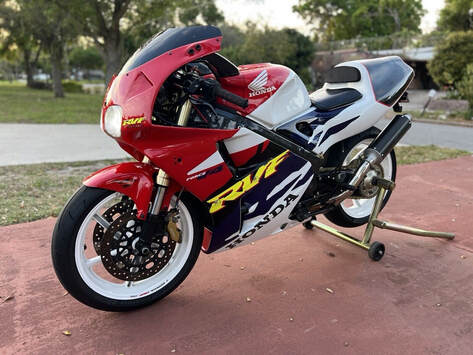
The cooling system components on Project 41, an '87 VFR700 F2, were completely removed and disassembled for the bike's resurrection. The individual pieces were cleaned, "de-corroded," and polished or repainted as necessary. Fresh seals, a new OEM thermostat and silicone hoses with new clamps from AS3 were sourced and even a new GPI aftermarket radiator. Time to put it all back together. These steps will generally apply to all the V4s.
(click on an image to enlarge)
(Below) I begin in the cylinder valley by assembling the two fittings and their chrome connecting tube. These components were in tough shape and separating the chrome tube was an effort. After a lot of prep, the parts were ready for assembly with their new, lubricated seals. 
(Below) Next I move to the lower chrome pipe and short water pump hose. The pipe looked terrible upon removal but proved to be mostly surface corrosion which cleaned up with 0000 steel wool and chrome polish. After sliding the lower hose and upper o-ring seal onto the pipe, I insert the upper portion and slide the lower hose onto the water pump housing, lining up the support bolt hole. Then I install the support bolt so everything is correctly positioned before tightening the two lower hose clamps. 
(Below) The water pump cover is next. The new o-ring seal won't want to stay in place during installation, so I coat it with a film of grease to hold it. I'll refer to my cheat sheet to match the bolt lengths to their positions — note how to measure bolt thread length. Tighten the bolts in an alternating pattern, and it's good practice to renew the drain bolt's crush washer.
(Below) Turning my attention to the right side of the engine, I'll first bolt the small coolant nipple onto the engine block with its fresh o-ring. Next I assemble the new thermostat and housing, and screw in the temperature sensor with a few turns of pipe tape (I don't think the sealing tape is necessary, but it makes me feel better). Plug in the sensor's wire connector before installing onto the engine — if you forget this connector, just use a long needle nose pliers to reach it once the housing is installed. Next I install the coolant hoses with their clamps loosely in place and this assembly is ready to go onto the engine.
(Below) The rear hose is slipped onto its nipple, but not tightened, and the thermostat housing is then bolted into place — don't forget the o-ring between the housing and the engine block. Note that there's a long and a short bolt; here the longer is being installed. Lastly, the rear hose clamps are tightened.
Picture
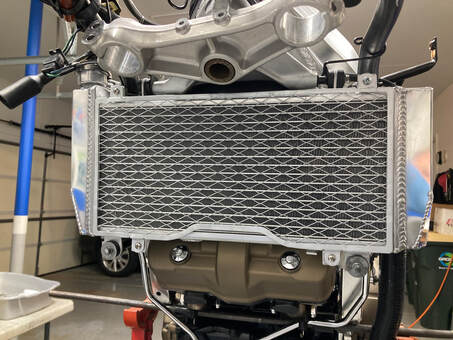
The next step is to install the radiator, and I'll enjoy easy access with the forks temporarily off the bike. For this project we've chosen a GPI aftermarket radiator (see Shop Blog post from Aug. '24), but the installation is the same for an OEM radiator.

(Below) Before beginning, I'll polish the chrome oil cooler lines while the radiator is out of the way. Some of the Gen-2 bikes are supplied with black lines, but these chrome lines were covered in dirt and surface rust. About ten minutes with chrome polish and crumpled aluminum foil has them looking new. A soft brass brush helps to clean the difficult-to-reach areas. In the final photo, note the pre-installed Hindle exhaust pipe adapters and springs.

(Below) The radiator is first slipped onto a stud located on the upper right side of the frame (note the fan wires exiting outboard of the rubber grommet), then the special left-side bracket is slipped into place in the rubber radiator grommet and bolted loosely into the frame. Then work the oil cooler hose into the wire bracket.
(Below) The two lower mounts are next. Often, the grommets won't line up with the frame brackets, as is the case here. I simply loosen the brackets' mounting bolts which allows me to align the radiator bolts and brackets. Tighten the three radiator bolts and, lastly, the lower bracket bolts to the frame. 
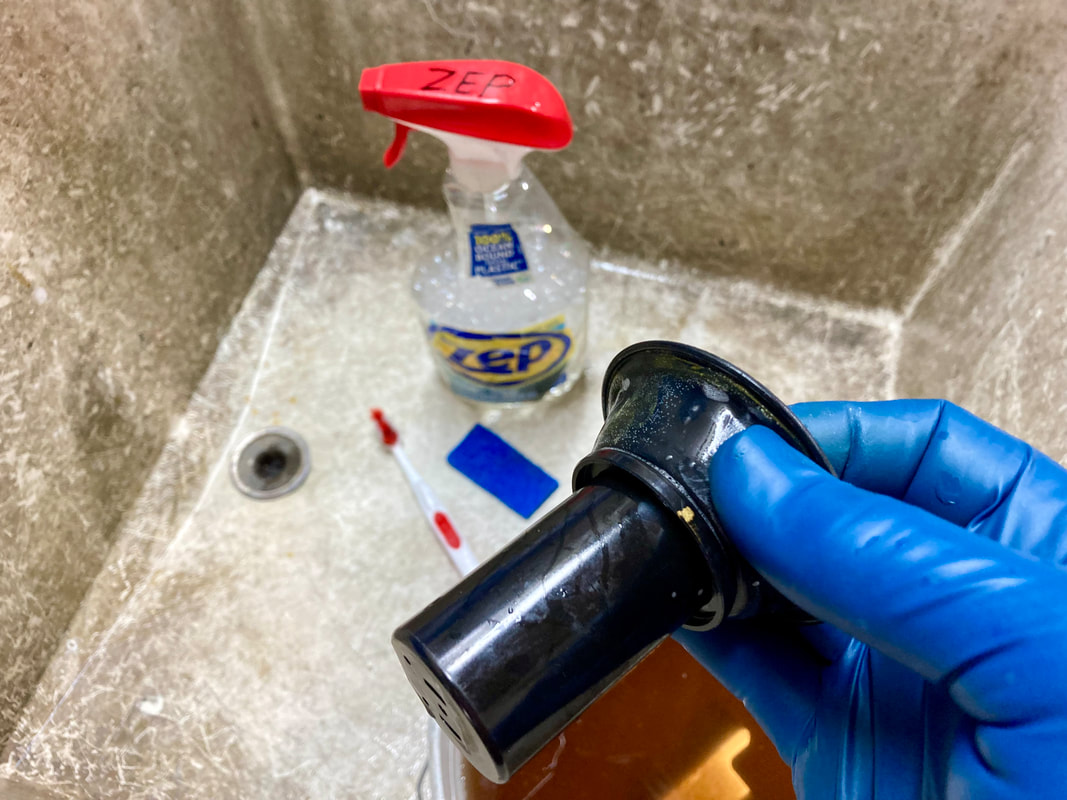
(Below) The two large radiator hoses are fitted next, and finally the overflow coolant bottle and its two hoses. I cleaned the bottle earlier, off the bike, using water-based degreaser, very hot water and a baby bottle brush. Rinse well and install. The radiator-to-bottle line has been replaced with a silicone hose which will stretch over the GPI radiator's larger radiator nipple. It's secured at four points (red arrows) and forward alongside the carburetors. The drain line is routed downward alongside the fuel tank drain line, exiting near the right footpeg. Don't forget to plug in the fan electrical connector.

All that's left is to fill with antifreeze, confident in your efficient and leak-free cooling system.
Picture
0 Comments

Carb Cleaning Tribulations

1/15/2025

0 Comments

 
PictureCarb parts fresh from a 'sonic bath
I've recently been working to clear my backlog of carburetors in need of rebuilding, consisting of five sets of Gen-3 carbs. It's always a bit like unwrapping a gift when I begin disassembly of a dirty set, never knowing what I might find lying in wait. Clogged jets and petrified gaskets are expected, but there's also broken bits, incorrect parts and creative assembly from past attempts by well-meaning DIYers. Here's a sampling of typical chores.

(Below) These carbs' vacuum diaphragms are afflicted with some sort of white and green stuff, possibly mold or mildew? These slide assemblies are NLA so I treat them with a delicate touch. Here I'm using Zep degreaser, a mild cleaner, massaging the rubber diaphragm with finger pressure and a soft toothbrush around the edges. In extreme cases the round rubber edge can be coated with stubborn crusty corrosion from a rusted diaphragm cap — a challenge to remove without damaging the diaphragm. I use a warm soapy bath and a fingernail to gently scrape the crust off as best I can. If the rubber seems particularly dry I will rub on a thin application of red rubber grease to rejuvenate and preserve the rubber.​ I also clean the plastic slide by scrubbing with a non-scuff kitchen pad followed by a hot water rinse and air dry.

(Below) The main jet needles are often stained with sticky brown varnished gasoline. This I remove with a scrub pad and degreaser or solvent. Two of these four float hinge pins were very difficult to remove due to varnished gas. Here, I'm using 1200-grit paper wetted with Ballistol to cut the varnish, allowing the floats to pivot freely. I like to roll these items (and the pilot adjustment screws) on a flat surface to check for straightness.
(Below) I'm no longer able to source individual float valves for the Gen-3 carburetors, so I rely on Keyster rebuild kits, which are quality Japanese-made parts. Next, this particular carb set had a broken enriching (choke) valve — these are soft brass and don't like to be forced. I learned this long ago when trying to remove a stuck valve by pulling with pliers. It didn't take much force to pop that little head right off, like the one shown here. This one had a bent tip which expectedly broke when straightened. Note that there's two distinct parts here…one has a wider gap to allow room for two pieces of linkage on carbs number 2 & 3 (red arrows). I clean these shafts with 1200-grit sandpaper wetted with cleaner/lube, like WD40 or similar. Shown next is an air cut valve assembly. These are often reusable, like this one, if treated gently. I carefully clean the rubber diaphragm and apply a light film of red rubber grease to preserve it. These assemblies should be removed when performing a thorough carb cleaning.
(Below) Here's two shots of the various parts cleaned and ready for assembly. The pink arrow shows how I mark each carbs' float with permanent marker dots. This way they maintain what float level adjustment they had previously, saving time setting the float heights after installing. I also keep the slide assemblies with their original carbs — not necessary, but my thinking is that each is well mated to their carb, so may as well keep them paired. 
And here's a few more examples of what may be lurking in your carb project.
0 Comments

Winter's Mid-point

1/15/2025

0 Comments

 
The good news; my winter off-season is half over! The bad news; my winter off-season is only half over. In any event, I'm making the best of it — Project 41 is in the assembly stage and coming together nicely. I've finally found time to get several sets of Gen-3 carburetors rebuilt, just waiting for the opportunity to get them tuned. For that I'll utilize my '93 VFR, but the lift is occupied with #41 for the time being. Parts orders and inquires are increasing as the season turns the corner, a sure sign that warmer days are coming.

As a mid-winter pick-me-up I'll share a 5-minute video from YouTube's V4 Rider, this time on a tuned Gen-8 VFR800 riding the Pampilhosa da Serra mountains in central Portugal. I like his riding style…note his cornering lines, he's a fan of the late apex, as am I. Also note his throttle/clutch/shift technique; he's very precise and barely fans the clutch lever — sometimes ignoring the clutch. He's good. Enjoy.
0 Comments

NC35 For Sale In Florida

1/10/2025

0 Comments

 
PictureClick on image for the eBay link
What: 1997 RVF400 (NC35)
Why: Beautiful, desirable, rare
Where: Orlando, Florida
Price: Auction; BIN $11,500

Often referred to as a smaller sibling to the RC45 (previous post), this little screamer was only available in the Japanese market. This final iteration of the 400cc V4 was a comprehensive upgrade over the earlier VFR400. Production actually ended in 1996 but left-overs were available for a few more years, explaining this 1997 example.

And this one enjoys a sampling of modifications, including Tyga bodywork, Ducati rear wheel, several carbon fiber bits and more. Whether these changes make the bike more or less desirable is up to the buyer to decide, but the buy-it-now price of $11,500 is in line with more original examples. Note that there's no mention of the missing turn signals and mirrors.

If you're the appropriate size and have the required flexibility, then the RVF400 is reportedly among the finest handling and fastest in this class. According to MCN, "Honda at their very best."

0 Comments

RC45 For Sale In California

1/6/2025

0 Comments

 
PictureClick on image for the Craigslist link
What: 1994 RVF750R (RC45)
Why: Rare, low miles, original owner
Where: Torrence, California (LA)
Price: $69,000

If you're still reading beyond the $69K price, you must know what's on offer here. Produced by Honda's HRC division for World Superbike competition, 200 road-going homologation RC45 examples were built, with only 50 going to the U.S. This model was an upgrade replacement for the iconic RC30, notable changes including fuel injection and shortened stroke. The U.S. model was rated at only 101 HP, the Euro model at 118, but the full-on race bikes could go to 190 HP. The bike distinguished itself with many important titles, including:
1995 AMA Superbike Championship
1996 Daytona 200
1997 WSB Championship
1998 AMA Superbike Championship
FIM Endurance World Championship SIX times!

This particular example, #43, is offered as an original-owner with only 3050 miles showing, and "total stock, untouched." Arguably the worst ad I've ever come across for such an exclusive and expensive motorcycle, it includes six bad photos and only 18 words in the description. I guess our seller assumes the bike will sell itself, and that's probably true. The most recent comparable I found is a 903-mile example sold on BaT 15 months ago for $66,500 (+buyer fee), so the asking price is in the ballpark. These bikes are few and far between, so here's your chance to own a piece of superbike history.

0 Comments

Ebay Bargain Alert

1/5/2025

0 Comments

 
PictureClick on image for the eBay link
I'm always on the lookout for parts bargains. They're not as common as they once were, but a sharp eye can still spot one now and then.

Here's a great example. This is a New Old Stock Gen-2 rear Disc Pad Pin Kit from EBC. I've never seen one of these but what a bargain! This kit contains a collection of hardware you may want or need for your caliper rebuild, not commonly found in a caliper seal kit, for example.

From left to right in the photo, we have the no-longer-available "hanger" and its attaching bolt which secures the pad pins, followed by the two pad pins, and finally the pad spring. The pins and spring are still available from Honda, but if you were able to purchase all of this separately it would total about $70.

Our seller has this kit listed for only $10 including shipping! And, within one hour of my adding the listing to my eBay Watchlist, I was sent an offer for $9.50 — that's a little discount trick I've often used over the years to save a little on the hoards of parts I've had to buy.

I don't have a need for these parts, but if you're doing a complete caliper rebuild, maybe you do. The remaining parts required would typically be piston seals (K&S 19-1005) and the lower slider "sleeve," Honda part # 45111-MA3-006.

0 Comments

Please Don't Do This To Your Engine

1/4/2025

0 Comments

 
From The Archives: November 2022
Picture
The space vehicle we call Earth has tilted once again, reducing Mother Sun's effective calefaction to those of us on the top half of the globe…in other words, winter us upon us, and here in America's snow belt, that translates into some five months of motorbike hibernation.

Machines don't respond well to disuse, but there's at least one common storage misconception that we need to heed, and that's the fallacy that running an engine during storage is somehow "good" for the machine. It is not, and the photo above is graphic proof. What we're looking at is an amazing window into the innards of a 1986 VFR750F (Project 38), thanks to Sebspeed's modified clutch cover. What we see is a huge accumulation of moisture created when a cold engine has been run for the first few minutes after startup. What we don't see is the production of acids created by the incomplete combustion process, due to the cold engine's need for a rich fuel setting and those gasses slipping past the not-yet-expanded cylinders and rings. Note that by "cold" I mean any ambient temperature — not just the cold months. This photo was taken on a warm summer day.

This situation took 20 minutes of running in order to heat the engine's interior to the point where the excess moisture finally evaporated and the window cleared. When a well-meaning owner starts his engine every few weeks and idles it for several minutes this is what he or she is producing. The inside surfaces of the crankcase are awash in this water and acid soup, and when it's shut down the corrosion of aluminum and steel parts begins — bearings, gears, camshafts, etc. A stored engine does not need this exercise, but if you insist on making yourself feel better by running your stored engine, then it must be taken on the road for at least 20 minutes of normal riding to effectively dissipate this stuff. If not, you're doing more harm than good.

And, speaking of acids, remember that used motor oil holds suspended combustion acids. These too will spend the winter months eating away at your engine's internal bits. That's why engine oil should be changed at the END of the riding season, NOT the beginning.

Be considerate of our machine's needs; when the warmth returns we will be rewarded with a willing and able riding companion.
0 Comments

BT46 Tire Review

1/3/2025

1 Comment

 
In the latest issue of Rider magazine, I came upon this on-road review of the Bridgestone Battlax BT46. These tires would be spec'd for the Gen-1 and Gen-2 VF/VFR models, as they're bias-ply construction — later models wore radial tires. There's very few tire choices out there for the 16" fronts/18" rears in the correct OEM sizes. I've sampled them on the Gen-2 but have always returned to Bridgestones, first the BT45, then superseded by the current BT46. There's more selection if you want to stray from original sizes but I've always found that the engineers got it right to begin with.

Our reviewer tested these on a newer Royal Enfield 650 and came away very impressed, with comments like, "reassuring grip," "predictable behavior, "clear feedback," and "precise handling and confidence in every corner." I agree; these tires are grippy, versatile and priced right. They even sport current tread design, giving a touch of modernity to our old bikes.

Also shown below are current prices from Rocky Mt. ATV/MC (Gen-2 VFR).
Your browser does not support viewing this document. Click here to download the document.

Picture
1 Comment

Happy New Year!

1/1/2025

1 Comment

 
Wishing everyone in the V4 universe a happy, healthy and prosperous new year. Stay safe out there.
As a handy new year's bonus, posted below is a PDF file of an index to the major technical posts on this web page since the inception of V4 Dreams nearly ten years ago (!). It's provided by reader Michael S. through his thoughtful and generous effort. My web hosting platform doesn't provide for a search feature for the the "Archives," so I'm very grateful to Michael for indexing some 115 months of posts.
Scroll through the index on this page or download by moving your cursor near the bottom and clicking the download button.
Your browser does not support viewing this document. Click here to download the document.
1 Comment

    THE SHOP BLOG
    •••

    An on-going account of miscellaneous information, project bikes and noteworthy VFRs for sale


    Archives

    May 2025
    April 2025
    March 2025
    February 2025
    January 2025
    December 2024
    November 2024
    October 2024
    September 2024
    August 2024
    July 2024
    June 2024
    May 2024
    April 2024
    March 2024
    February 2024
    January 2024
    December 2023
    November 2023
    October 2023
    September 2023
    August 2023
    July 2023
    June 2023
    May 2023
    April 2023
    March 2023
    February 2023
    January 2023
    December 2022
    November 2022
    October 2022
    September 2022
    August 2022
    July 2022
    June 2022
    May 2022
    April 2022
    March 2022
    February 2022
    January 2022
    December 2021
    November 2021
    October 2021
    September 2021
    August 2021
    July 2021
    June 2021
    May 2021
    April 2021
    March 2021
    February 2021
    January 2021
    December 2020
    November 2020
    October 2020
    September 2020
    August 2020
    July 2020
    June 2020
    May 2020
    April 2020
    March 2020
    February 2020
    January 2020
    December 2019
    November 2019
    October 2019
    September 2019
    August 2019
    July 2019
    June 2019
    May 2019
    April 2019
    March 2019
    February 2019
    January 2019
    December 2018
    November 2018
    October 2018
    September 2018
    August 2018
    July 2018
    June 2018
    May 2018
    April 2018
    March 2018
    February 2018
    January 2018
    December 2017
    November 2017
    October 2017
    September 2017
    August 2017
    July 2017
    June 2017
    May 2017
    April 2017
    March 2017
    February 2017
    January 2017
    December 2016
    November 2016
    October 2016
    September 2016
    August 2016
    July 2016
    June 2016
    May 2016
    April 2016
    March 2016
    February 2016
    January 2016
    December 2015
    November 2015
    October 2015
    September 2015
    August 2015
    July 2015
    June 2015

    Categories

    All

    RSS Feed

Site powered by Weebly. Managed by HostGator