Honda's V4 Interceptors
V4 Dreams
  • Home
  • Shop Blog
  • Maintenance
  • Products
  • My VFRs
  • Historical

Fuel Pump Maintenance

12/26/2024

0 Comments

 
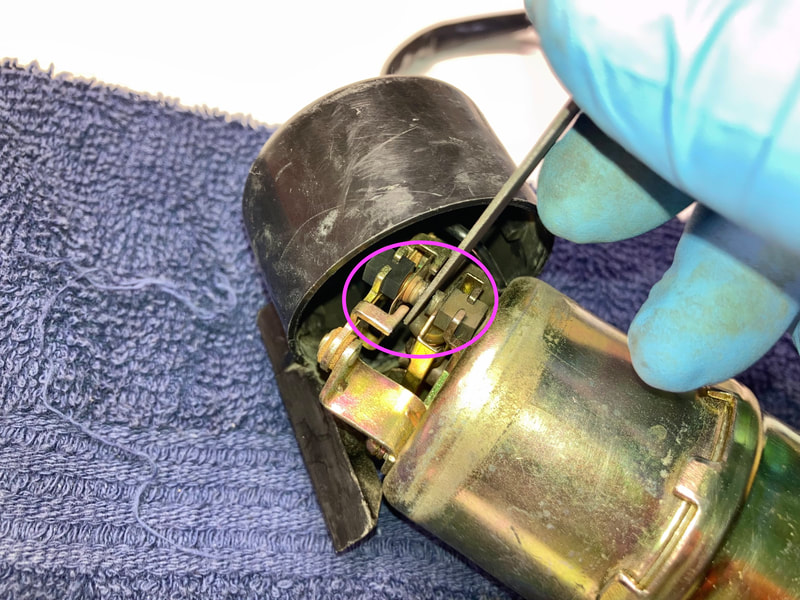
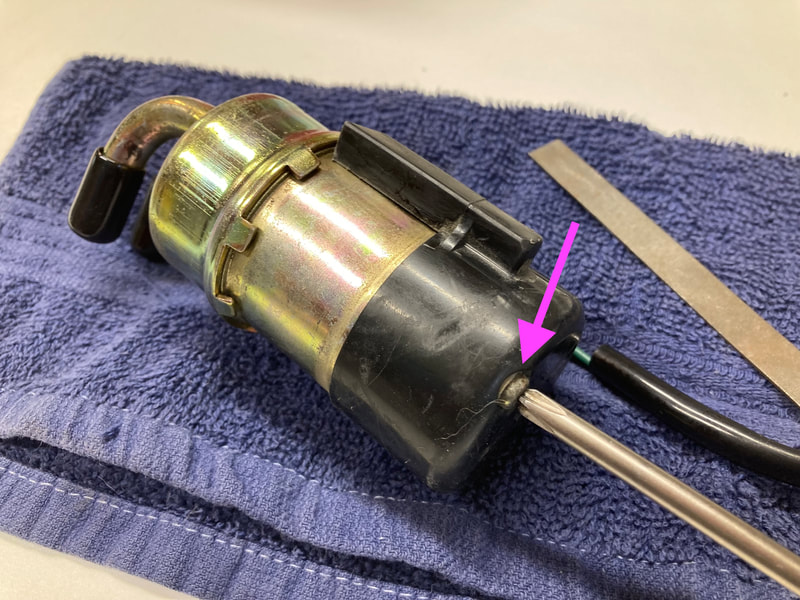
It's time to ready the original fuel pump for installation on Project 41. The pump was working fine when removed so I'm going to give it a little love before installing. After a general cleaning, I remove the single screw holding the plastic cover and, using a old-school points file, I gently file flat the points set, just like we did to distributor points back in the day. This removes any unevenness or corrosion, giving a fresh surface for the electrical contacts. Then a general spray with electronic contact cleaner, and the cover can be reinstalled.

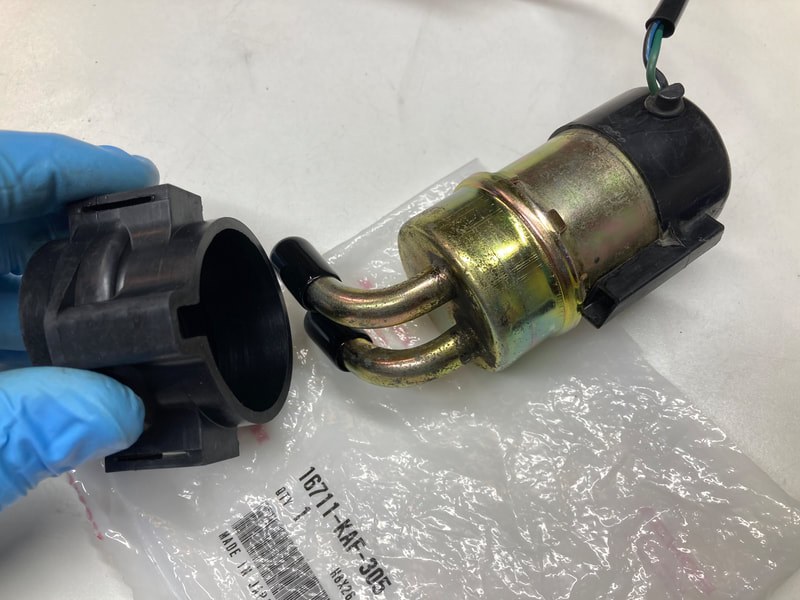
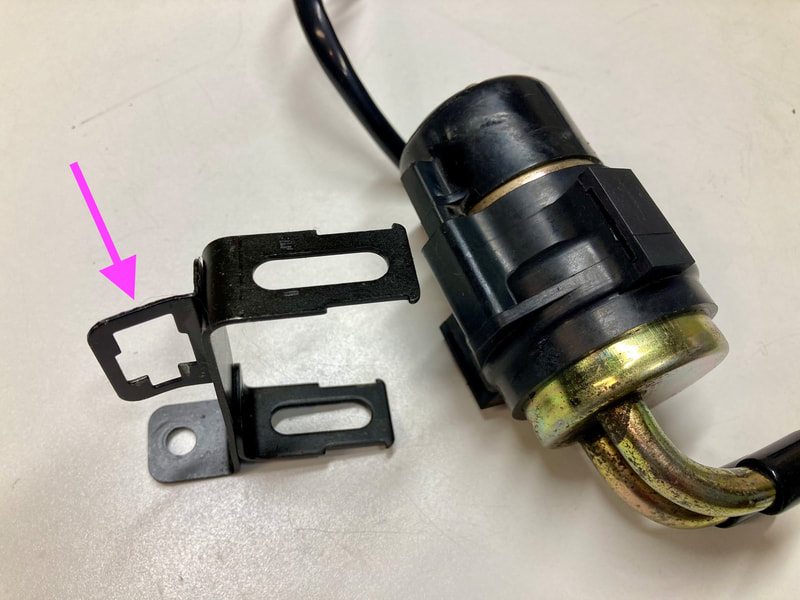
Honda still supplies the rubber "insulator" so I coerce that into place — warming it with hot water helps. That tang on the metal mounting bracket is there to hold the 3-wire stator connector, which I'm eliminating in favor of solid solder joints. That tang will now be in the path of the wires, so I bend it out of the way — it can be bent back in the future if desired. Finally, I ensure the wires' connector blades are clean, and this pump is ready to be bolted in place. 
Picture
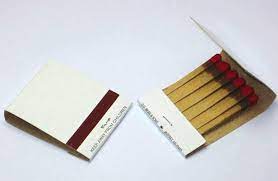
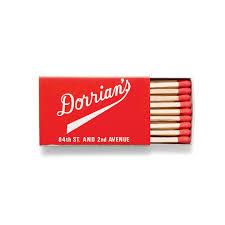
Historical note: Back in the time of distributor points, if a points file wasn't available, we would just slide a matchbook cover between the points, which would effectively remove surface corrosion until it was time to replace the points set, part of a traditional "tuneup." The tuneup consisted of replacing the points (and setting the "gap"), plus the condenser, spark plugs and "setting the dwell" which was done with a hand-held meter measuring the time, in degrees, that the points remain closed to produce the required magnetic field for the coils to blast the spark plugs. The kicker here is that a tuneup was best done about every 10,000 miles, or once per year, unheard of these days.

As I pondered this, it occurred to me that younger generations might not be very familiar with the whole "matchbook" thing. But back when cigarette smoking was taken for granted, nearly everyone had a book of matches handy, especially us low-life motorheads who spent our days tinkering with muscle cars. And that's why we used the common matchbook to clean the points. An adjunct to the matchbook, of course, was the less-common matchbox, which the Matchbox toy cars were a reference to, and when emptied, were used to store tiny childhood treasures. "Hey pal, got a light?"
0 Comments

Merry Christmas

12/25/2024

0 Comments

 
Picture
Painting By Tom Newsom
0 Comments

License Bracket Mounting Fix

12/20/2024

0 Comments

 
Picture
When restoring or refurbishing our bikes, all the bits and pieces will need some degree of attention. A few months ago I repainted the rear fender extension on Project 41. This particular piece was just too weathered to be saved with plastic restorer or black dye, so a few coats of black and satin clear paint brought it very near its original look.

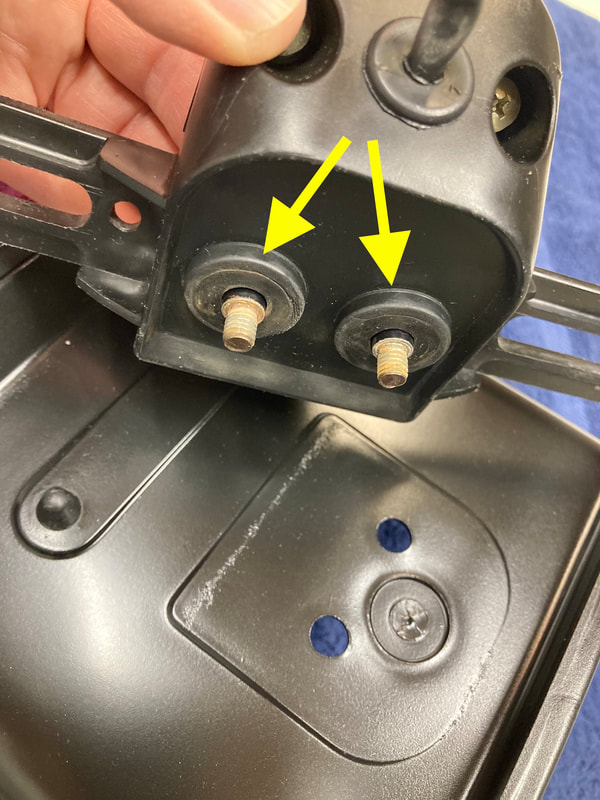
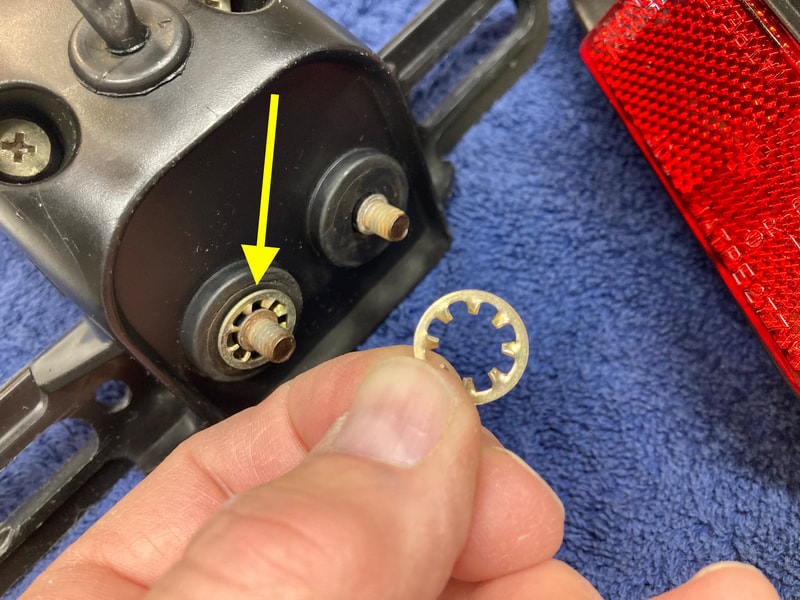
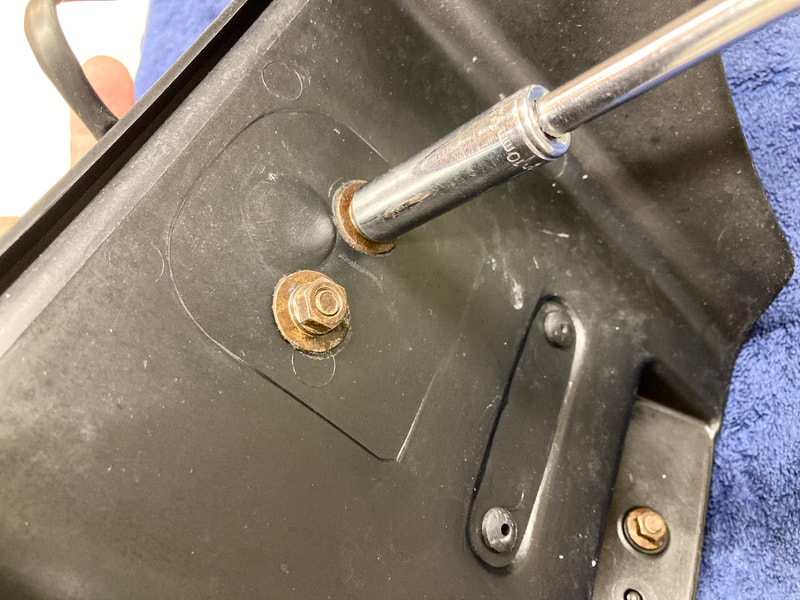
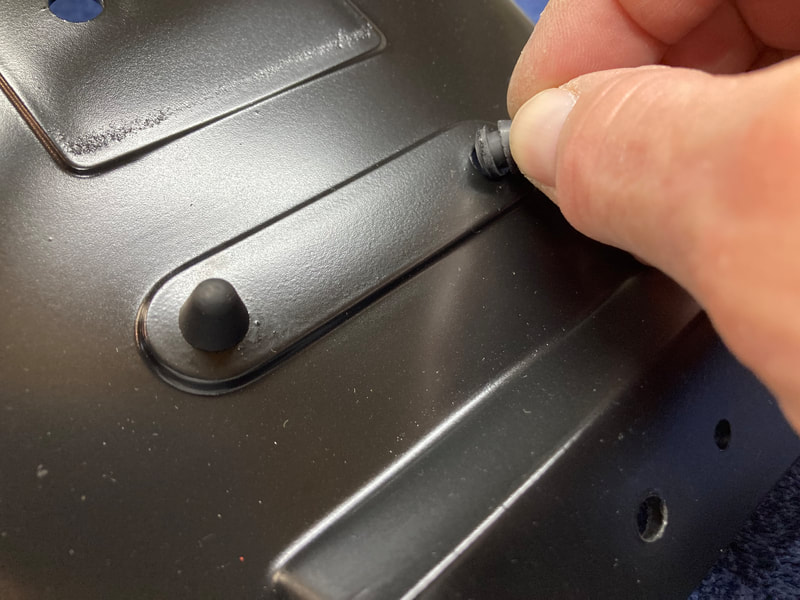
​Last week came time to reassemble the components, but a common issue with the Gen-2 license light assembly is that the rubber mounting grommets (arrows) are no longer supple enough to grab and hold it from twisting side-to-side. Tightening the rear mounting bolts won't help, as they bottom on a "step" on the mounting bolts. There's a few ways to address this, but my simple solution is to add an internal or external tooth lock washer to the back side of the light — the washer takes up the void and the teeth mechanically "grab" both the rubber washer and the fender itself. Tighten the bolts and the light assembly is locked in place. Works for me.
​(click on an image to enlarge)

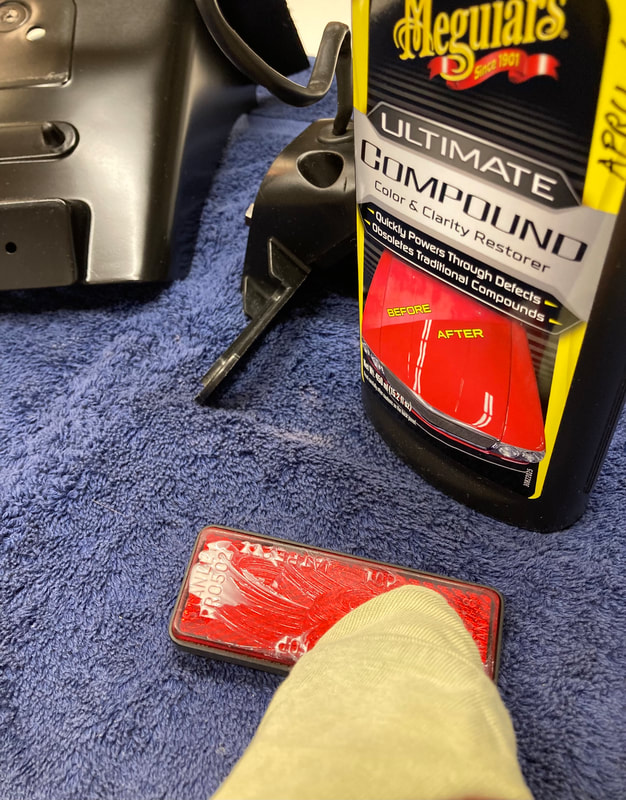
(Below) To finish up, I install the little license plate bumpers, often missing in action, but still available from Honda. I also give a little love to the dulled reflector lens before bolting it in place. This fender is ready to take its place on this project.
0 Comments

Brake Rotor Refurb

12/16/2024

0 Comments

 
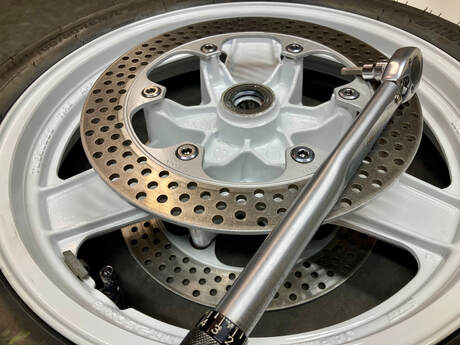
PictureThe finished rotor is torqued into place with its refurbished bolts
There's no way around it…brake rotors live a hard life, so after a few decades they're due for some TLC.

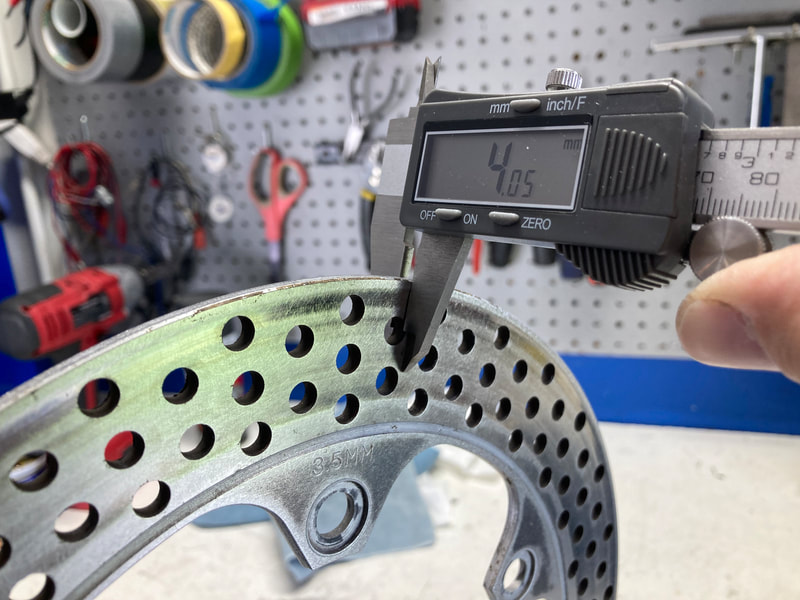
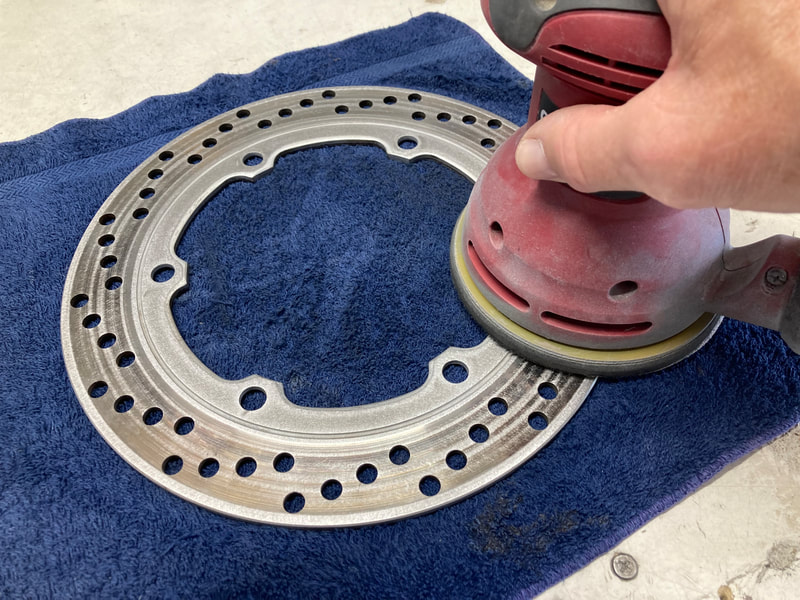
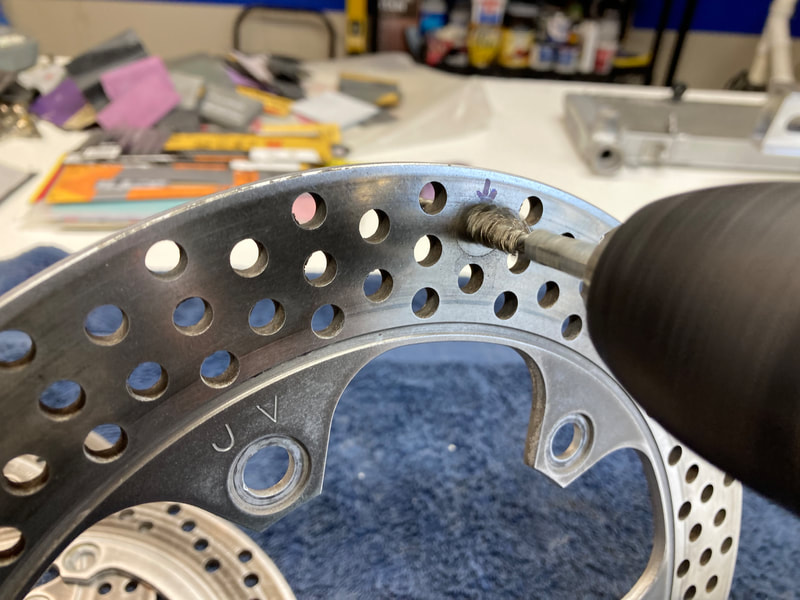
Such is the case for Project 41, a 1987 VFR700 F2. First things first; I spin the wheel/rotor assembly on a static balancer to check for warpage and verify there's sufficient thickness (below). If everything checks out, I degrease the rotors and begin my refurbishment by orbital sanding the rotor face with aggressive 80 or 100-grit paper, then wire-brush each of the rotor holes, which are always dirty and/or rusty.

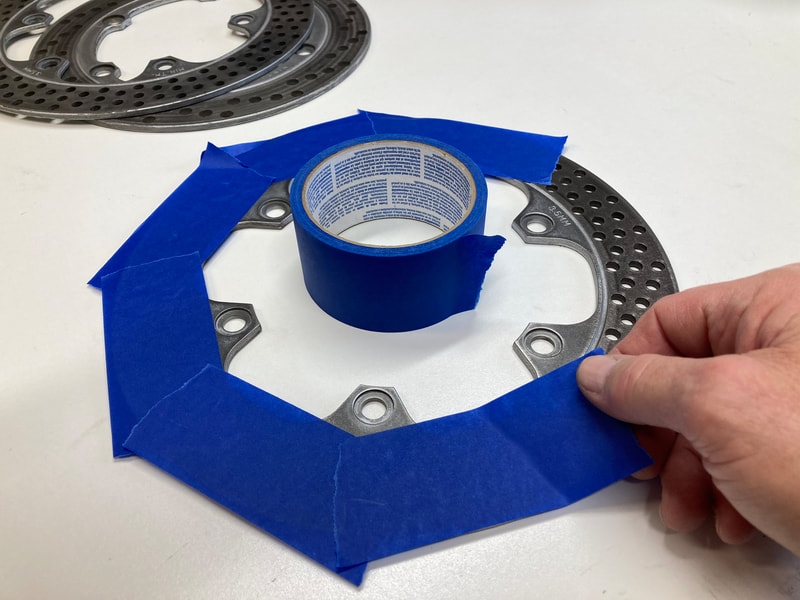
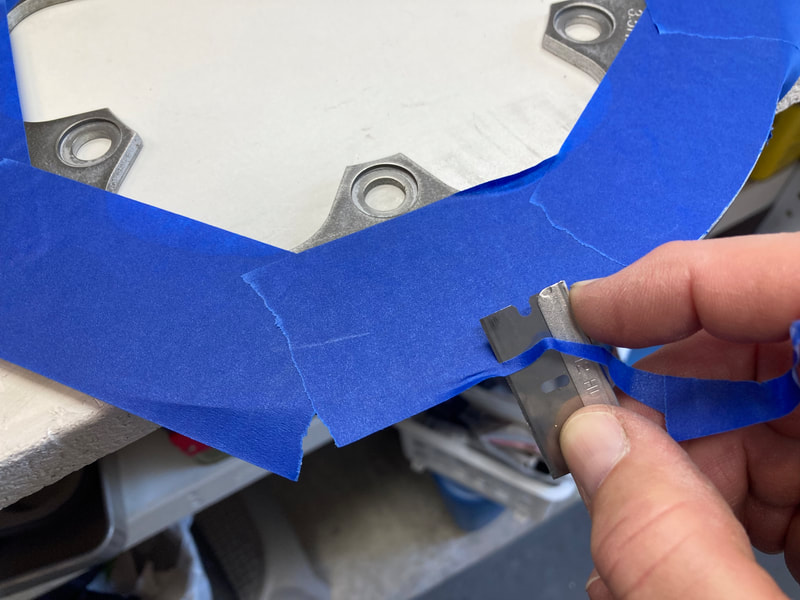
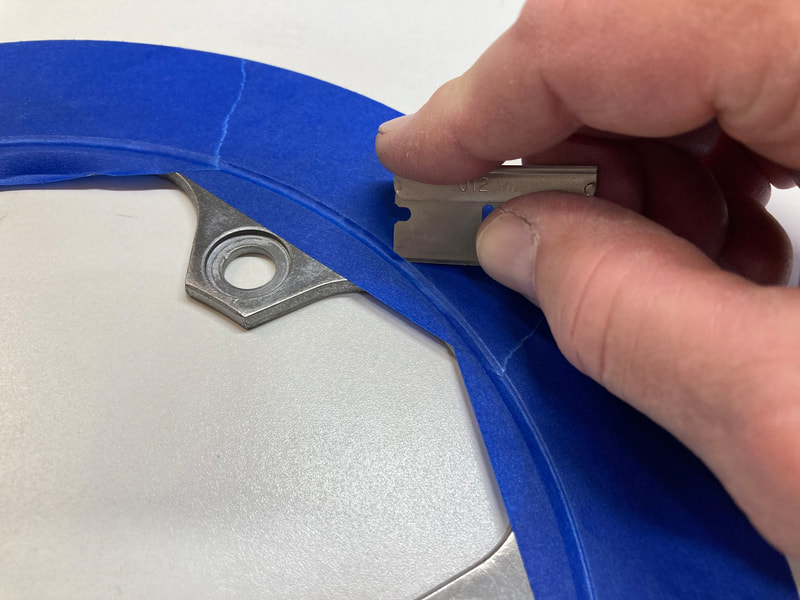
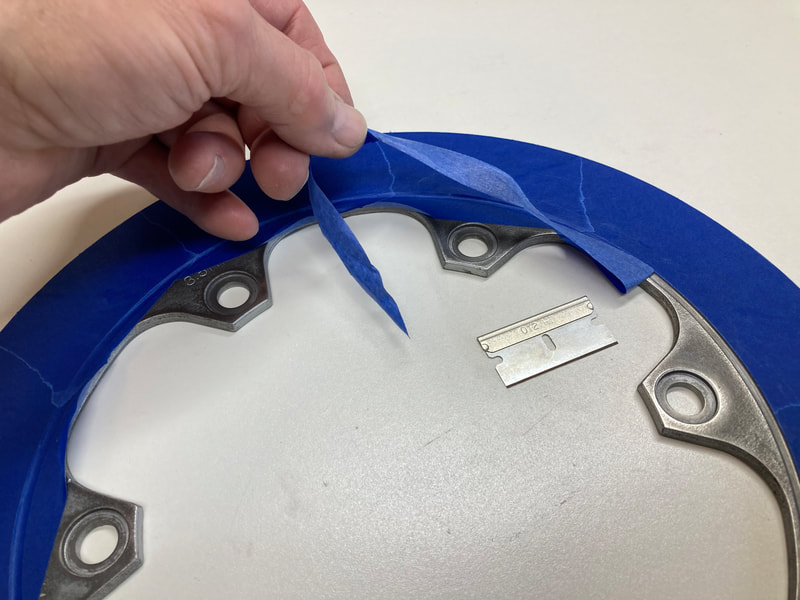
(Below) After a hot bath in Dawn detergent, I prepare for painting by masking off the rotor faces with overlapping 5-inch lengths of tape — when the painting is complete, these overlapped pieces will peel off as one piece. Using a fresh, sharp razor, I easily trim the outside edge, then score the small inside groove and peel off the excess. I use a fresh razor for each rotor, allowing a quick and clean edge.
Picture
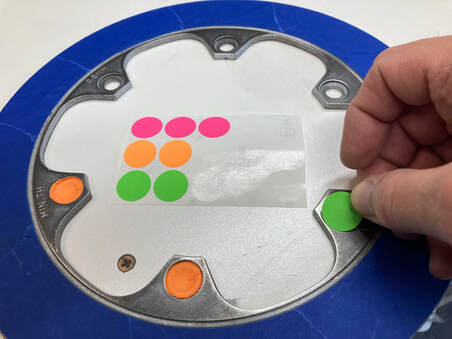
Finally, I like to tape off the bolt surfaces front and back. Probably not necessary, but makes me feel better. For this I use 3/4" adhesive dots from the Dollar Store. A perfect fit.

In this case I'm painting the outer edge of the rim, but that edge can also be sanded to clean stainless steel and left natural.

Don't forget to restore or replace the 18 allen bolts!

Ready for paint!

Picture
0 Comments

Blue/Silver Gen-2 Project From Kaplan America

12/6/2024

0 Comments

 
PictureClick on image for the eBay link
What: 1987 VFR700 F2
Why: Good bones
Where: Manchester, Connecticut 
​Price: On auction, or BIN $2500

UPDATE: An internet friend and V4 Dreams reader purchased this bike after it was relisted with a lower buy-it-now. $1950.

Ken Kaplan has another VFR up for auction, but this one ​is a "kinda-sorta running" project bike. He acquired it almost two years ago but has decided to sell it as is and in need of, well, some attention.

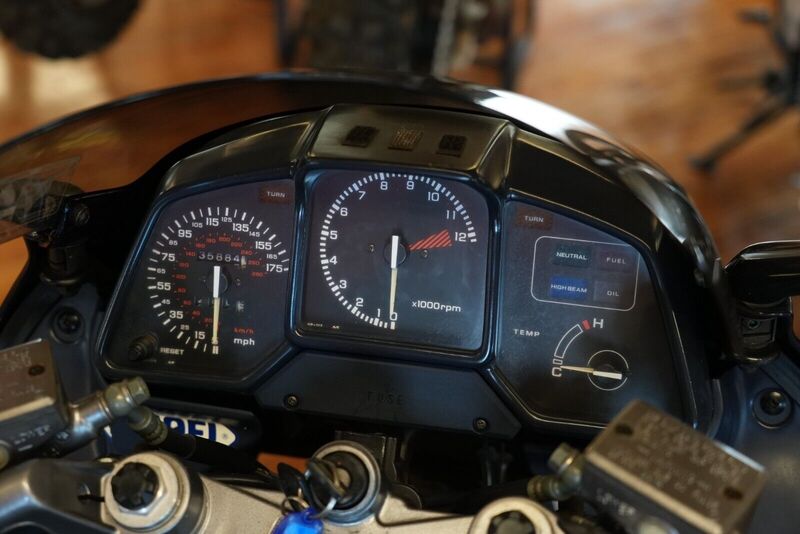
The bike shows 35,884 miles so it's not a pristine garage queen, rather has the typical patina of a 37-year old used bike with some history. Looking over the photos, I notice that the rear wheel is incorrect white, the purple seat is from a R/W/B model (should be gray), there's mismatched tires and a missing chain guard. The Yoshimura slip-on is a nice touch, looks straight and would polish up beautifully. But, this will not be a quick "change the tires & light the fires" refurbishment — at minimum, the carbs, brakes and tires will need attention but the bike is mostly original and complete and will be a great classic rider when finished. Personally, I'd lose the boy-racer stickers first thing and then address the mismatched wheel issue by substituting a white wheel up front.

If you're someone who's been thinking about a V4 project, this would be a decent starting point. It's on auction with reserve and a buy-it-now of $2500, which seems a little high for a non-running project. Ken does a walk-around video, promises clear title and there should be some wiggle room in the price for a December sale.

0 Comments

Handy Part Numbers

12/2/2024

0 Comments

 
Below is a PDF copy of my go-to quick reference list for various OEM and aftermarket replacement parts for many VFR and a few VF models. Scroll down to read, if you'd like a digital copy, place your cursor near the bottom of the window and click the download button.
Your browser does not support viewing this document. Click here to download the document.
0 Comments

    THE SHOP BLOG
    •••

    An on-going account of miscellaneous information, project bikes and noteworthy VFRs for sale


    Archives

    May 2025
    April 2025
    March 2025
    February 2025
    January 2025
    December 2024
    November 2024
    October 2024
    September 2024
    August 2024
    July 2024
    June 2024
    May 2024
    April 2024
    March 2024
    February 2024
    January 2024
    December 2023
    November 2023
    October 2023
    September 2023
    August 2023
    July 2023
    June 2023
    May 2023
    April 2023
    March 2023
    February 2023
    January 2023
    December 2022
    November 2022
    October 2022
    September 2022
    August 2022
    July 2022
    June 2022
    May 2022
    April 2022
    March 2022
    February 2022
    January 2022
    December 2021
    November 2021
    October 2021
    September 2021
    August 2021
    July 2021
    June 2021
    May 2021
    April 2021
    March 2021
    February 2021
    January 2021
    December 2020
    November 2020
    October 2020
    September 2020
    August 2020
    July 2020
    June 2020
    May 2020
    April 2020
    March 2020
    February 2020
    January 2020
    December 2019
    November 2019
    October 2019
    September 2019
    August 2019
    July 2019
    June 2019
    May 2019
    April 2019
    March 2019
    February 2019
    January 2019
    December 2018
    November 2018
    October 2018
    September 2018
    August 2018
    July 2018
    June 2018
    May 2018
    April 2018
    March 2018
    February 2018
    January 2018
    December 2017
    November 2017
    October 2017
    September 2017
    August 2017
    July 2017
    June 2017
    May 2017
    April 2017
    March 2017
    February 2017
    January 2017
    December 2016
    November 2016
    October 2016
    September 2016
    August 2016
    July 2016
    June 2016
    May 2016
    April 2016
    March 2016
    February 2016
    January 2016
    December 2015
    November 2015
    October 2015
    September 2015
    August 2015
    July 2015
    June 2015

    Categories

    All

    RSS Feed

Site powered by Weebly. Managed by HostGator