|
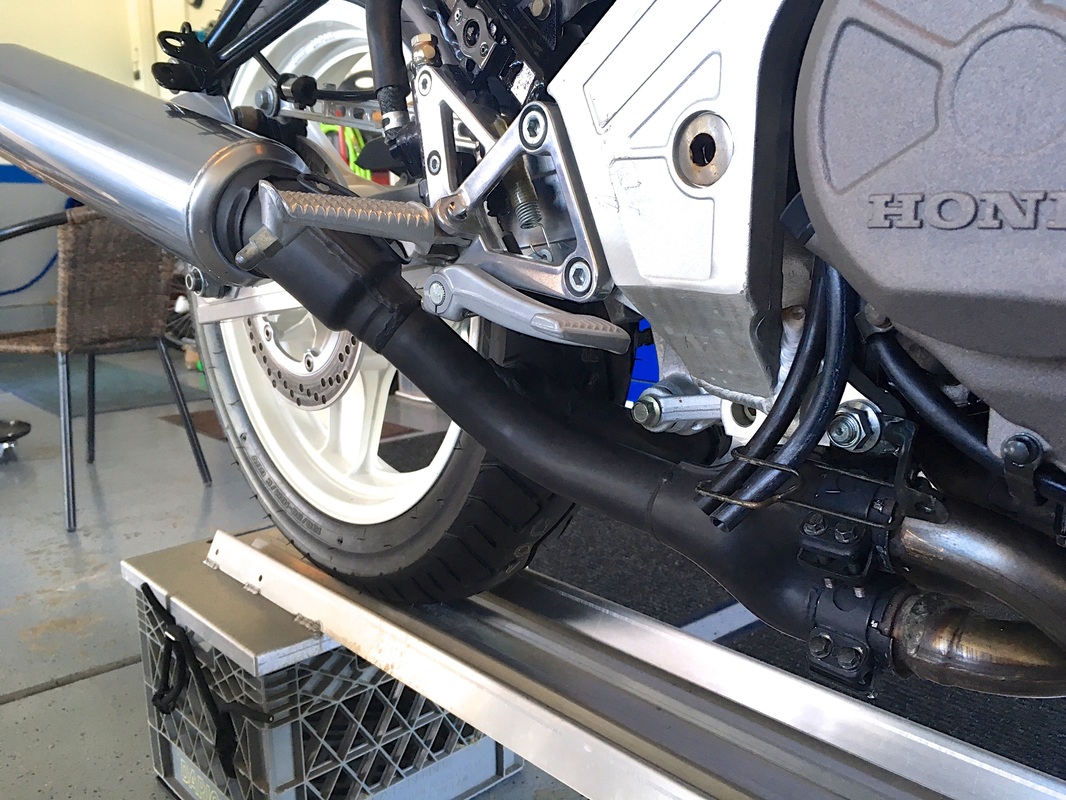
With the refurbished exhaust system in place an all systems buttoned up, it's time to make engine noises with Project 18, a 10,000-mile 1986 VFR750F. Everything went as expected and this one is ready for it's restored bodywork.
0 Comments
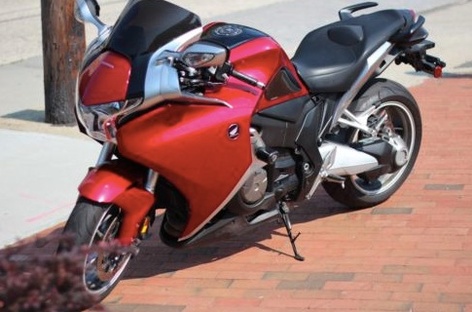 Click on image for the eBay link. Click on image for the eBay link. What: 2010 VFR1200 DCT Where: Hempstead, New York Why: Nicely farkled, DCT Price: Auction opens at $4800 One of the ultimate sport touring Gran Turismo motorcycles, the VFR1200 also offered at least two unique attributes not to be found in the competition — a soul-stirring 150 HP V4 engine and an optional Dual Clutch Transmission. While a DCT may not be to everyone's liking it definitely serves a niche and this bike has it and more. Some of the add-ons include a heated Corbin seat with the handy Smuggler option, heated grips, factory saddlebags and aftermarket muffler. The bike shows 14,200 miles and this is a no reserve auction. Some buyer may get lucky on this one. 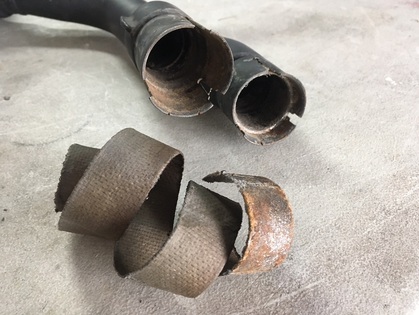 While preparing an OEM muffler set for installation on Project 18 I devised a way to make my life just a little easier. These old systems can be a real bear to remove, and even harder to reinstall. Something that would really help is to expand the female joint before sliding onto the header pipes. Here's one of the pipes in question, and what happened to the old exhaust gasket when removing it. 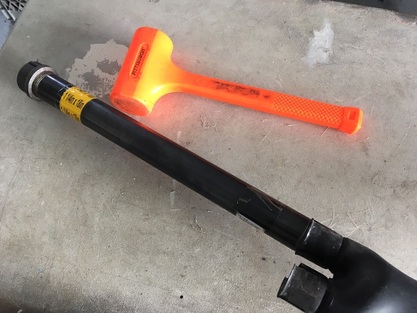 This is my homemade tool, which is the same black gas pipe I use to drive steering head bearings into place. The cut threads on these pipes are slightly tapered, so tapping the pipe into the muffler opening gently expands the opening. 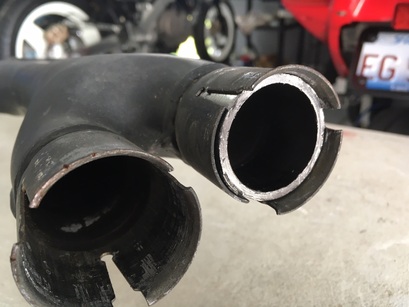 Here's a fresh gasket in place in the expanded opening. When installing the mufflers, I slip the new gaskets onto the exhaust pipes and slide the mufflers in place. Even with the expanded openings this can be a pushing and shoving match. It's never an easy chore. The clamps are right & left specific, so be sure to get them oriented correctly before installing the mufflers. With everything test fitted, the black muffler pipes can be sanded and painted. Job done. 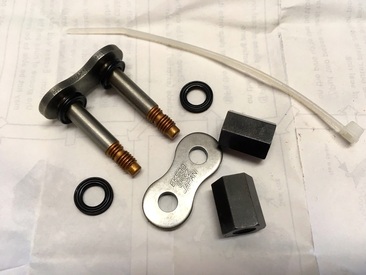 As part of Project 18's restoration I've fitted a new chain & sprocket set from EK. These high-performance bikes don't, or shouldn't, use a clip-type master link, but instead require a riveted master. Assembling a master link requires the right touch when pressing (riveting) the master pins — not too much, not too little. Here's a different approach. 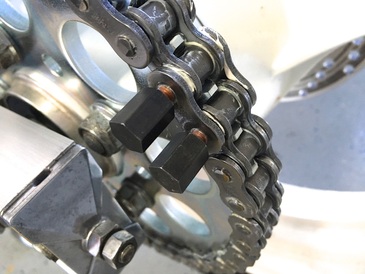 They call this a screw-type connecting link, and the objective is to take the guess work out of your master link installation. After assembling the plates, these two nuts are alternately screwed down till they bottom, which gives the correct "squish." They're then backed off to the narrowed portion of the shaft and...... 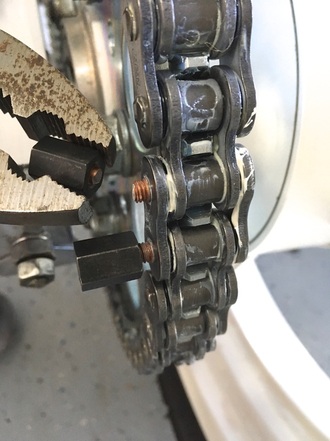 .....snapped off with a pliers. I grind down the nubs a bit for aesthetics and job done! Next up; refinish the original exhaust system. 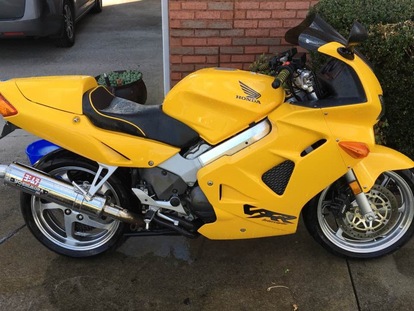 Click on image for the classified ad. Click on image for the classified ad. What: 2000 VFR800 Where: Knoxville, Tennessee Why: Electric yellow, nicely sorted Price: $2900 Available only in 2000, and only in Pearl Shining Yellow, this bright beauty sports 25,000 miles and looks to be very well-kept. Extras include a few desirable extras like a Yoshimura slip-on, Sargent seat and bar risers. The rear seat cowl is in place and that appears to be an aftermarket windscreen. Our seller claims it's never been down. This looks like a nice one and is offered at a refreshingly friendly price. You can find it at VFRdiscussion.com (may require registration). 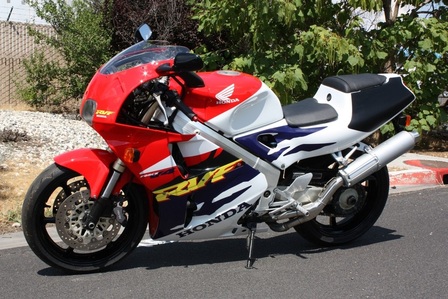 Click on image for the eBay link. Click on image for the eBay link. What: 1996 RVF400 Where: San Jacinto, California Why: Unobtanium V4 Price: No reserve auction While super-popular in other world markets (often due to licensing restrictions), 400cc machines never sparked much interest in the U.S., at least in the modern era. The smallest V4 Interceptor to reach our shores was the 500cc version available from 1984-86. This bike was derived from the VFR400, first seen in 1986, with later versions being the NC24 and NC30. This model, the NC35, is the final development of these little screamers with notable updates being inverted forks along with frame and wheel changes. This one looks great in its very 90's livery and is showing 9800 miles with a few cosmetic blemishes noted. The seller indicates that he/she is familiar with these bikes and notes some recent maintenance. A unique and interesting V4. Bidding is active and auction ends Tuesday. Also featured on RSBFS. (click on an image to enlarge) 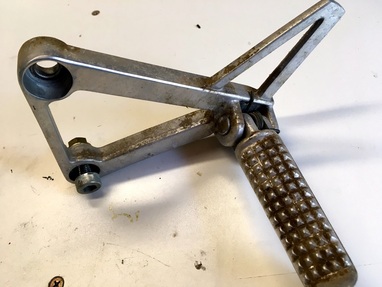 Project 18, an '86 VFR750, is in the reassembly stage, and that's when all the little details hit. This bike spent several years in a pole barn on a working farm in West Virginia and accumulated a coating of brown dirt. Fortunately, it hadn't progressed to the corrosion stage and all these parts will clean up nicely with a combination of modern cleaners and a few tools, but mostly old fashioned elbow grease. 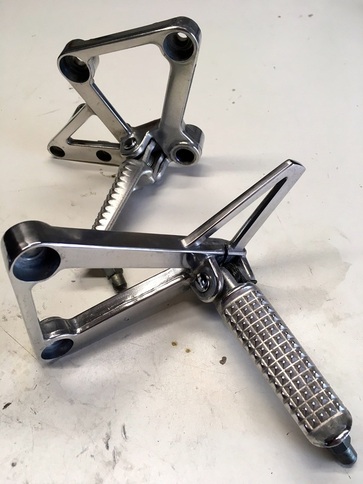 Shown above is the left side rider's peg assembly and the right side was no better. After a good scrubbing, some light wet sanding and hand polishing these parts are looking showroom fresh. 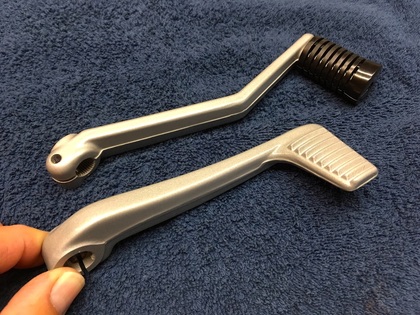 And here's the refinished shift and brake levers. These are cast aluminum and originally finished in a silver paint or anodizing, not really sure. In some cases I've stripped, smoothed and polished these parts, but on this restoration project I've decided to leave the original casting marks and simply refinished them in silver wheel paint with clearcoat. A fresh OEM shift rubber and they're ready for mounting. 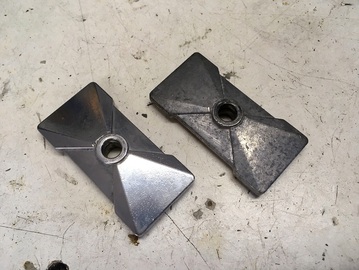 These chain adjuster end plates have a tough life being located at the rear of the swingarm. They tend to collect dirt and chain spooge, and are usually ignored when cleaning the bike. Also cast aluminum, they will polish up nicely on the buffing wheel. They weren't a mirror finish when new, so I just buff them to a satin finish and clean up the adjusting bolts. In this case, a little TLC goes a long way. 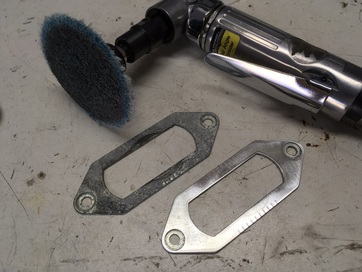 The side axle plates were also in tough shape. These appear to be stainless steel and I was able to bring them back with a quick buff with a metal finishing pad mounted on the die grinder. To keep 'em looking good, I wipe them down with a corrosion inhibitor called Corrosion-X. It's a mil-spec product developed for the military to treat metal corrosion on aircraft. In their effort to "add lightness," Honda began to use more plastic during the 1980s. One part that changed from heavy metal was the chain guard. Over time, however, the long and not very well supported piece tends to twist or warp and begins to look a little wonky. I've found that if the right amount of heat is applied judiciously these plastic parts can be massaged nearer to their original shape. This chain guard was deformed near the rear and actually rubbing on the rear sprocket. I use my trusty heat gun and gently warm the area that I think will help reshape the part and then hold it (with thick gloves — it gets hot!) as it cools. This takes several gentle attempts. Be careful, too much heat and the part can deform or even bubble till its no longer useable.
To bring back the original finish I lightly wet sand the chain guard and apply one or two coats of Griot's Bumper & Trim Reconditioner. This stuff works on all the black plastic parts, like the rear fender/license plate area. (click on an image to enlarge) 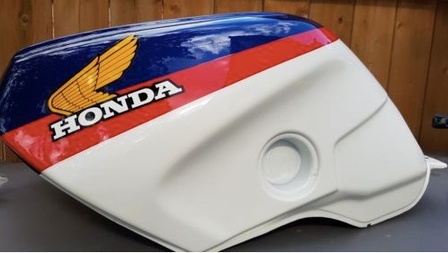 Click on image for the eBay link. Click on image for the eBay link. In the world of old bikes, two of the most difficult items to find or restore are exhaust systems and fuel tanks. Both live along a path of potential damage from accidents, garage rash, careless kids, careless owners and the ravages of time. And repairing either is nearly impossible — dents can’t be pounded out from the inside and rust is generally terminal. So when a nice example comes along I’m automatically interested. Back in March I posted about a used 1986 R/W/B tank that went for $731 on eBay. Here we have an unused NOS example with an opening bid price of $550 plus $75 shipping and no reserve. Unfortunately, it does show some storage rash, including what appears to be a dent at the upper righthand corner. Our seller states that it’s “probably the last unused 1986 VFR750 gas tank on the planet.” Not exactly, I have a perfect example in my secret underground parts bunker. Our seller may be a little optimistic with regard to value. In any case I hope someone can find a use for this rare piece. |
THE SHOP BLOG
|



 RSS Feed