|
Yesterday I was asked by a member of the Dutch ST1300 forum to clarify how my replacement VITON carburetor float bowl gaskets manage to conform to the bowl shape, as they're not pre-shaped like the OEM part. That's a fair question, and I think the best way to answer it is to show how I install them.
0 Comments
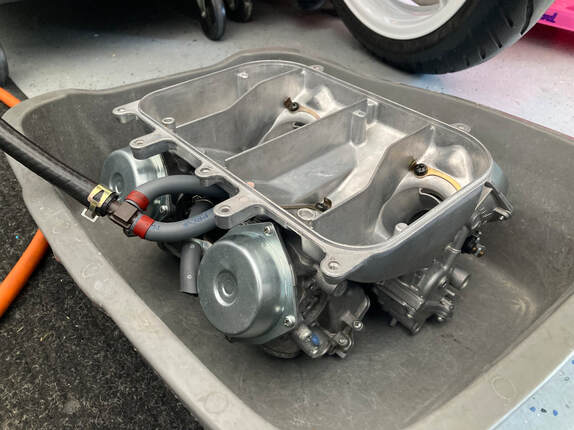
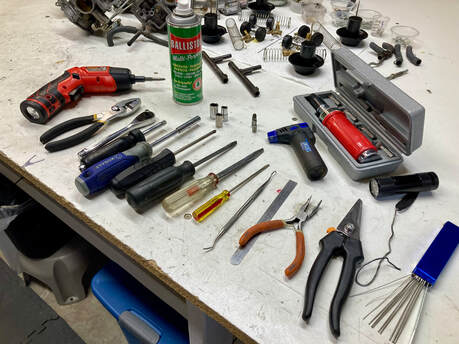 I clean, inspect, update and tune all my projects' carbs as a matter of course, and recently began work on the carburetor set for Project 42, a Euro-spec 1986 VFR750. I thought I'd share a few tips and reminders I've stumbled upon over the years. (Right) Here's a basic collection of tools I use in the rebuild process. The small pistol-looking device is a butane torch used to soften the adhesive on the tamper-proof pilot mixture screw caps. (Below) During carb removal, simplify your life by disconnecting the throttle cables via the bracket, not by the adjustment nuts. This preserves the throttle cable settings and saves time. (click on an image to enlarge) 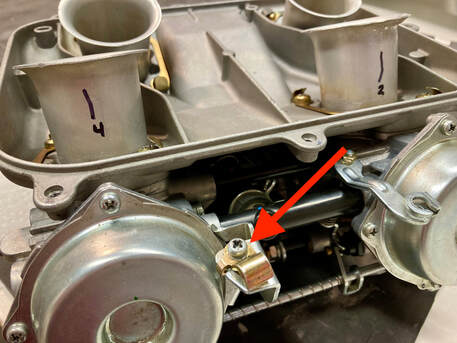 (Right) Two things here: After about the third time dropping the choke cable bracket down into the bike's netherlands, I finally learned to leave the bracket and screw in place during removal and installation (I'm a slow learner). Just loosen the screw to remove and install the cable (red arrow). On the 3d- and 4th-gen carbs, you will find refitting the air intake tubes easier by first marking them with their number & orientation. Here, I've drawn a reference line to line up with the upper diaphragm cover screw. (Below) Before splitting the carb set you may want to mark the carbs with a small drill bit — I once wasted a half-hour struggling in vain to install carbs #1 & 4 in reversed positions (2d-gen). I quickly drill indentations on #1, 2 & 3, leaving #4 unmarked. 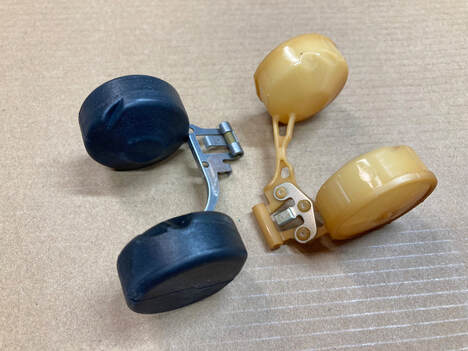 (Right) When removing the floats on Project 42, I was surprised to find they were black-colored with all-metal brackets, unlike the yellowed color and mostly plastic brackets on every other VFR carb I've dealt with. A UK thing? (Below) When removing the pilot screws, it's imperative to remove the tiny washer and o-ring stuck deep in the recess. I have a proprietary "tool" to accomplish this — a bent length of wire with a sharp angle filed at the end. The metal parts are reusable but the o-rings will be replaced. At reassembly the order is: spring, washer, o-ring. (Below) A major part of the rebuild process is to replace the fuel joint o-rings. The fuel and vent joints are shown here. Looking closely at the fuel tube pictured, you can see the issue — there's a residual fuel trail visible (pink arrow), and the leaking culprit is the crusty o-ring (red arrow). TIP: the joints are plastic — they're pretty tough but will only tolerate so much ham-fisted abuse, like forcing off a stubborn fuel line. After several decades those lines are stiff and often stuck in place. Running them under hot tap water or soaking in hot water for several minutes will allow a gentle twisting removal. I leave the vent lines and their o-rings in place, as they're not critical seals. (Below) Pictured are the 2d-gen carb-to-plenum o-ring-style seals. They're reusable unless damaged in some way. Note that one side of the seal is grooved and the other smooth. The grooved side faces outward on the carburetor and is held in place by tiny nubs (pink arrows). This does not apply to later model seals, which are specifically shaped and can only be installed one way. (Below) Lastly, I leak test the freshly assembled set before mounting on the engine. This is where you'd like to discover a leak, not dripping on the engine and shop floor. A plastic tub works great, in this case a $4 cat litter box. The fuel bottle is attached and the set is allowed to sit at least overnight, as tiny leaks may take some time to appear. I then install the set with the fuel bottle still attached, ready to start up for the tuning process.
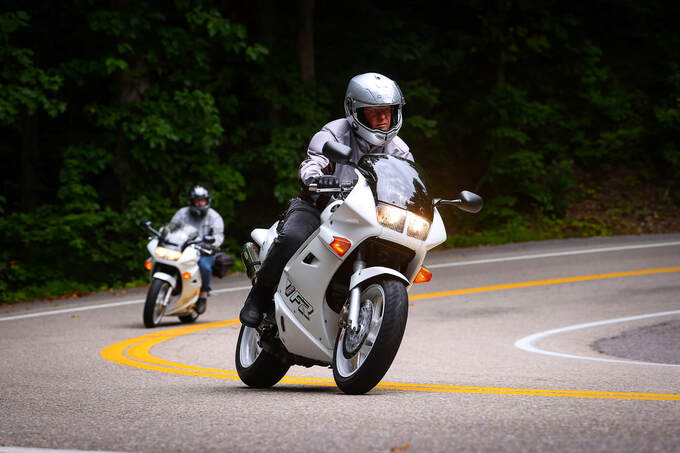
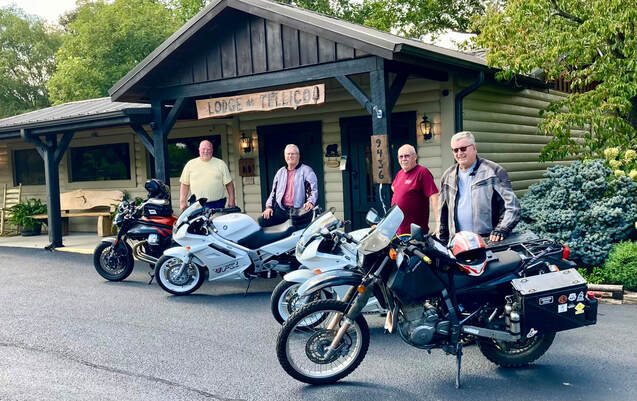
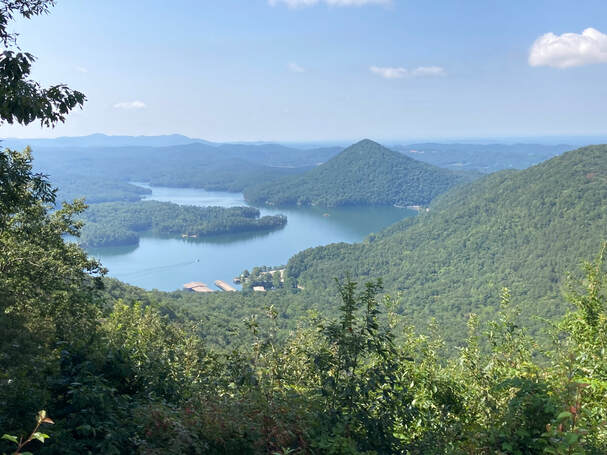
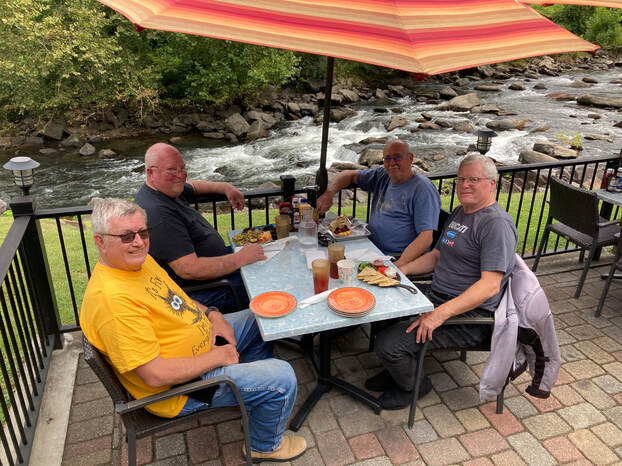
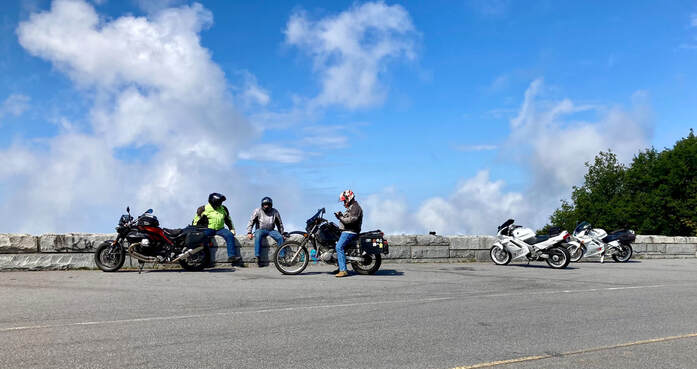
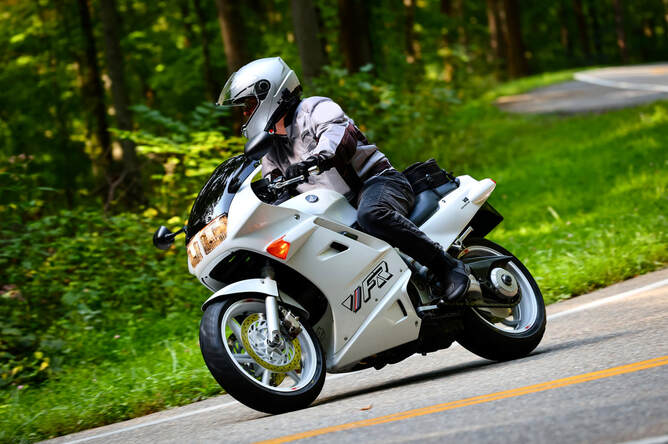
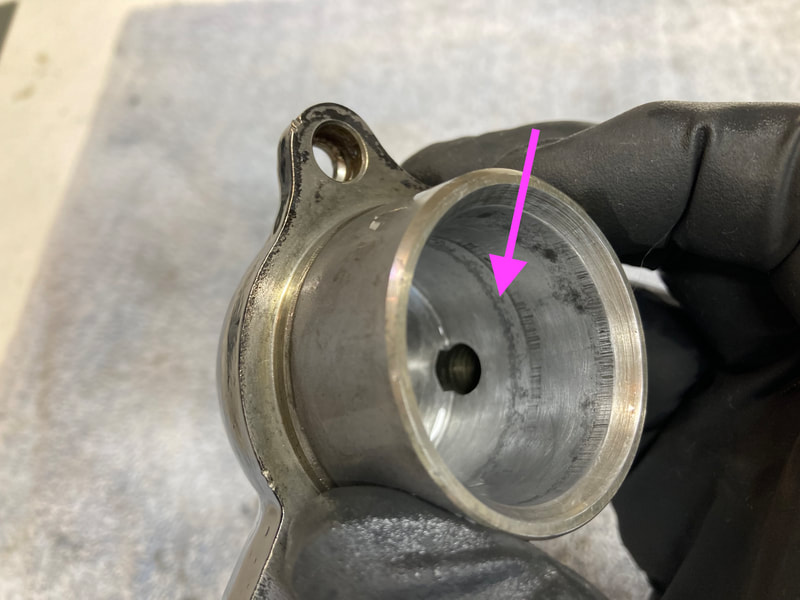
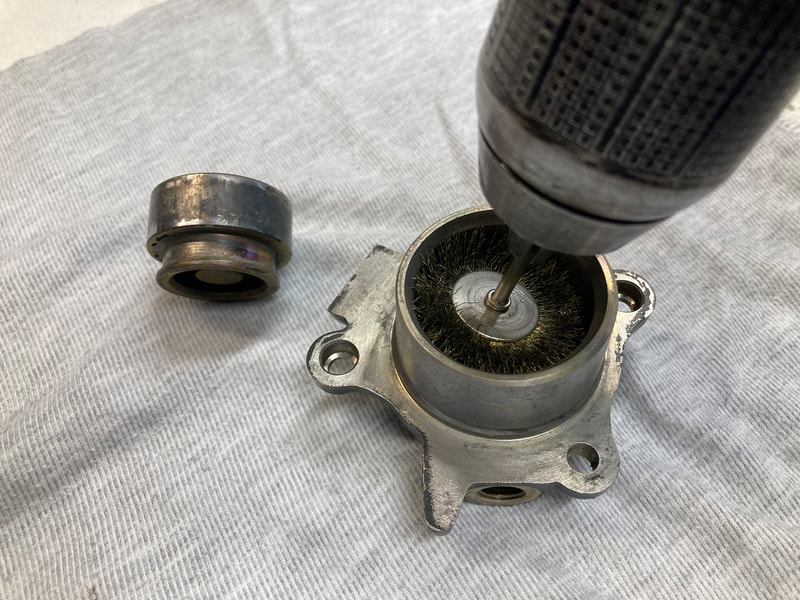
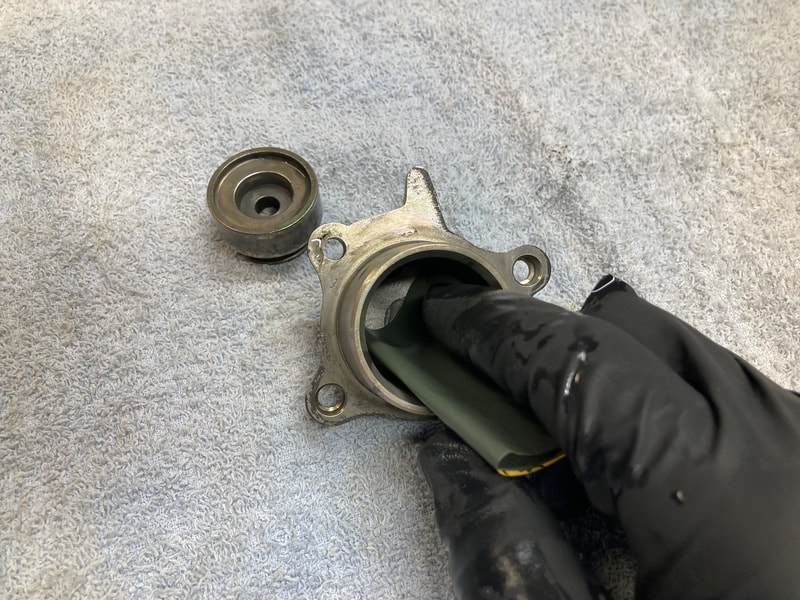
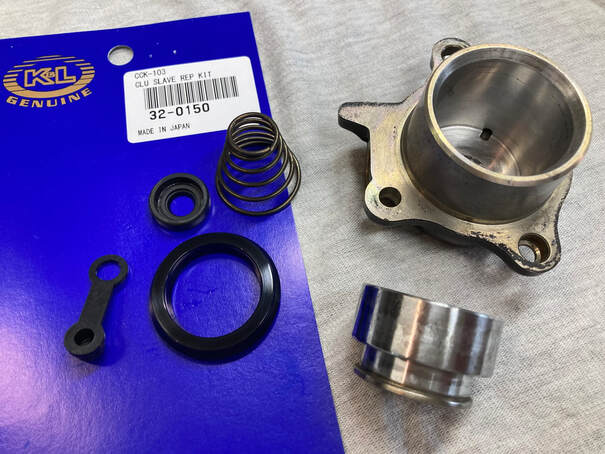
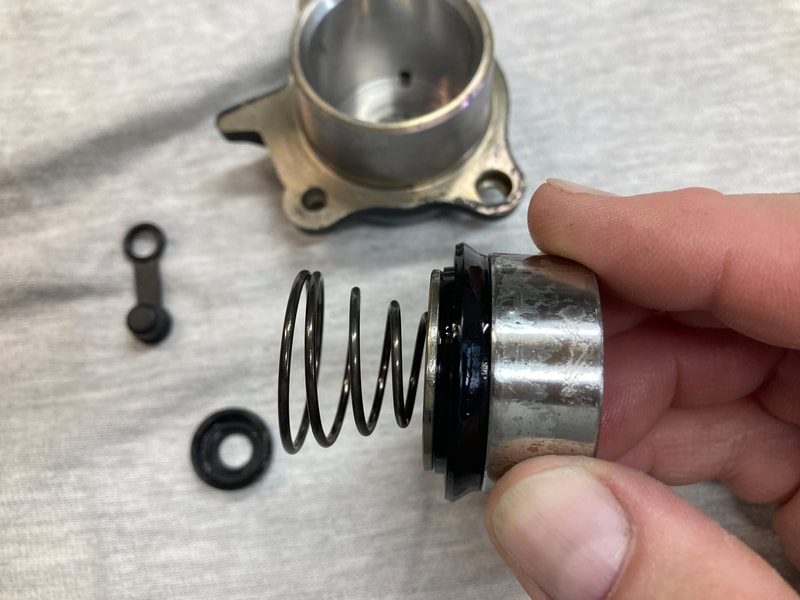
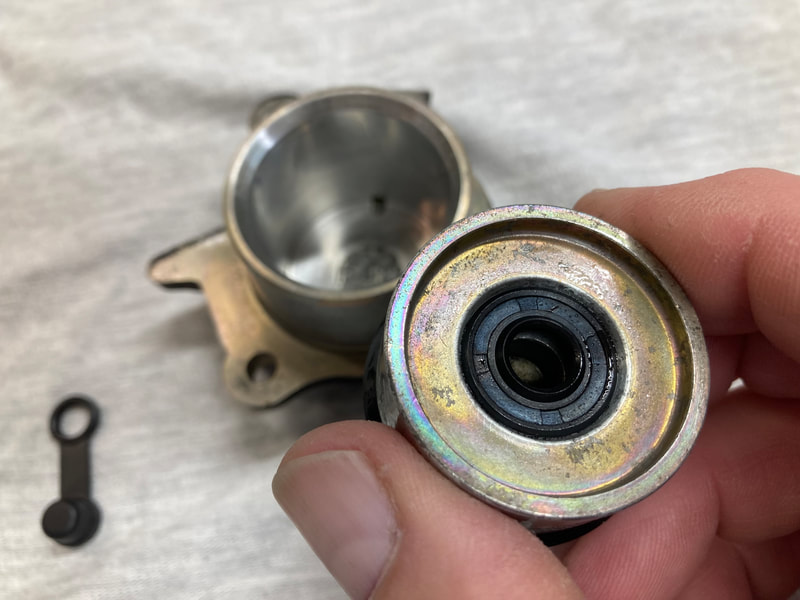
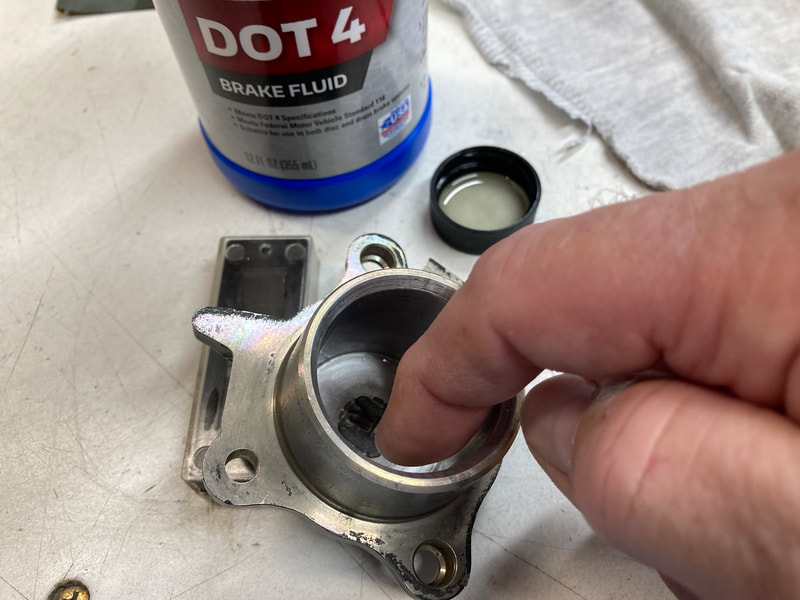
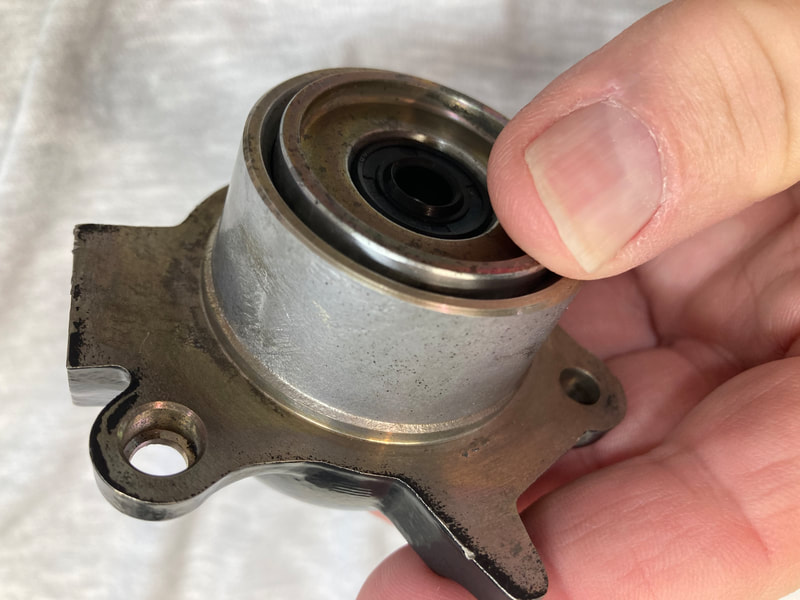
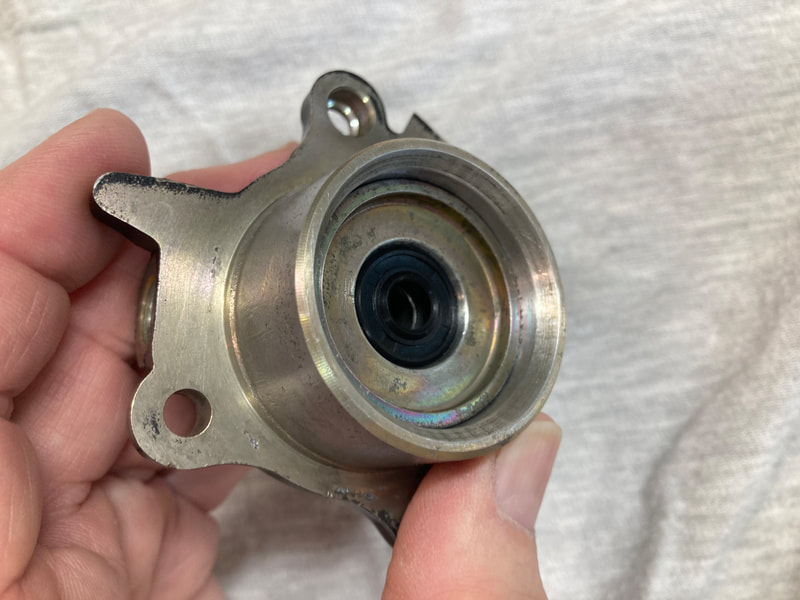
This past week I finally fulfilled a glaring omission in my riding history — experiencing a VFR in the Blue Ridge Mountains on a few of the more exciting and famous roads that America has to offer. I've sampled the area in the past on a Suzuki V-Strom 1000, Honda ST1300, our Victory tourer, even a rental Mustang convertible…but never on a VFR. This opportunity came about when reader Al Bleyenberg contacted me early this summer with some questions about his recently acquired 1993 VFR750. During our conversations I mentioned that I was completing my own '93 — one thing led to another and he graciously invited me to join him and his small riding group on their annual Blue Ridge outing. "Yes." 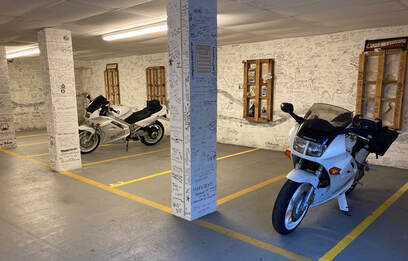 The guys base themselves at the Lodge At Tellico in the little town of Tellico Plains, TN. The Lodge is a moto-centric operation run by motorcyclists Bryan and Catherine and consists of 16 updated cabin-style rooms, impeccably clean, with rocking chairs on your porch. There's a large secure garage for your bike (photo, right) and parking areas for your truck and trailer if necessary. Tellico Plains is strategically located at the western terminus of the Cherohala Skyway, a National Scenic Byway and 43-mile piece of motorcycling bliss. This ride is a bucket list item for anyone who treasures roads for their character and personality. All the best roads seem to have names, as is fitting for those of us who personify them, dreaming of our chance to experience them. The Cherohala lies a bit south of one of the more infamous roads in the world, Tail of the Dragon, aka Deals Gap or simply TN/NC 129. But the area boasts seemingly endless lesser-known backroads, most featuring table-top smooth asphalt along with curves, charm, scenery and lots of little cafes with great food. Did I mention the friendly locals? It's hard to take a wrong turn in these parts. My three days with the group began with an awesome collection of back roads local to the area, southwest out of Tellico Plains with a side trip up into the Chilhowee Recreation Area and a couple of scenic overlooks, including the Sugarloaf Mountain overlook (above). Back down along the lake, then southeast to Ducktown, joining Hwy 68 which would lead us home to the Lodge. Hwy 68 is, in itself, a beautiful and worthy ride. Only about 115 miles on this day, but with breakfast, lunch and full menu of twisties and scenery, it made for a great first day. I'll vote for quality miles over quantity any day. I also found it relaxing to play the "I don't know the area" card and just sit back in the group to follow the others' lead, Al's V4 Yoshimura music occasionally making it through my earplugs. Day two would find us having breakfast in town at the awesome Tellico Grains Bakery, a place so delicious we would need to repeat the experience the next morning. Then northbound on Hwy 360, eventually crossing the Little Tennessee river, then riding alongside it on Hwys 72 & 129…yes, that 129, which would eventually morph into the Dragon (above and lead photo). After a short stop at an early overlook, we headed eastbound to challenge all 318 curves (some more elegantly than others) with a quick stop at the resort to calm the nerves and grab the obligatory dragon sticker. Then a short run south to the Historic Tapoco Lodge Resort for a picture perfect lunch alongside the babbling Halfmile Branch River (below). Just north of the Lodge we pass the Cheoah Dam, site of Harrison Ford's jump scene in "The Fugitive." 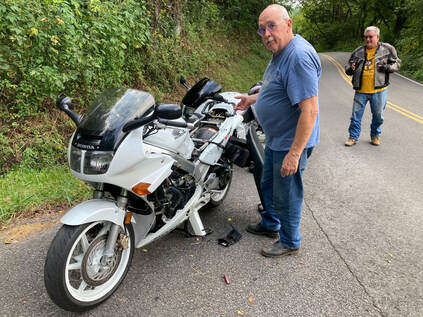 From there we would logically return via the Cherohala Skyway, but putting a temporary damper on the whole trip, the Cherohala was officially closed for repairs to a washout near the western end — more on that tomorrow. So, our best option was to return via the Dragon (damn!) which we grudgingly accomplished. At the western end of the Dragon we took a scenic right turn up the narrow but engaging Happy Valley Road, a steady climb, eventually intersecting with the Foothills Parkway. Part way up the mountain, Al's VFR decided the steady power and lower speeds were more than the cooling system was prepared for, necessitating an unplanned roadside hot-wiring of the radiator fan. No worries, we were soon enjoying a downhill run on the fantastic Foothills Parkway, replete with perfect asphalt and sweeping turns. A gorgeous road, returning us to Hwy 129 and home. Day three, where John and Rick were determined to find a way onto the Cherohala Skyway. Scouring their digital maps a potential backdoor route was found and we embarked on an exploration of 1 1/2-lane squiggly local roads well-suited to John's dual sport, thankfully somewhat paved, steadily climbing till we literally bumped into the Skyway at Miller Chapel Road on the far side of the washout. Eastbound from there we had unobstructed sailing with the road mostly devoid of traffic — after all, it was officially closed. The Dragon may get all the press, but the pristine, entertaining Cherohala is the gem of the southern Blue Ridge, at least in my limited experience — especially on this postcard perfect day. Rick was leading on the Griso and seemed to want to play, so Al graciously motioned me ahead and off we went into the zone. I don't possess the vocabulary to describe how this road was seemingly designed for motorcycles, its rising and falling twists encouraging perfect harmony with two-wheeled machines like ours. The road can be a killer in the winter months, and it's sometimes cold and misty at the summit…but not on this day. 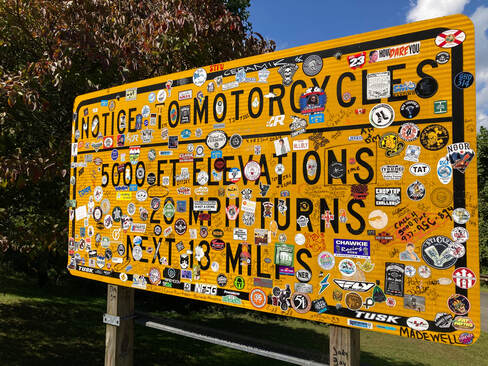 After lunch in Robbinsville, NC, there was no question that we would make our return via the Skyway, where the guys encouraged me to take the lead for my final run of the trip. It was surely the personal highpoint of my time with the group. Back at the Lodge, the VFRs were loaded onto their trailers, we said our goodbyes, and Al and I departed at oh-dark-thirty the next morning, me arriving home in time for dinner. I don't think I realized how much I needed this trip. I haven't taken a solo ride in I don't know how many years, and I'd forgotten how important it is to include an occasional motorbike mental health break in our lives. And, to be honest with myself, at 72 I don't know what the future will allow in any case. My VFR was the perfect companion for this tour, and it performed flawlessly, making me look much better than my waning skills allow. It received a well-earned bath and a few private words alone in the garage when we were back home. I'm grateful for the opportunity to still play with motorcycles and to the guys for graciously welcoming a new guy into their group. I hope we meet again. 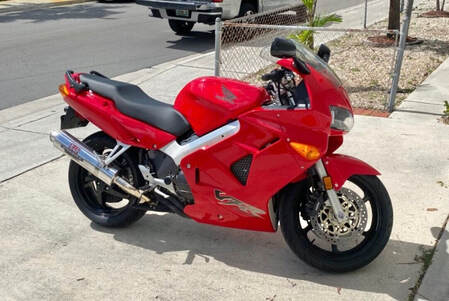 Click on image for the eBay link Click on image for the eBay link What: 1998 VFR800 FI Why: Low miles, complete Where: Miami, Florida Price: $5000 opening bid Often considered the sweet spot in the VFR lineage, the 1998-99 models featured a complete mechanical and styling update from the previous carbureted 750s, while retaining the gear-driven cam gear. This example shows only 6450 miles with a very complete recent service history. There's not much for photos, but the seller describes it as "an honest 9/10." Not mentioned is the lovely Yoshimura slip-on and I don't see a passenger seat cowl in the photos. This is offered on an auction format with an opening bid of $5000 and no reserve. 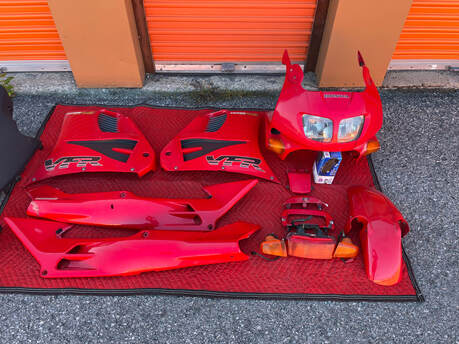 Click on image for the VFRdiscussion.com link Click on image for the VFRdiscussion.com link Reader Jay recently contacted me on an unrelated subject but mentioned that he has a set of 1994-97 VFR750 bodywork for sale. The parts are repaired and just about ready for paint. Jay's asking $1200 for the lot plus shipping from California. Click on the photo for the forum classified link. 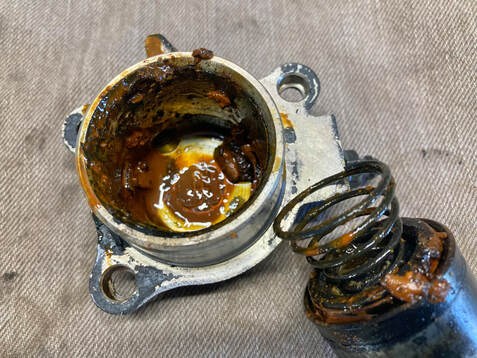 Hydraulic brake components don't fare well when neglected, which is why manufacturers specify a 2- to 3-year fluid replacement. Unfortunately, "out of sight, out of mind" often prevails so the clutch slave pictured here is more typical of what I encounter in my projects. This was found on Project 41, a 1987 VFR700 F2, which hasn't turned a wheel in over 20 years. The master cylinder and brake line looked the same. Let's try to save this assembly, which will apply to all VFR slave cylinders. It's a simple mechanism, a large piston is pushed outward in its bore by hydraulic pressure from the master cylinder, moving the clutch rod which passes through the crankcase to the clutch basket, separating the clutch plates, which achieves a disconnect between the engine and transmission. Hydraulic pressure is held captive by a single large seal on the piston. All we need to do is clean everything, smooth the piston and bore and fit the fresh rubber seal. (Below) After cleaning with soap & water, I inspect the bore for deep gouges or corrosion, which would prevent sealing, but this one looks useable — the arrow shows the area where the seal actually moves, so that's the critical point in the bore. I begin with a brass rotary brush to remove staining or deposits missed by cleaning and then move on to finger sanding with wet/dry sandpaper, the grit depending upon the condition of the bore and piston. Here. I'm finishing up with 1000-grit. (click on an image to enlarge) Ready for assembly. (Below) After lubricating with brake fluid, I install the main seal being sure that the larger lip faces the spring. Next, the clutch rod seal is pushed into place with the flat side facing outward. Then coat the bore with brake fluid. (Below) Carefully align the piston and bore so that with firm, even pressure the piston slides home. When installing onto the bike, refit the bleeder valve, add a dab of grease into the rod's cavity and fit a new gasket (available from Honda). This little job is complete, and, with regular fluid changes should be good for a few more decades of use. Next up, the master cylinder.
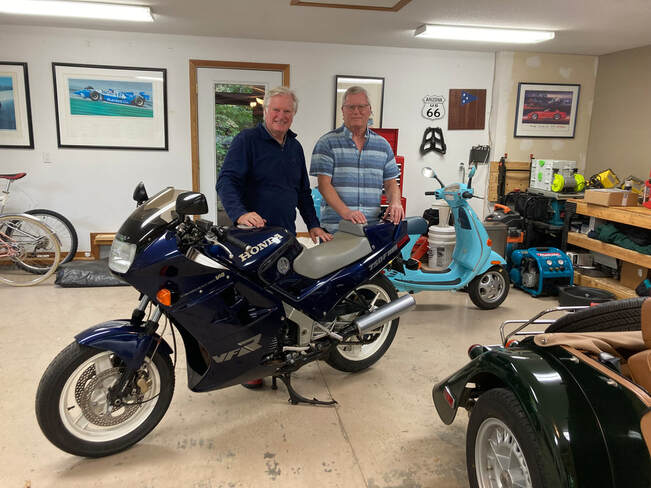
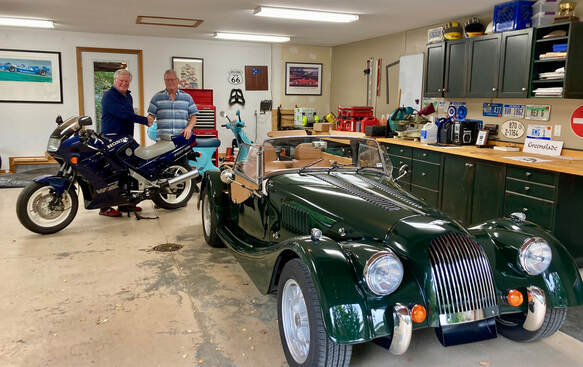
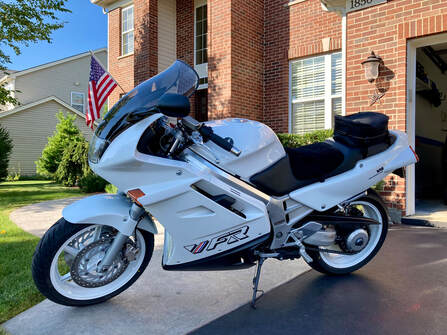 - SOLD - GIVI Touring Windscreen For Sale $75 shipped. I have a used Givi brand windscreen for the 3d-gen Interceptor which I no longer have a use for. Very nice condition with a few imperfections but nothing significant. It might benefit from a polishing but I didn't find it necessary when fitted to my '93. The photos don't show much detail, of course, but this is a nice screen. It measures the same width as OEM but is 3 1/2 inches higher at 20 1/2" with a little flip at the top for airflow and an aerodynamic vent at the bottom to smooth airflow over the top, which works well. It takes virtually all the wind off my torso. I will ship this to CONUS only, deduct $20 for local pickup in Antioch, IL. Here's a few more photos. A few weeks ago, reader Rex contacted me about my possible interest in acquiring his VFR. As it turns out, Rex's story is an interesting and unique one. Rex is British, and back in 1986 he was on the staff of Motor magazine, and as such he became privy to the press introduction of the new 1986 Honda VFR model. Honda made three bikes available to the press and, with the road tests completed, Rex inquired as to the possibility of acquiring one of the test units. An agreement was struck and Rex was given his choice of red, white or blue. His wife, Carol, opined that blue was the fairer of the three and the choice was made. Shown below is that very bike. In 1987 Rex and Carol emigrated to the U.S., specifically Michigan, when he accepted a position with Ford Motor Company. Rex shipped the VFR with his household belongings and somehow managed to wade through the importation process, getting the bike duly registered. So, here is possibly the only European-spec second-generation Honda VFR750 Interceptor legally residing in America. Rex has reluctantly decided that the Interceptor is too tempting a pleasure machine, and made the difficult decision to pass it on the next caretaker. As a partial replacement, he has acquired the Morgan Plus 8 pictured below. By happenstance, my Dad had an identical-appearing Morgan Plus 4 when I was a teen, so I spent much of our time together drooling over the Morgan.
In any event, Patti and I loaded the VFR onto the trailer for the ride home as Rex soulfully watched his old friend leave his life. But its future is bright, as I embark on the journey to find this unique motorbike its new owner. The VFR has just ticked over 18,000 miles and is gleaming in its original bodywork. I will need to address a few cosmetic bits and treat the bike to some fresh tires, but that's about all. Stay tuned. |
THE SHOP BLOG
|








 RSS Feed