
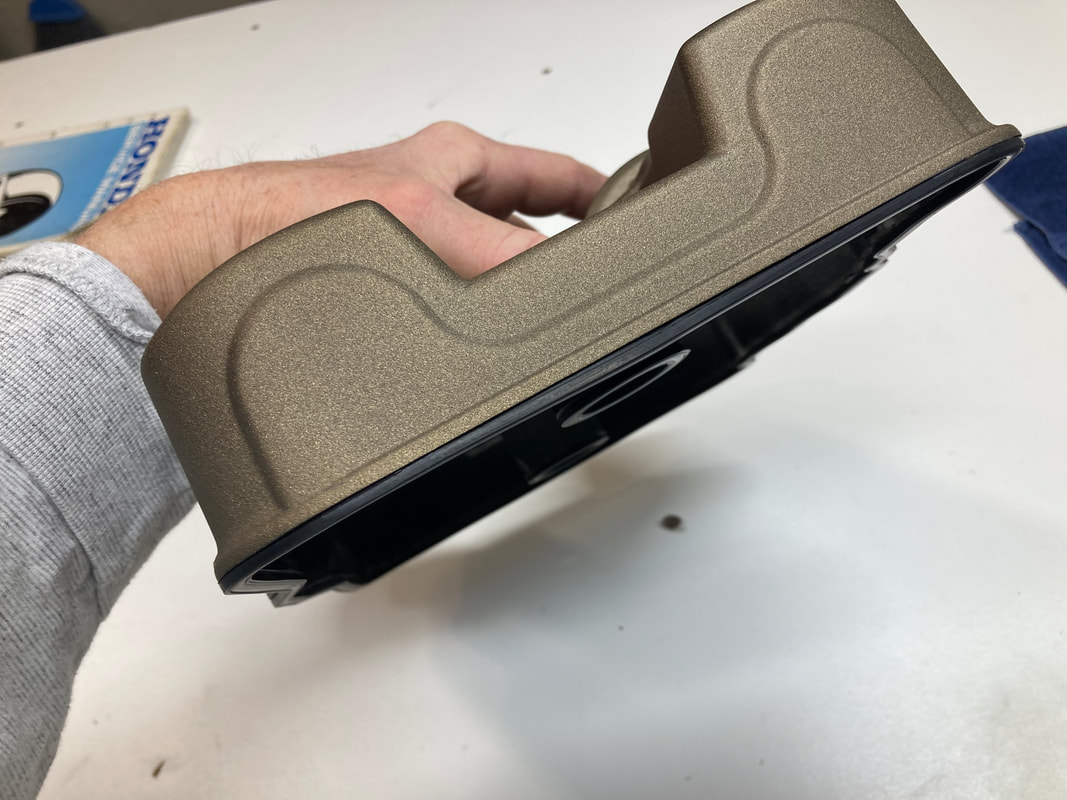
I recently received Project 41's engine covers back from Tom at Tom's Cycle Recycling (https://www.facebook.com/Tomk1960/) showcasing his usual powdercoat perfection. Finished in Textured Gold Dust, the idea is to mimic the unique-colored covers from the 1986 VFR, while providing a deeper, richer color. These covers are special — they're made of magnesium, shared with more exotic factory-prepared machines like the RC30 and RC45, IRRC. To my knowledge, Gen-2 VFRs are the only generation of standard production models to sport magnesium covers.
Let's go through my part of the process to get to the finished product, beginning with disassembly.
Powdercoating requires media blasting and baking in high heat, so everything must be stripped from the assemblies. For the clutch/alternator covers, this begins with removal of the (sound?) baffles on the backside of the covers. A single bolt holds each plate and its rubber gasket, which are lock-tighted in place, requiring an impact tool for removal.
(click on images to enlarge)


For the valve covers, I'll need to remove the rubber gaskets and the rear cover's oil baffle assembly, where I discover a paper gasket (a first for me) in place of the typical stamped metal (below). The metal is reusable, but the paper version shreds upon removal. Neither is available from Honda but, fortunately, a paper replacement is available from the aftermarket, about $13 on eBay.
Once stripped down to the bare covers, I address any cosmetic damage. In this case only the lower portion of the alternator cover had some road rash. I smooth out the metal with a combination of light sanding discs on a die grinder followed by hand sanding till smooth.
Once stripped down to the bare covers, I address any cosmetic damage. In this case only the lower portion of the alternator cover had some road rash. I smooth out the metal with a combination of light sanding discs on a die grinder followed by hand sanding till smooth.


After Tom works his magic, I give all the parts a soapy bath and hot rinse to ensure nothing harmful is left behind, then assembly begins with remounting the oil baffle (below).


Next, I'll assemble the side covers (below). I lay the sound baffle's rubber gasket in place, set the baffle in the gasket's groove and lay the rubber washer and its metal cap in place. After degreasing the bolt, I'll coat with red threadlock and tighten the bolt very securely. Note which side of the baffle plates face upward.


Next, I install the rubber valve cover gaskets (below). The Honda manual states to "apply sealant between the gaskets and cylinder head covers." I've never found this to be necessary, except to add six or eight dabs of gasket cement or similar (center photo) in order to hold the gasket in place when it's tipped upside down during installation onto the engine. I let the cement set up for a few minutes and then test that the gasket stays in place long enough to allow installation.
The manual also states, "apply sealant around the projections of the gasket." I have no idea what they're referring to, but I've never had a reused valve cover gasket leak when installed dry. YMMV.
The manual also states, "apply sealant around the projections of the gasket." I have no idea what they're referring to, but I've never had a reused valve cover gasket leak when installed dry. YMMV.


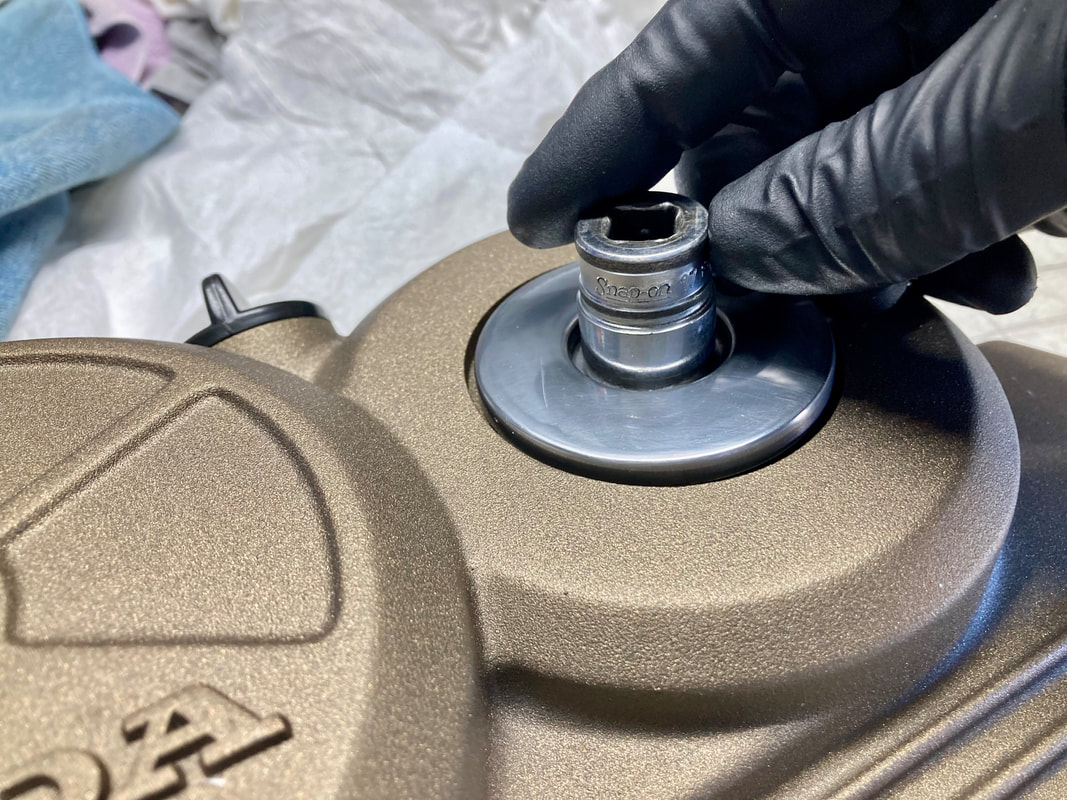
Finally, I spend some time with the timing hole cover. The cover can be powdercoated, of course, but I like the contrasting polished aluminum look. After chemically stripping the original black paint (in this case) I wet sand with three or four grits till I'm happy with the look, then coat with Sharkhide to protect the raw aluminum finish. The manual wants us to coat its threads with moly grease, and I also add some to the o-ring, which I always reuse. Snug in place with a 17mm socket, and these parts are ready to rejoin the engine…a future post.


 RSS Feed