"Installation is the reverse of removal" — an oversimplification common to service manuals since the dawn of the industrial revolution. While completely accurate in an objective sense, there's often a few beneficial tips to help keep the gears meshing and that black gold inside the machine where it does the most good. This post shows my work on Project 41, a Gen-2 VFR, but it generally applies to all years.

(Below) The very first step is to prepare the gasket surfaces to ensure a leak-free mating. The covers' were done before powdercoating but the engine surfaces are more of a challenge. There's a lot of interior crevices where bits of dirt and old gasket can disappear, and we don't want that stuff circulating around our engine internals. I position paper towel around the perimeter and carefully scrape the surfaces with whatever I can make work. My favorite gasket scraper is the excellent Bahco pull tool shown here, but I also use a traditional scraper and small bits of crocus/emery cloth (sandpaper for metal). The surface needn't be virgin aluminum, but it does need to be smooth. Be careful to avoid gouging the soft aluminum surface, but if you do, fill the gouge with gasket cement during installation.
Bahco #625 gasket scraper is available on eBay: $21
Finally, I vacuum the area and go after any leftover debris with a thin cloth on a screwdriver tip wetted with a bit of grease — the debris will stick to the grease. When everything is clean, I proceed to the gasket and cover.
Bahco #625 gasket scraper is available on eBay: $21
Finally, I vacuum the area and go after any leftover debris with a thin cloth on a screwdriver tip wetted with a bit of grease — the debris will stick to the grease. When everything is clean, I proceed to the gasket and cover.


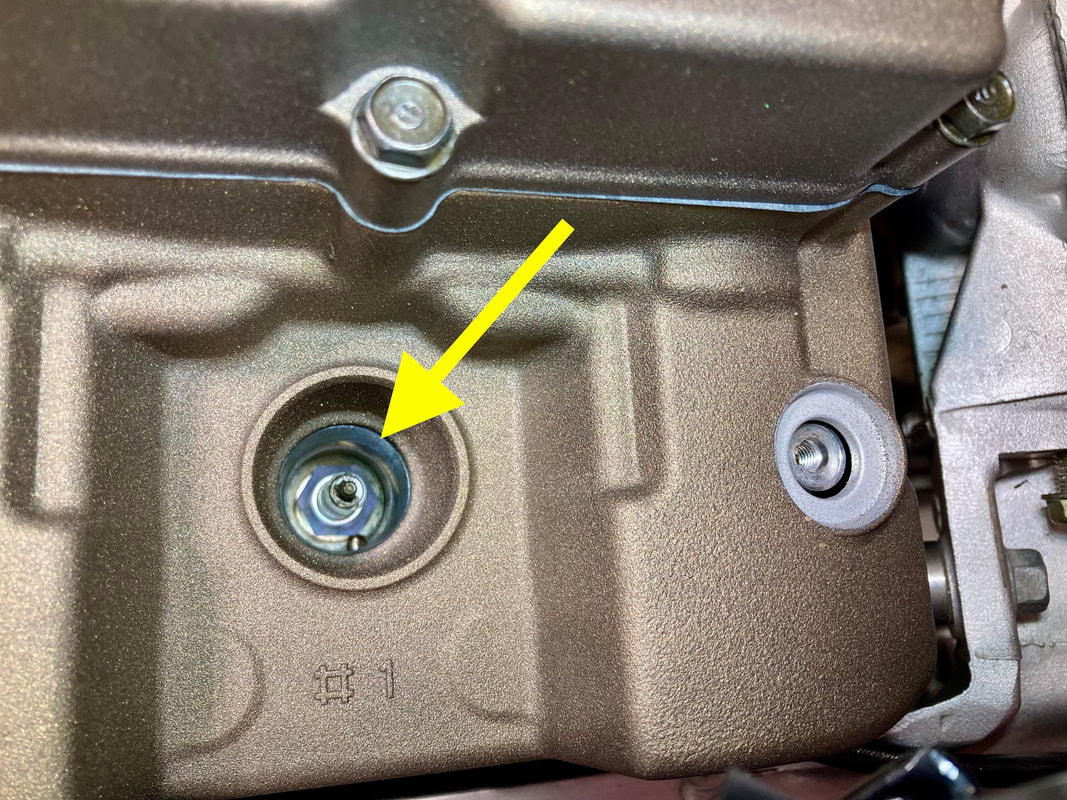
(Below) But first I complete any cleaning around the area, including detailing the fasteners (previous post), blowing out the threaded holes and shining up the nearby wiring and hoses, like the starter cable shown here. Check for chafing on the pulse generator wire harness where it touches the sharp edge of the gasket surface (yellow arrow).


(Below) I begin with the alternator cover using a dry gasket and tightening the bolts sequentially in a crosswise pattern. Here I'm speeding up the process with a cordless drill with a socket adapter and the drill's clutch set to a very low torque. I do the final tightening by hand — note the radiator hose support bracket. I've never found a torque setting but not much is required, maybe 8-10 Lb/Ft? "Tight but not too tight," as my Dad would say. I didn't like the look of the excess gasket peeking out at the top, so I trimmed it with a razor.


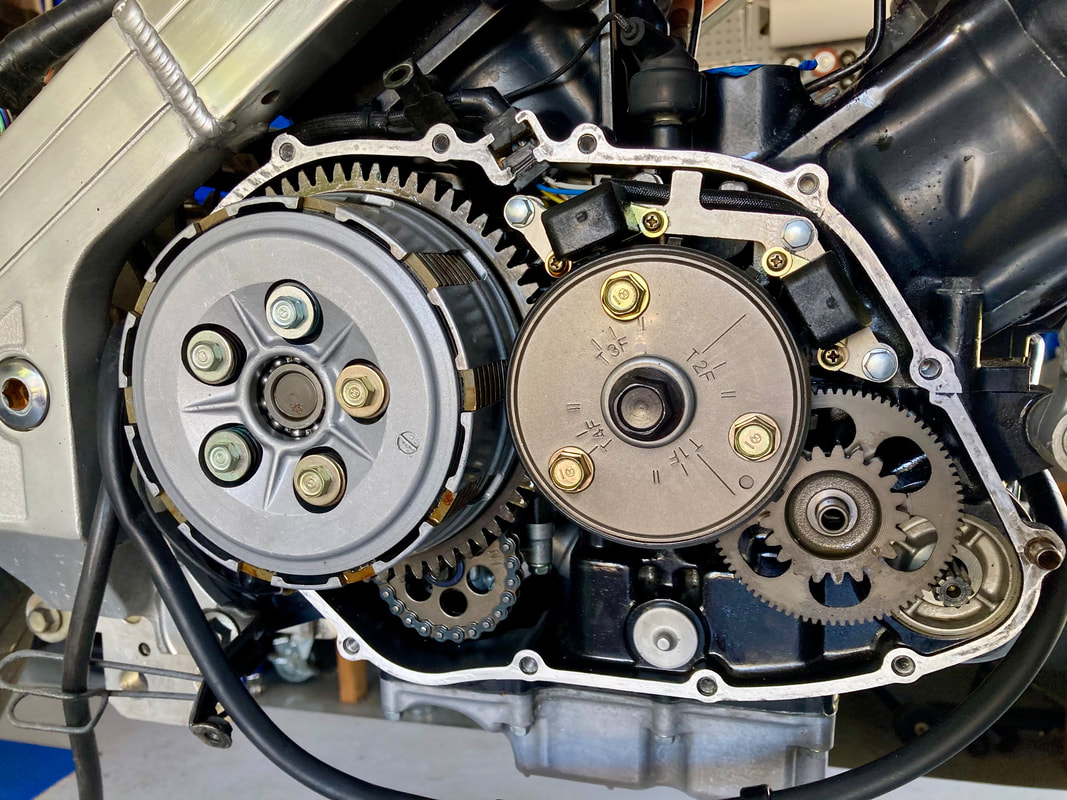
(Below) Moving to the clutch cover, note the location of the two dowels, which are also the location of the two longer bolts — all the clutch and alternator bolts are the same length except for these two.


(Below) Before installation, make certain that the bushing holding the primary drive gear assembly is firmly seated (arrow). This is the same bushing that you hoped would not pull free when you removed the cover from the engine — if it did, you'll have a 3-handed puzzle getting those gears meshing together correctly. That bushing locates in the cover's recess shown in the second photo. I give it a light coat of oil to help the bushing slide easily in place.
I slide the dry gasket onto the engine, locating it onto the dowels; it will want to droop along the top so I add a few dabs of gasket cement along that area to hold it during assembly. Before I snug the bolts I visually verify that the gasket is in place around the entire circumference (third photo). Bottom all the bolts in a crosswise pattern and tighten incrementally. Finally, install the oil filler cap and dipstick, ensuring that their o-rings are in place. If needed, the o-rings are still available from Honda.
I slide the dry gasket onto the engine, locating it onto the dowels; it will want to droop along the top so I add a few dabs of gasket cement along that area to hold it during assembly. Before I snug the bolts I visually verify that the gasket is in place around the entire circumference (third photo). Bottom all the bolts in a crosswise pattern and tighten incrementally. Finally, install the oil filler cap and dipstick, ensuring that their o-rings are in place. If needed, the o-rings are still available from Honda.


Valve Covers: (Below) Pretty straightforward, but first I do a final check for debris using a bright light. I've been asked many times the secret to removal/installation of the rear cover on the Gen-2 — there doesn't seem to be enough side-to-side room between the subframe rails. There is not, so the trick is to fully raise the wire harness above the frame rail, then hold the left side higher as you remove or install the cover. Finally, visually check that the rubber gasket is correctly seated all the way round.


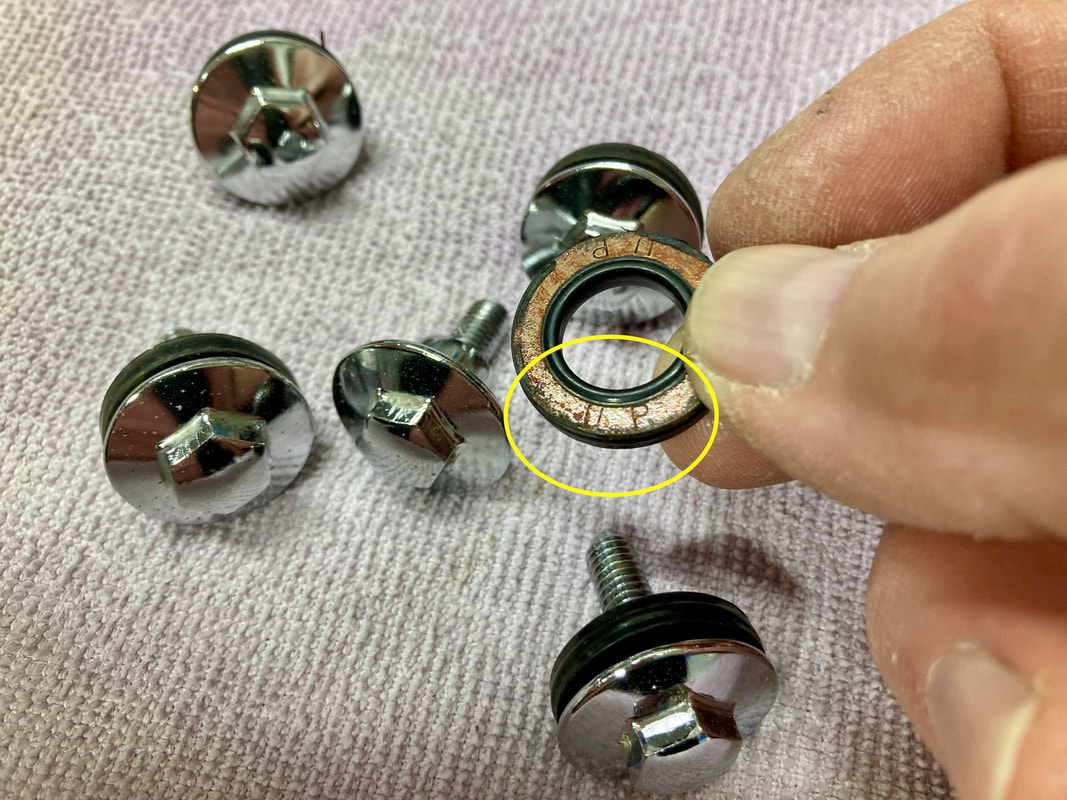
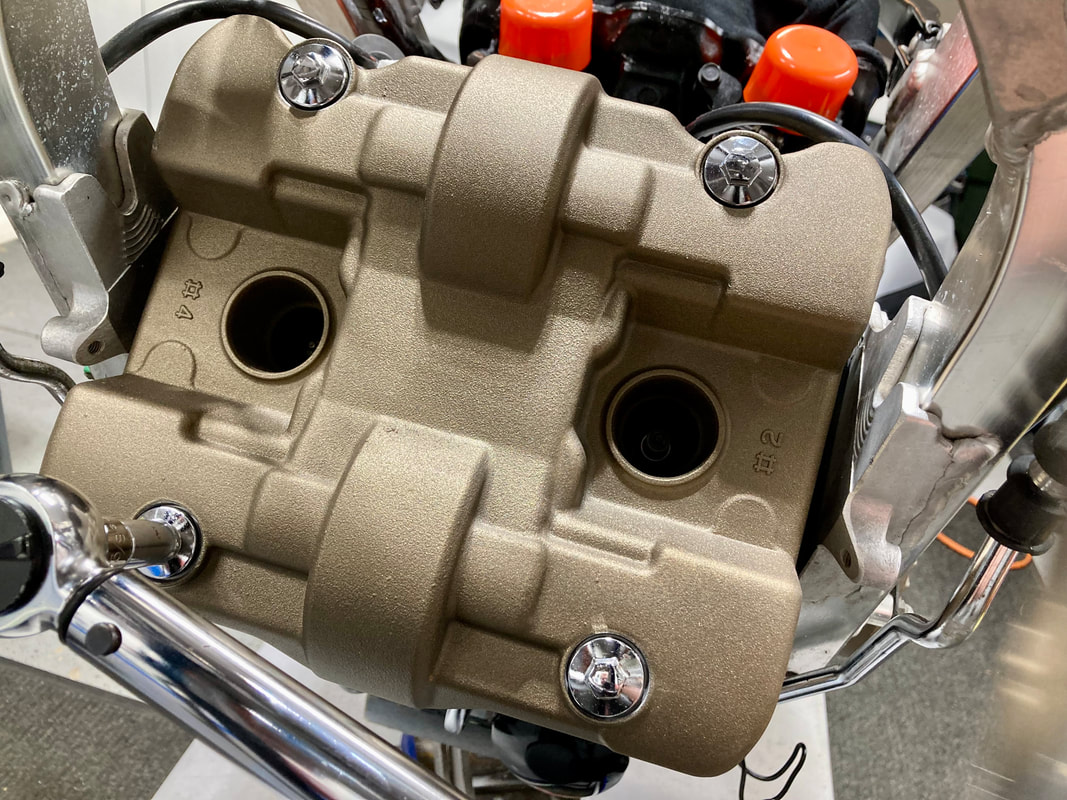
(Below) The front cover sets in place easily from the front side (this is one reason I remove the radiator during valve service). The bolts are seated with their gaskets then torqued sequentially to about 9 Lb/Ft, or 108 inch-pounds. Ensure that those bolt gaskets are installed right-side up; Honda thoughtfully stamped "UP" on the upward-facing side.
At this point I blow out the spark plug holes with compressed air (spark plugs in place). Note that there's water drain holes for these cavities 90° to the outside of the engine casting, which should also be cleared with compressed air or a long wire, if clogged. I do this along with swabbing the spark plug holes clean before valve cover removal.
Finally, I refill the crankcase with oil, and with the engine buttoned up, I'll move on to the cooling system install.


 RSS Feed