My trials and tribulations with VFR projects have included lots of fuel tanks in varying states of...ahh...despair. They're all the same relative age, so their condition is a reflection of how they've been cared for over the decades. I've come across tanks which look great on the ouside but heavily rusted internally, and just the opposite. But, it's like a Realtor likes to say about waterfront property, "they ain't makin' any more," so these tanks are worth saving, and that's where tank sealant comes in.
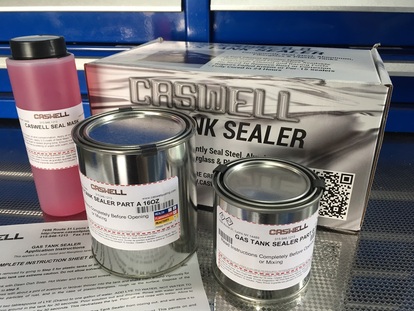
My choice for do-it-yourself tank sealant is Caswell"s motorcycle sealing kit. This kit runs $40 for clear and $55 for colored. Both are a 2-part epoxy with some pretty fancy chemists' terms associated with it (i.e. "phenol novolac is more thixotropic") but the bottom line is that Caswell claims it sticks better, even to uneven rusty surfaces and is resistant to anything short of a nuclear detonation. It will bridge and seal up actual gaps and is pretty easy to work with. Pictured above is another product I like to use on tanks with a salvageable exterior finish; Seal Mask. This pink liquid brushes on the painted finish and protects during the cleaning and application process. Pretty amazing stuff, 'cause it washes off with only clear water when finished. Caswell provides written instructions with the kit and on their website.
My choice for do-it-yourself tank sealant is Caswell"s motorcycle sealing kit. This kit runs $40 for clear and $55 for colored. Both are a 2-part epoxy with some pretty fancy chemists' terms associated with it (i.e. "phenol novolac is more thixotropic") but the bottom line is that Caswell claims it sticks better, even to uneven rusty surfaces and is resistant to anything short of a nuclear detonation. It will bridge and seal up actual gaps and is pretty easy to work with. Pictured above is another product I like to use on tanks with a salvageable exterior finish; Seal Mask. This pink liquid brushes on the painted finish and protects during the cleaning and application process. Pretty amazing stuff, 'cause it washes off with only clear water when finished. Caswell provides written instructions with the kit and on their website.
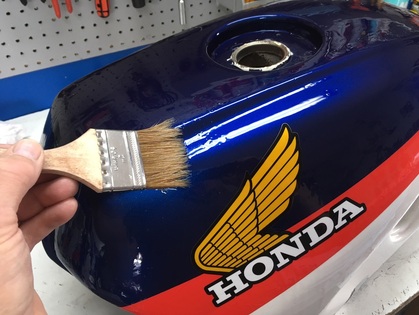
If the paint is to be saved, I first brush on one or two coats of Seal Mask, which dries in about 30 minutes to a thick plastic film. Caswell also suggests taping plastic and aluminum foil over the tank, but I've not found that necessary if you're careful. Or, use that approach in lieu of Seal Mask.
Our first task is to prep the inside of the tank as best we can. Remove the petcock; you'll need to "back blow" compressed air through the openings after sealing. I install the lower fuel level sensor with its rubber gasket and tape the top filler hole or just close the filler if it's still in place. Using acetone, I slosh about a pint of it around the interior with a double handful of small drywall screws, drain out the bottom hole, and repeat as needed.
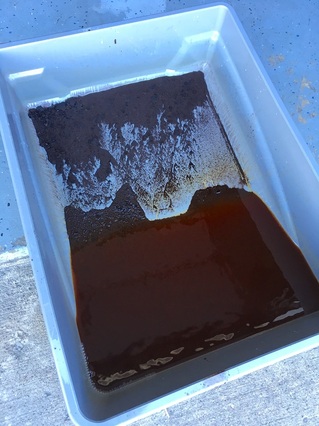
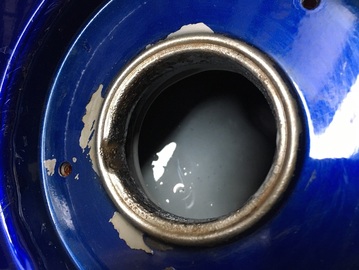
This photo shows what typically comes out of a rusty tank. The putrid smell of rancid gas can permeate a garage for a few days — be warned. When I'm happy with the cleaning operation I open up both holes and allow the tank to completely dry for a couple of days.
This photo shows what typically comes out of a rusty tank. The putrid smell of rancid gas can permeate a garage for a few days — be warned. When I'm happy with the cleaning operation I open up both holes and allow the tank to completely dry for a couple of days.
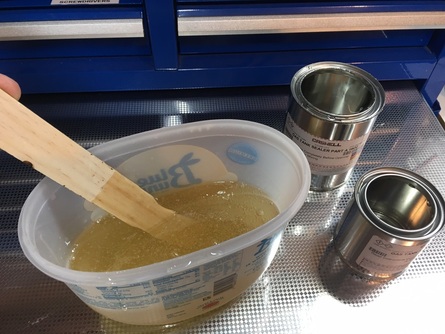
Next we need to mix the 2-part epoxy in a plastic container. Working time is dependent on air temperature, but basically be ready to pour into the tank immediately after mixing.
Shown here is the clear sealant.
Pour the very thick mixture into the filler opening (with the bottom opening taped over), tape the filler opening, and slowly rotate the tank to distribute on all surfaces. When I'm satisfied that everything's coated, uncover the lower hole and prop the tank level allowing it to drain for a couple of hours. I tape down some plastic, like a grocery bag, under the the opening and allow the drained glob to solidify on it. Immediately after beginning the drain operation blow compressed air into the fuel pickup tubes (at the petcock) to clear potentially clogged pickup screens inside the tank — don't skip this step. After about an hour, I'll take a sharp blade and cut off any drips around the drain hole. Caswell suggests allowing the tank to sit a few days undisturbed to cure the epoxy.
Here's a look at a cured tank interior, in grey.

After curing, peel away the Seal Mask, or just clean with water. Reassemble your refurbished fuel tank and add gas.
Job done!
 RSS Feed