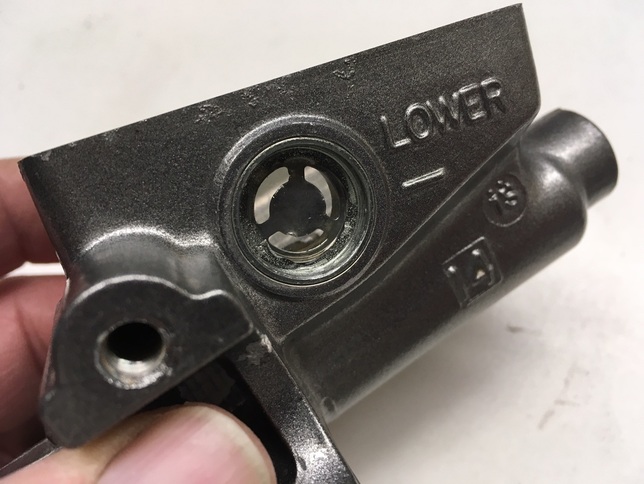
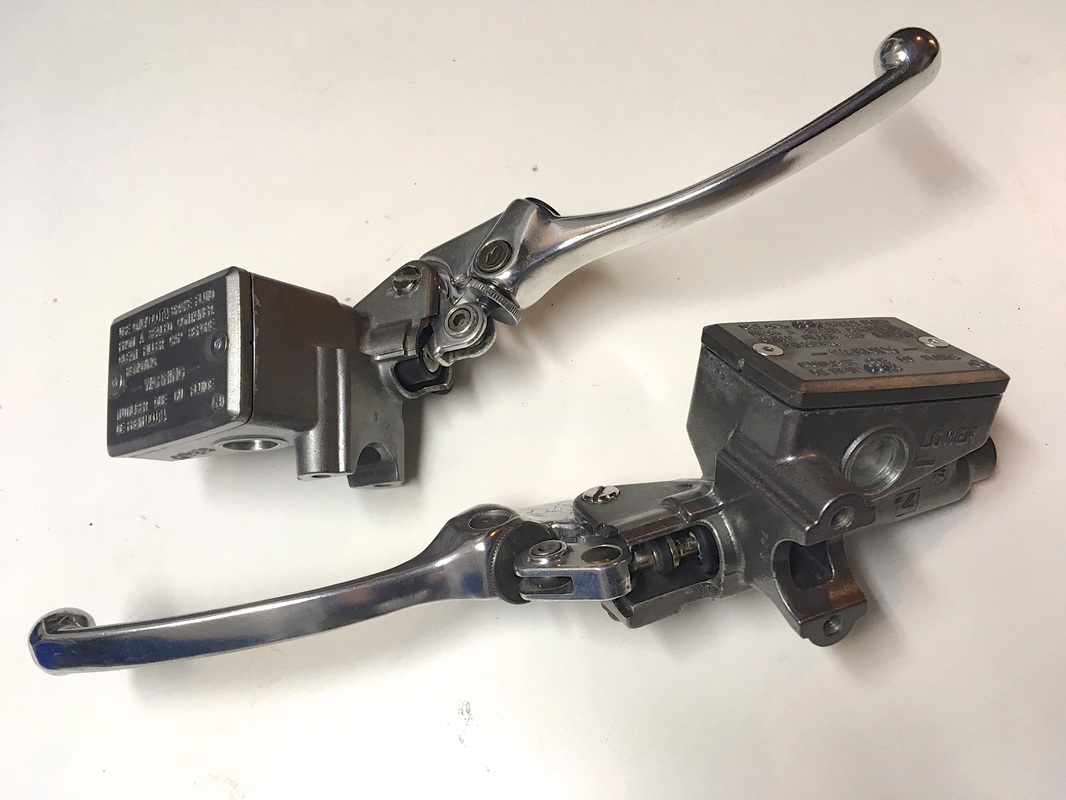
Project 14, an '87 VFR700 F2, needs attention lavished on all of its systems. When the clutch and front brake master cylinders were opened up here's what lay in wait.
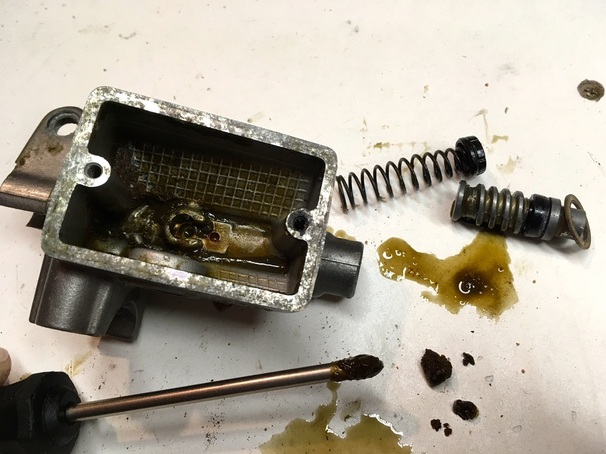
This situation is very common with my projects and is due to nothing more than neglect. Brake fluid should be flushed every two years, and this is the long-term result of ignoring that maintenance item.
I don't know how that solidified gunk forms, but fortunately it cleans up with a straightforward sudsy washing.

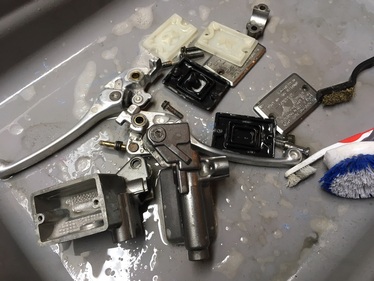
Both of these master cylinders will require a complete rebuild. That involves new seals and replacing the aged sight glasses.
I like to clean the bore with solvent and a plastic rotary brush. If the bore then passes a visual inspection I move on with the sight glass repair before installing the new seals — I don't want to risk debris from the old sight glass contaminating the seals.

I begin with the demolition of the old plastic window. A tap with a small screwdriver from the inside starts the process. Then, using a larger flat-blade screwdriver I pry around the perimeter from the outside, working my around.
Sometimes they come out pretty cleanly, as here, and sometimes not. When I come across a stubborn lens that just won't let go, I use a small wire brush on the Dremel tool to finish the job.


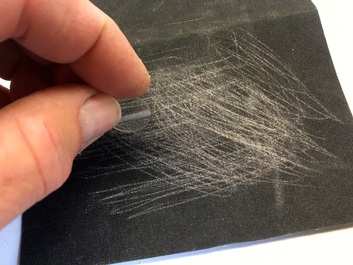
Due to manufacturing variances, the lens will sometimes be a bit too tight a fit. A few minutes spent gently sanding the edge, while rotating the lens, on some medium grit sandpaper will allow it to drop into place.
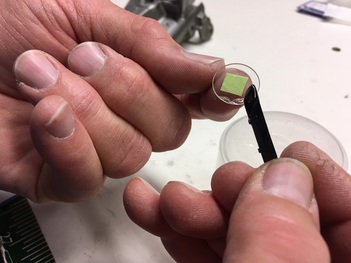
After a final cleaning of the lens and it's seating groove with acetone or similar, I stick the lens on a finger tip (using rolled-over masking tape) and carefully apply adhesive around the perimeter.
I've used clear RTV but here I'm using Permatex 5-minute epoxy which claims to be impervious to most chemicals. And brake fluid is actually pretty nasty stuff.
Put the lens place and secure with a rubber banded socket while the adhesive cures.


Expect some residual adhesive to show, but overall a practical repair.
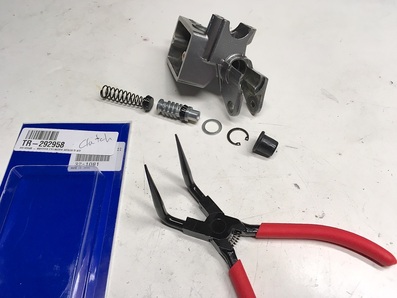
Now we're ready for the seal kit. I hold the assembled plunger down in the bore (against the spring pressure) with a screwdriver while inserting the circlip. The bent-tip snap ring pliers makes this a smooth operation. Be sure and coat the parts with brake fluid when installing.
(clutch master shown) >>
All that's left are the levers. Motion Pro and probably others make complete reproduction levers for the VFR, but there's nothing like the originals if they can be saved.
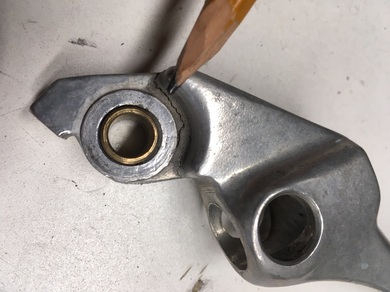
A thorough inspection is called for with these old parts and their unknown history. While looking over the brake lever I discovered this crack on the underside. It obviously resulted from a crash or tip-over. No question that this one goes into the trash bin. Fortunately, I had a NOS brake lever on hand.
A thorough inspection is called for with these old parts and their unknown history. While looking over the brake lever I discovered this crack on the underside. It obviously resulted from a crash or tip-over. No question that this one goes into the trash bin. Fortunately, I had a NOS brake lever on hand.
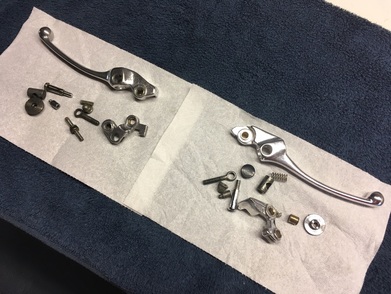
Who knew these adjustable levers have so many parts?
After a thorough cleaning, de-rusting and polishing, I carefully reassemble the levers with a touch of white lithium grease on all the rotating parts. Fresh stainless steel reservoir screws are a finishing touch.
These master cylinders are ready for the next thirty years......
Replacement sight glass lens and reservoir screws are available on the "Products" page.
 RSS Feed