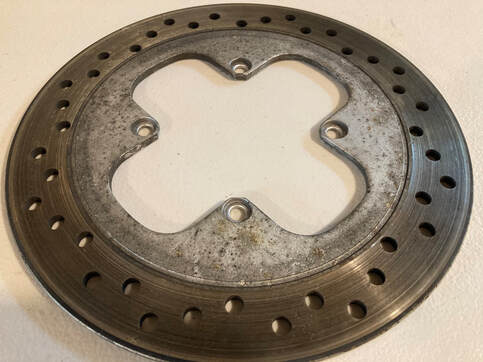
One look at the cosmetic condition of that brake disc and I knew it would not fit with the rest of this VFR, which is receiving a full repaint and detailing. No, it would need to be addressed, so off it came. These discs are stainless steel, but the center and outer edge portions are painted; the photo above showing its sad state. I've done many of these discs and the first thing on the list is checking for true, then a thorough degreasing followed by sanding with 400-grit wet paper and taping. The photos below show the progress after those steps. In the left photo, sanding marks are visible on the braking surface itself, which I scuff with 100-grit dry paper to remove any glaze and years of ground-in brake dust and dirt.
I recently finished maintenance and refurbishment of the drive end on Project 37, a 1993 VFR750. This is the first generation of the V4 line to utilize the beautiful and efficient Honda/ELF designed single-sided swingarm. There are desirable maintenance advantages to this arrangement, in particular drive chain alignment and wheel removal/installation. But, removing the rear brake disc isn't on that list. The disc is held captive behind the stub axle, so removal requires disassembly of the axle assembly, which I'll cover in the next post. One look at the cosmetic condition of that brake disc and I knew it would not fit with the rest of this VFR, which is receiving a full repaint and detailing. No, it would need to be addressed, so off it came. These discs are stainless steel, but the center and outer edge portions are painted; the photo above showing its sad state. I've done many of these discs and the first thing on the list is checking for true, then a thorough degreasing followed by sanding with 400-grit wet paper and taping. The photos below show the progress after those steps. In the left photo, sanding marks are visible on the braking surface itself, which I scuff with 100-grit dry paper to remove any glaze and years of ground-in brake dust and dirt. After painting, the part is looking new and ready for reassembly onto the stub axle. Visible behind the beautiful 8-spoke wheel, this component will now be a bit of eye candy instead of an eyesore.
0 Comments
Your comment will be posted after it is approved.
Leave a Reply. |
THE SHOP BLOG
|