TIP: To avoid breaking the plastic center cap, remove it by tapping it from beneath with a dowel or similar.


For a tutorial on replacing the steering bearings see the "Maintenance" page article: "Steering Head Bearing Replacement."
|
|
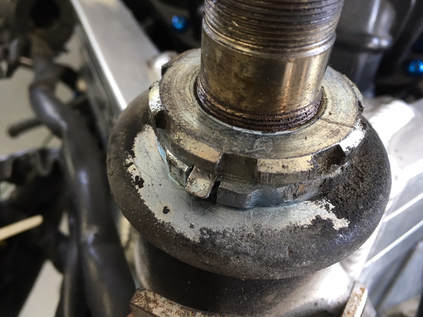
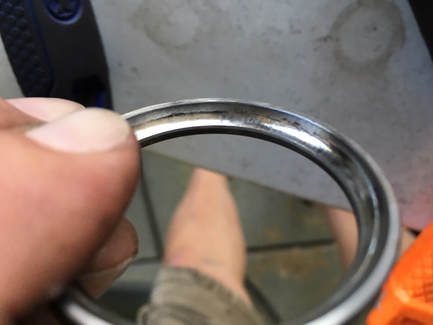
When the forks are removed for rebuilding, it's the perfect opportunity to check the steering head bearings for wear. Without the added weight of the forks and wheel I'm able to swing the triple clamp through its arc and feel for roughness or a notch, typically in the centered position. That wasn't necessary in the case of Project 17. What I found here is the worst case of notched bearings I've ever seen on a bike. This must have been a handful to actually ride. Here's a video... (Below) Let's get this thing apart. TIP: To avoid breaking the plastic center cap, remove it by tapping it from beneath with a dowel or similar. (Below) Next I remove the upper nut with an impact wrench and lift off the upper bridge, exposing the locking nuts beneath.  (Right) With a closer look at the locking nuts I see that a previous mechanic had failed to bend up the locking tabs. This is a sure indication that an earlier service on this bearing issue was dealt with badly. (Below) Lacking the proper tool, I simply use a slip-jaw pliers to loosen the two serrated nuts, allowing the steering stem assembly to drop out the bottom of the frame neck. This thing is an over-greased mess. (Below) After cleaning some of the dirty grease away, I use a long piece of round stock to drive out the upper and lower bearing outer races.  Here we see the damage to one of the outer races. It's subtle but it's enough to cause problems with the steering bearings. For a tutorial on replacing the steering bearings see the "Maintenance" page article: "Steering Head Bearing Replacement."
0 Comments
Your comment will be posted after it is approved.
Leave a Reply. |
THE SHOP BLOG
|