
Hydraulic brake components don't fare well when neglected, which is why manufacturers specify a 2- to 3-year fluid replacement. Unfortunately, "out of sight, out of mind" often prevails so the clutch slave pictured here is more typical of what I encounter in my projects. This was found on Project 41, a 1987 VFR700 F2, which hasn't turned a wheel in over 20 years. The master cylinder and brake line looked the same. Let's try to save this assembly, which will apply to all VFR slave cylinders.
It's a simple mechanism, a large piston is pushed outward in its bore by hydraulic pressure from the master cylinder, moving the clutch rod which passes through the crankcase to the clutch basket, separating the clutch plates, which achieves a disconnect between the engine and transmission. Hydraulic pressure is held captive by a single large seal on the piston. All we need to do is clean everything, smooth the piston and bore and fit the fresh rubber seal.
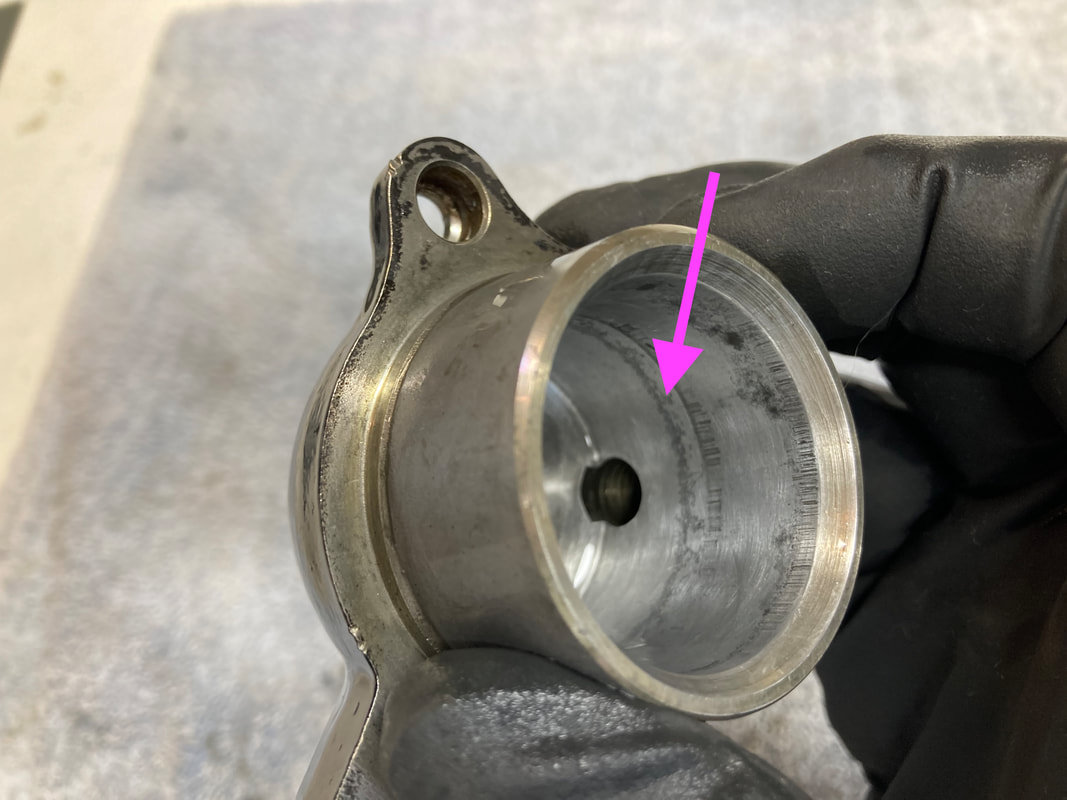
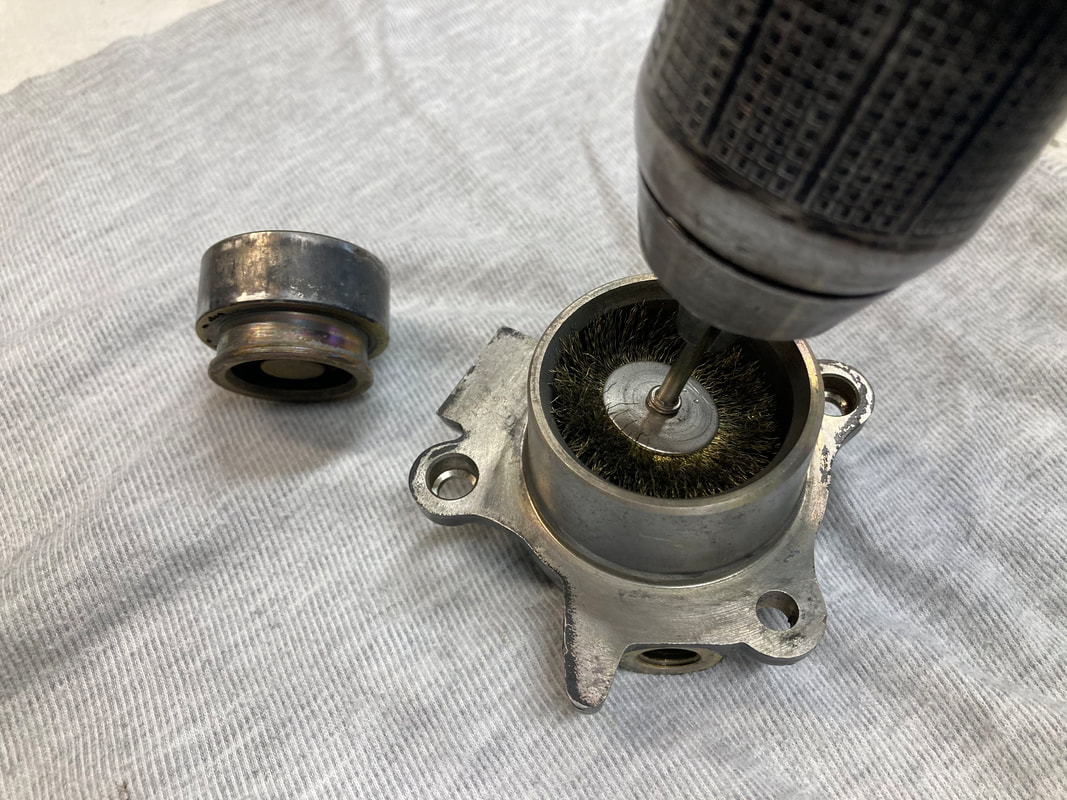
(Below) After cleaning with soap & water, I inspect the bore for deep gouges or corrosion, which would prevent sealing, but this one looks useable — the arrow shows the area where the seal actually moves, so that's the critical point in the bore. I begin with a brass rotary brush to remove staining or deposits missed by cleaning and then move on to finger sanding with wet/dry sandpaper, the grit depending upon the condition of the bore and piston. Here. I'm finishing up with 1000-grit.
(click on an image to enlarge)
It's a simple mechanism, a large piston is pushed outward in its bore by hydraulic pressure from the master cylinder, moving the clutch rod which passes through the crankcase to the clutch basket, separating the clutch plates, which achieves a disconnect between the engine and transmission. Hydraulic pressure is held captive by a single large seal on the piston. All we need to do is clean everything, smooth the piston and bore and fit the fresh rubber seal.
(Below) After cleaning with soap & water, I inspect the bore for deep gouges or corrosion, which would prevent sealing, but this one looks useable — the arrow shows the area where the seal actually moves, so that's the critical point in the bore. I begin with a brass rotary brush to remove staining or deposits missed by cleaning and then move on to finger sanding with wet/dry sandpaper, the grit depending upon the condition of the bore and piston. Here. I'm finishing up with 1000-grit.
(click on an image to enlarge)

Ready for assembly.
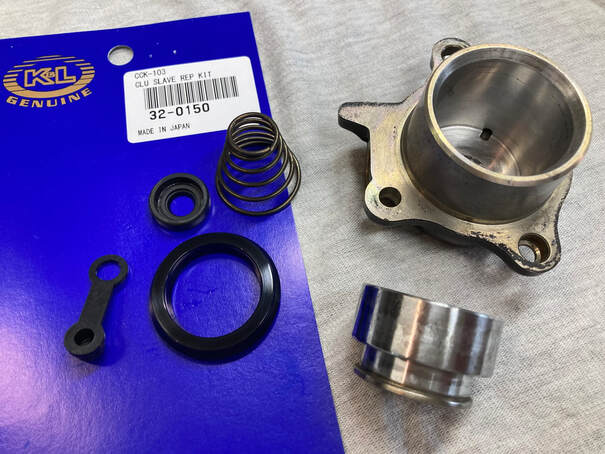
(Below) After lubricating with brake fluid, I install the main seal being sure that the larger lip faces the spring. Next, the clutch rod seal is pushed into place with the flat side facing outward. Then coat the bore with brake fluid.
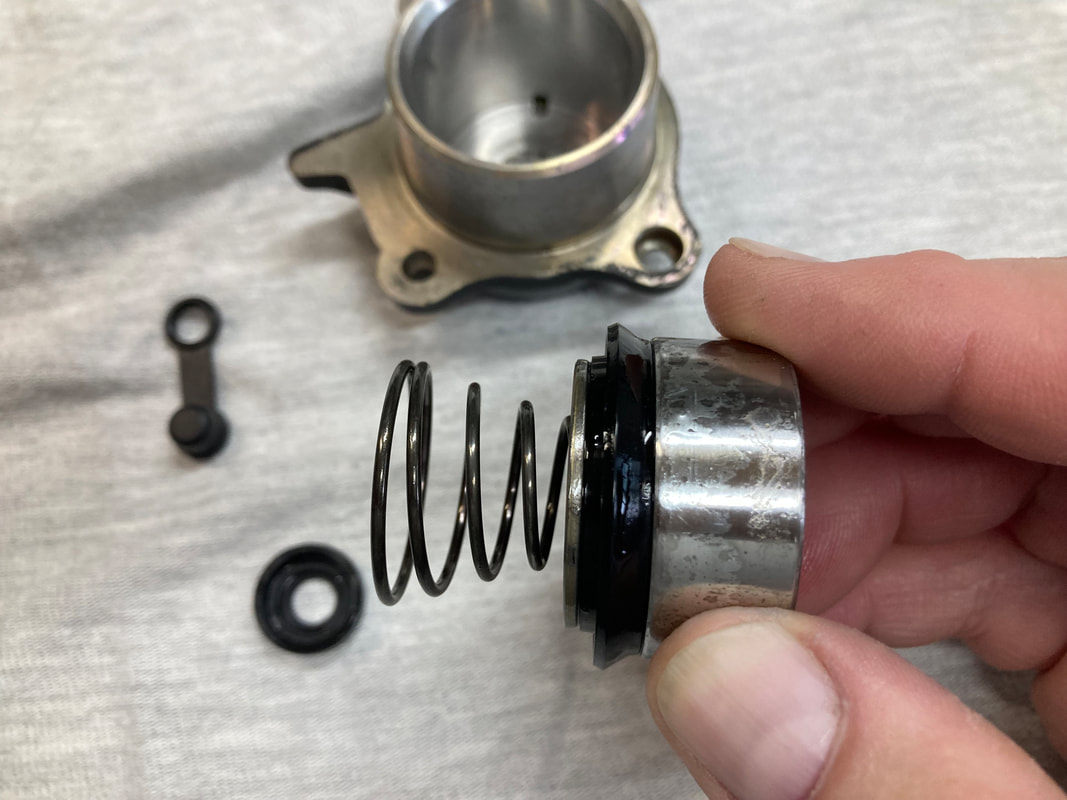

(Below) Carefully align the piston and bore so that with firm, even pressure the piston slides home. When installing onto the bike, refit the bleeder valve, add a dab of grease into the rod's cavity and fit a new gasket (available from Honda). This little job is complete, and, with regular fluid changes should be good for a few more decades of use. Next up, the master cylinder.


 RSS Feed