No good will ever come of gasoline left to "mature" beyond its expiration date. Pictured below is a perfect example. The photo on the left shows what I found lurking inside a set of Gen-2 carbs, sent by a hopeful owner in the hopes of salvaging them. The second photo, of course, is the after shot. If you've never personally experienced this situation, I can assure you that black tar is just as nasty as it looks — foul, sticky, thick, gooey varnish. Obviously, these carburetors were saved, and here's how I tackled this nasty task.
(click on an image to enlarge)
(click on an image to enlarge)


Having tried a variety of cleaning/degreasing concoctions over the years, I have a few go-to products, shown below. I must have gone through at least 30 gallons of "purple degreaser" in my time. My local Menards big box store carries "Super Clean," so that's what's on the shelf. I typically use it full strength in a spray bottle as a parts cleaner, but in this case I diluted it 50/50 and let all the loose parts soak for hours, even overnight. It will affect aluminum if used too long or too strong, so be aware. I soaked the carb bodies themselves for only about four hours, then scrubbed the remaining residue with a stiff brush and rinsed with warm water. For the plastic floats, I soaked overnight and did a final gentle scrub with a medium-course green scrub pad. I soak the floats in a 32-oz Mickey-Dees drink cup, held submerged with a suitable weight, like a the handle end of a screwdriver. This will also allow you to check them for leakage, which I've never found.
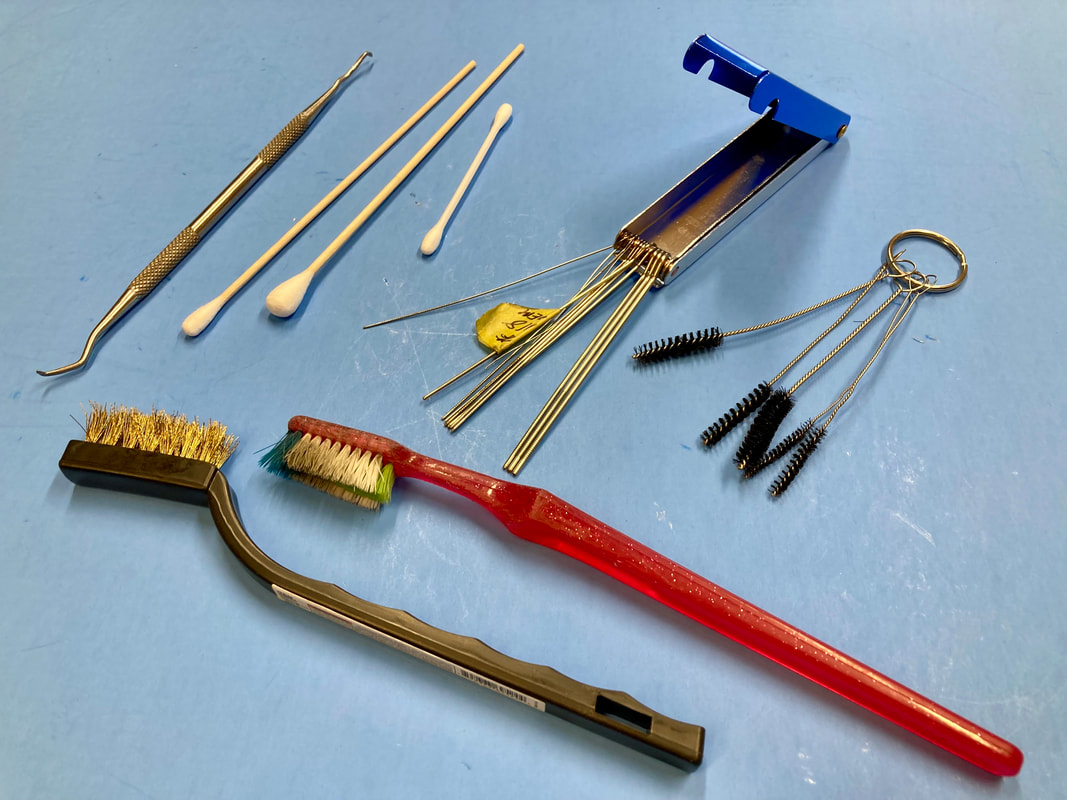
For the really heavy deposits, I spray on "Gum Cutter" and scrape with a pick, then brush with a small brass scrub brush (Harbor Freight or Amazon).
The pilot jets were replaced with new #40 jets from EBC, but they can be cleared, if desired, with a very tiny wire after soaking. The remaining jets were soaked and their orifices gently cleared with jet cleaning wires followed by small scrub brushes soaked in Gum Cutter. The float valve needles are replaced with new Viton-tipped needles.
I didn't use it in this case, but an alternative is Berryman's "Chem-Dip." The parts would be soaked for many hours, even overnight, then rinsed, scrubbed and cleaned as above.
All of this is in preparation for the final cleaning step, a refreshing agitation in the ultrasonic cleaner (all except the floats). Just about any cleaner can be used in a sonic cleaner, but my go-to is "Clean 2020" from Master Fluid Solutions (find it on Amazon). Not cheap, but it's diluted 10:1, so a gallon goes a long way, and it can be used several times. depending upon how nasty your stuff is. I run the ultrasonic cleaner at 40° C and do two 20-minute cleanings with about a 30-minute cooling period in between — these machines can overheat. My 6-liter cleaner can hold two VFR carbs at a time.
While the ultrasonic cleaner does its magic, I spend that time hand cleaning all the other miscellaneous bits, like brackets, pilot screws, bowl drain screws, scraping old bowl gaskets, etc. I also inspect and clean or replace stuff like air cut valve and choke valve assemblies.
When the carb bodies are finished with their cleaning, I rinse and immediately blow out every passage and orifice with 100-lb compressed air, followed by manually blowing through those (via a short length of hose) to verify clear. Once satisfied, assembly can begin.
I'm in the process of putting together a thorough step-by-step tutorial on my rebuilding process, but it's slow going, so look for that in the future.


 RSS Feed