As we welcome the New Year, I wish you peace, prosperity and health.
Please be careful out there — remember, someone is expecting you home.
Please be careful out there — remember, someone is expecting you home.

|
|
As we welcome the New Year, I wish you peace, prosperity and health. Please be careful out there — remember, someone is expecting you home.
2 Comments
Once again, reader Michael S. has generously updated his V4 Dreams The Shop Blog Index, covering the entire 15+ years of technical posts on this page. My software doesn't provide for a built-in index, so this is an especially helpful search tool. So, again, thanks Michael!!! (click the link below to download the Excel file)
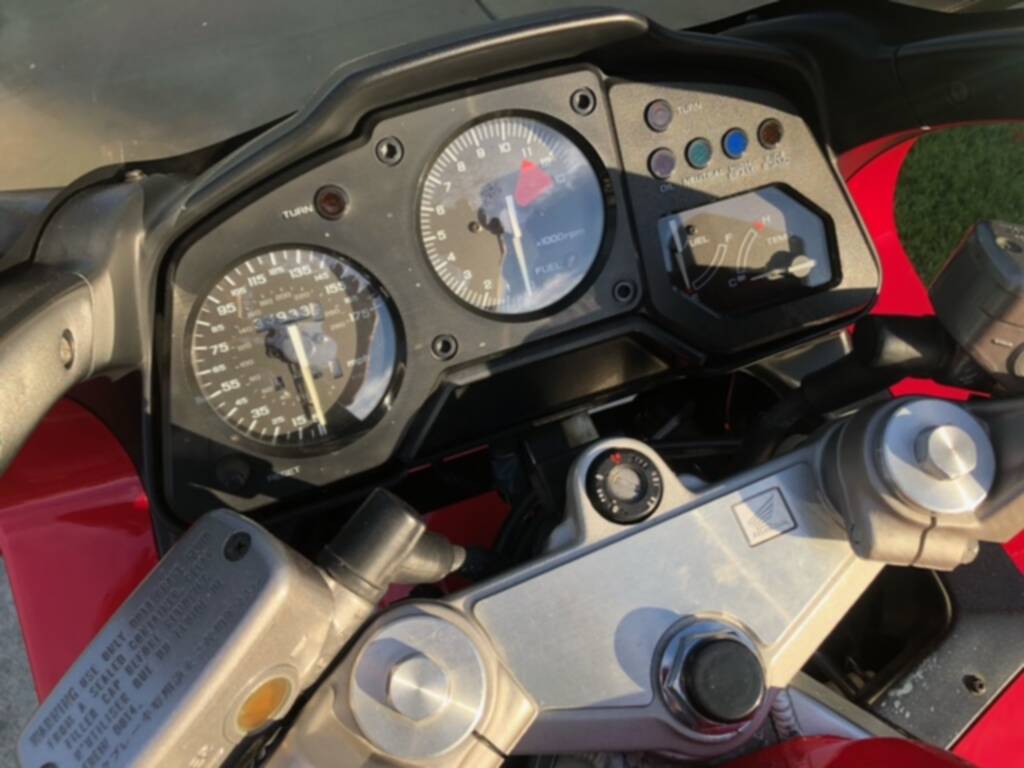
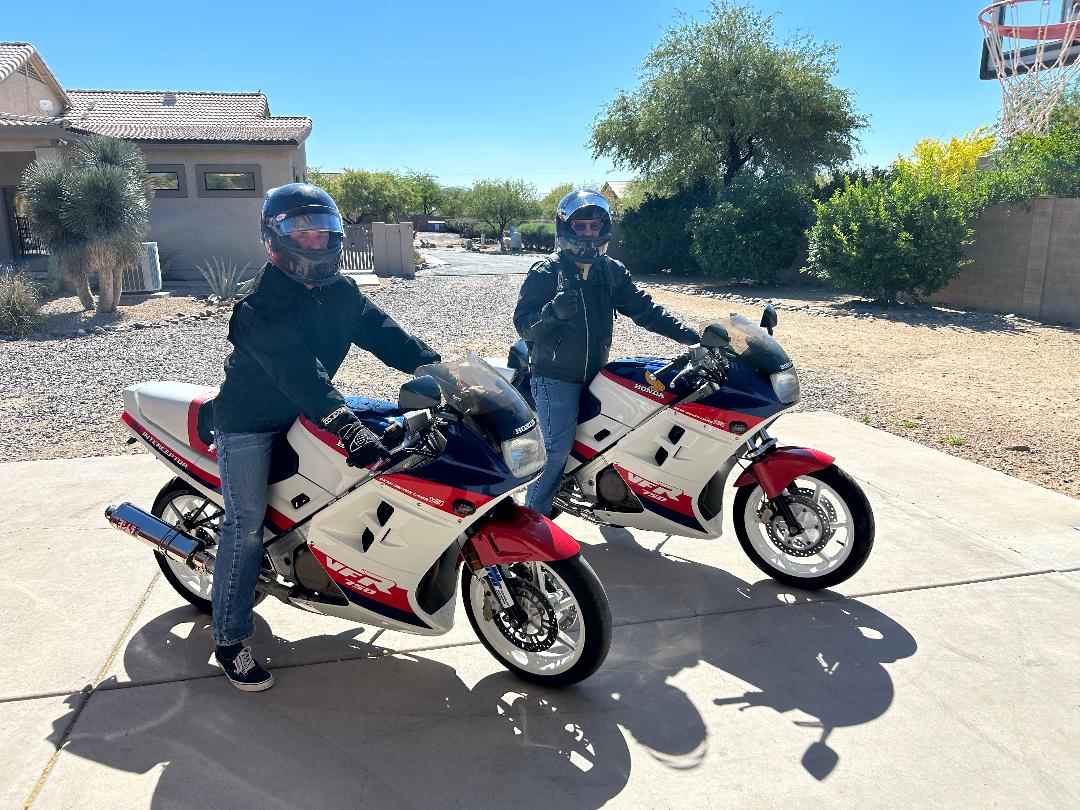
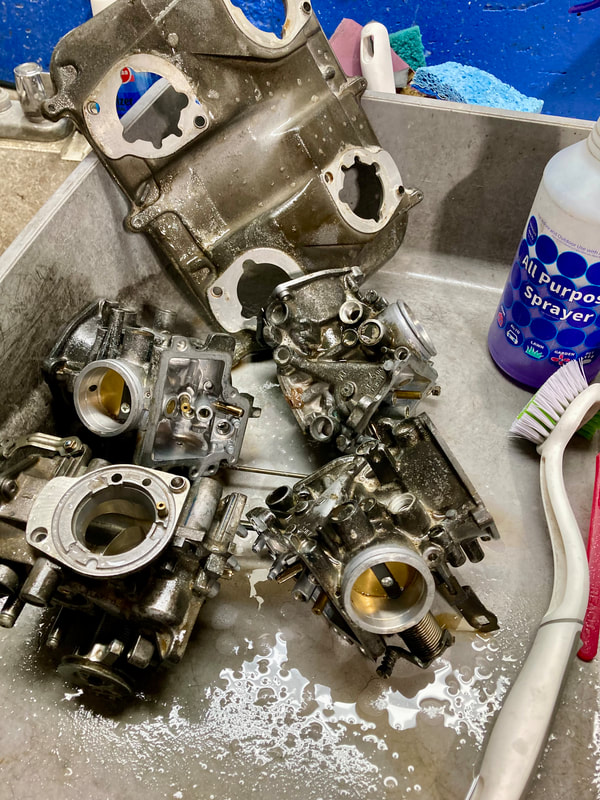
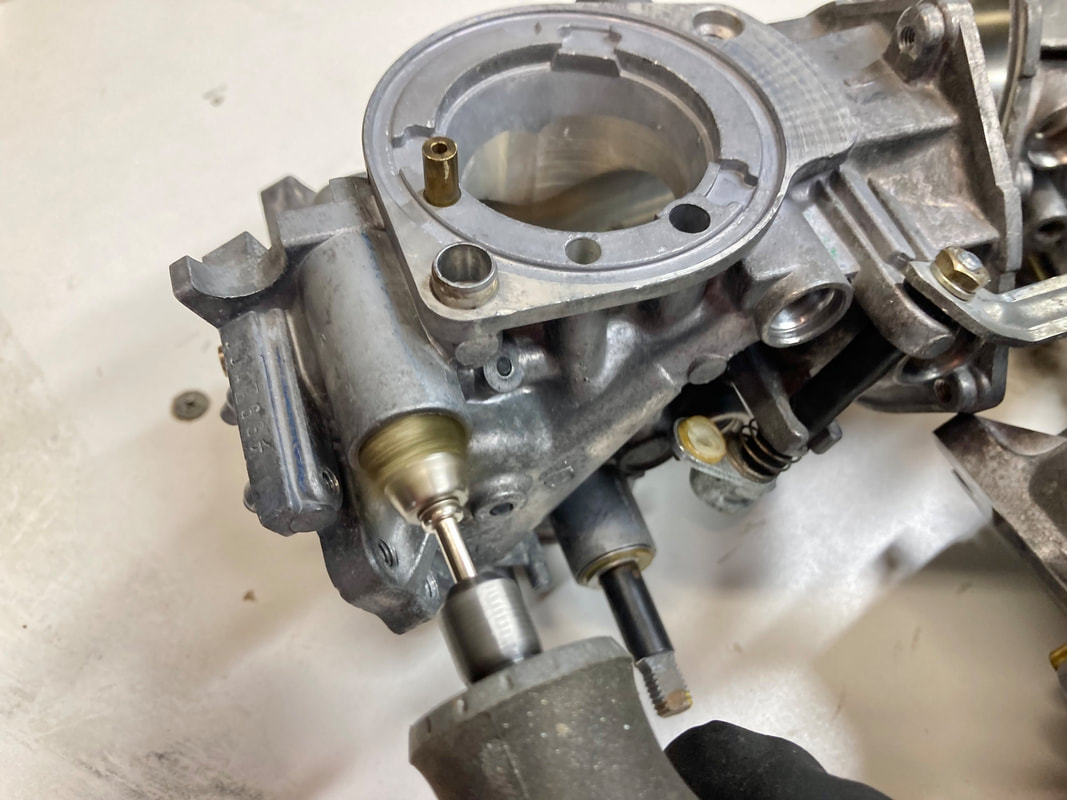
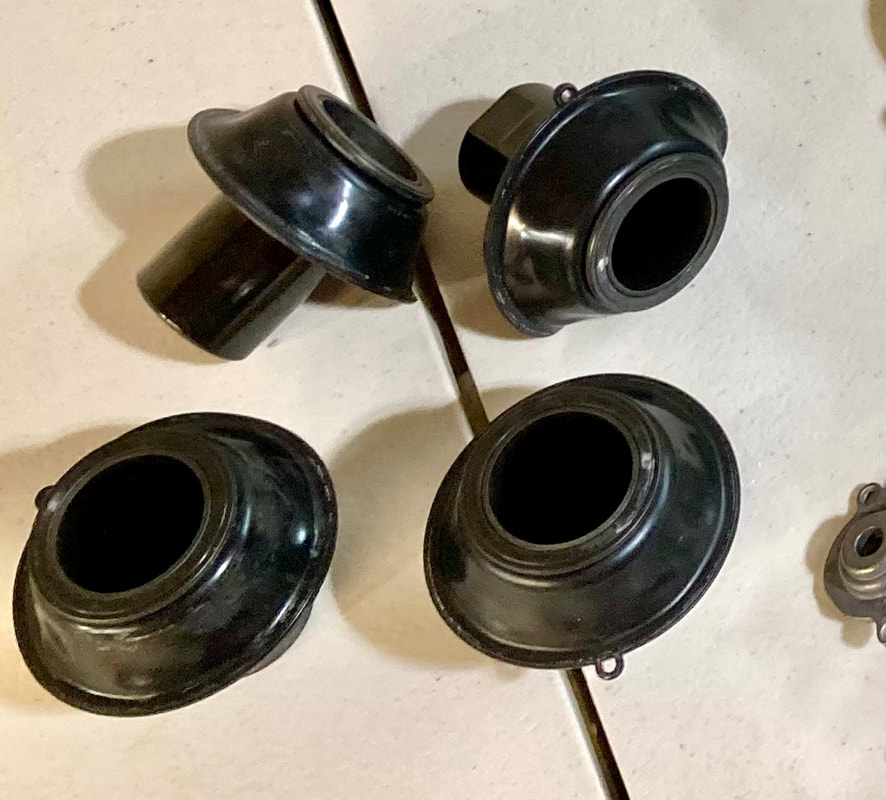
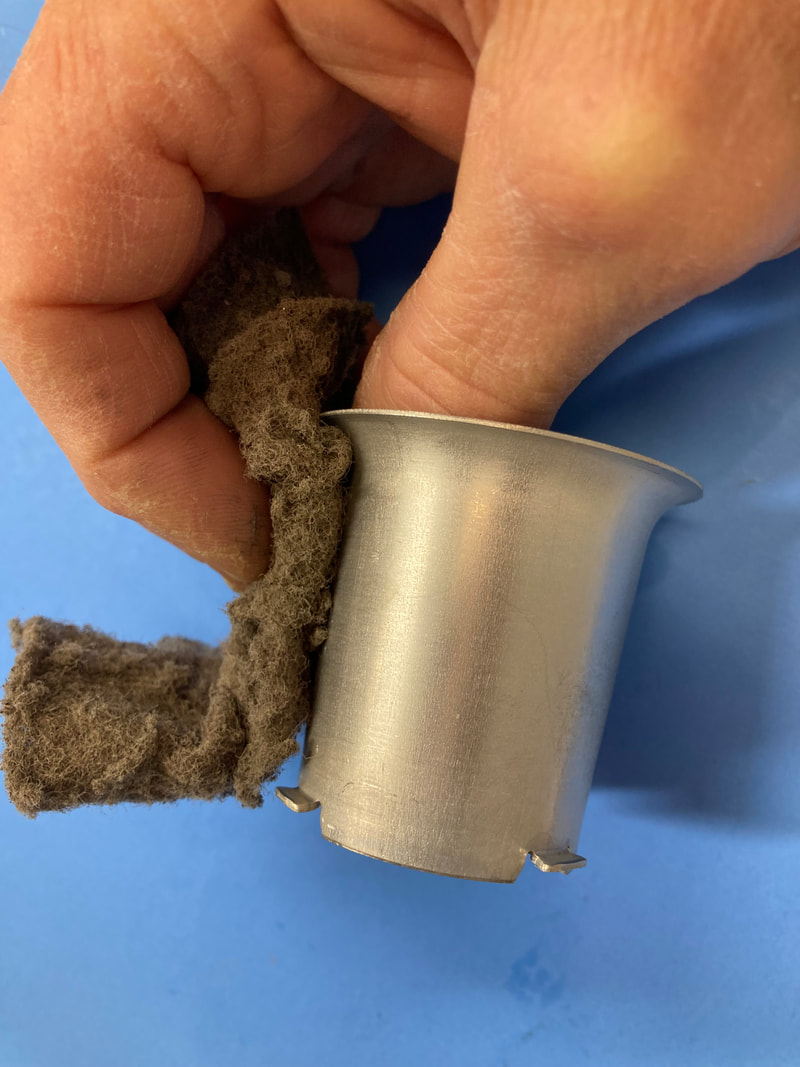
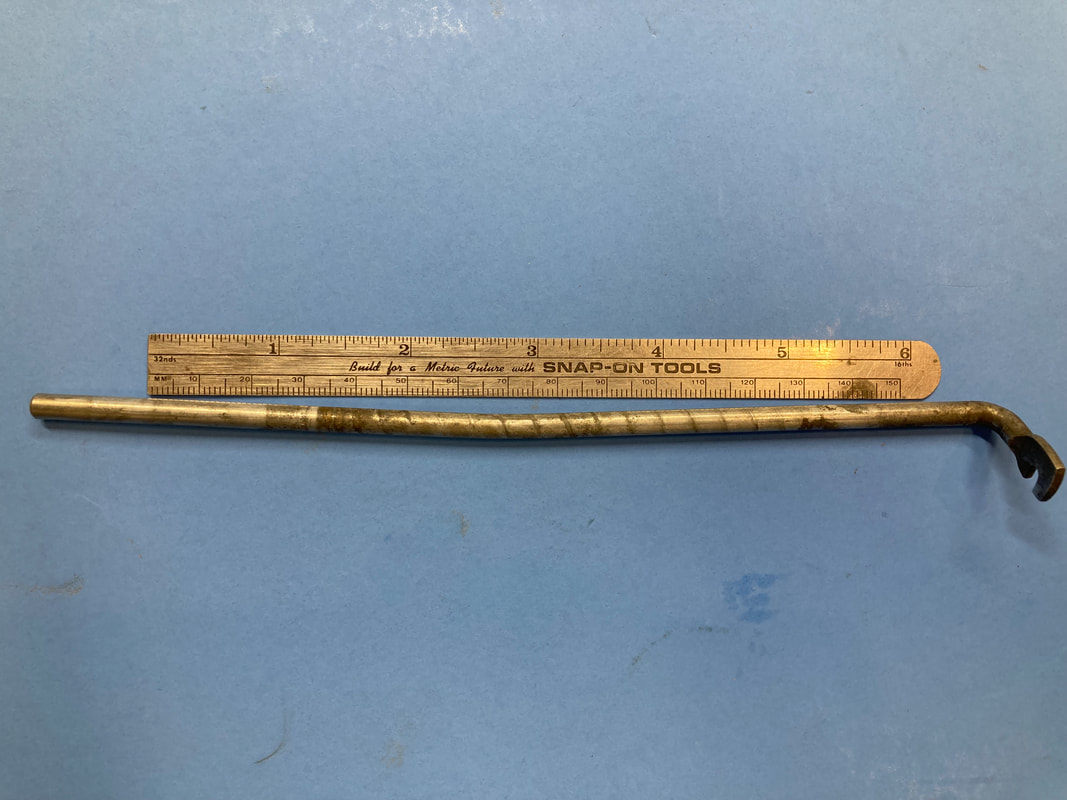
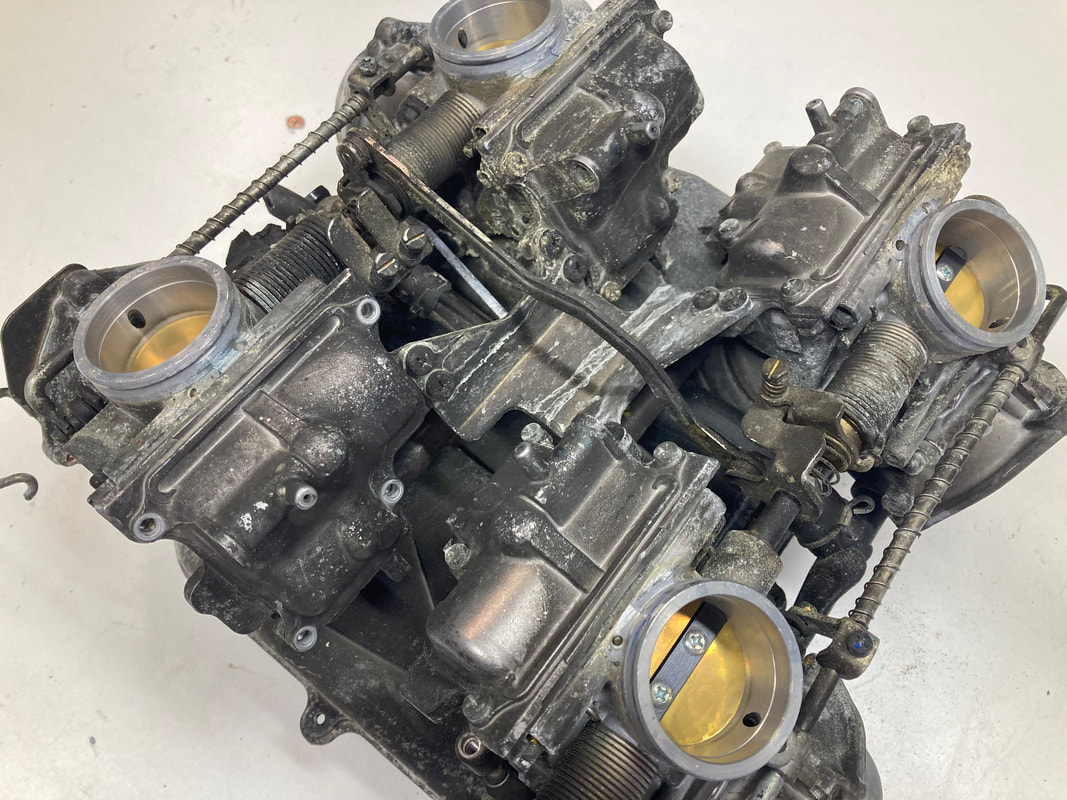
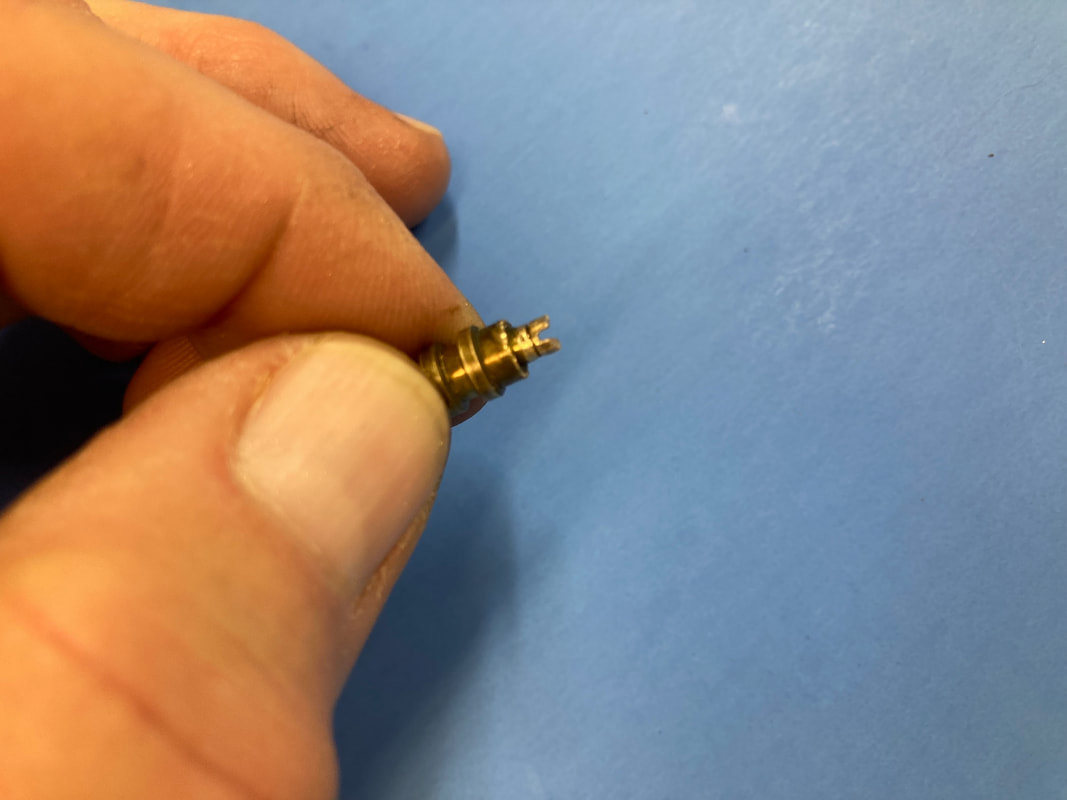
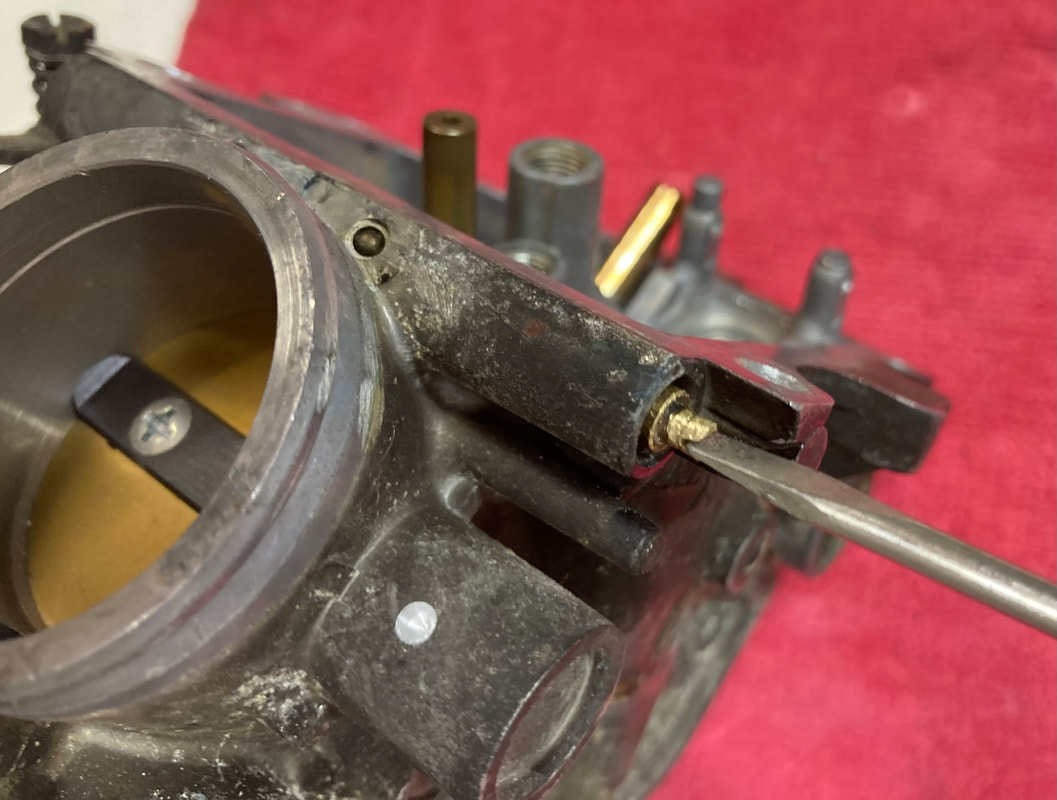
 Click on image for the Cycle Trader link Click on image for the Cycle Trader link What: 1990 VFR750F Why: Well-kept, original Where: Upland, California Price: $3100 Arguably the most striking colorway of the many all-red VFR years, the 1990 cuts a classic '90s profile thanks to that gorgeous Italian Red with the stark contrast of bright white wheels, a one-year only combination. Looks aside, this first-year RC36 marked the transition of the VFR's mission to a less aggressive, more "GT" look and feel. The mechanicals followed suit with a new frame, subtle engine changes, a more relaxed riding position, 17" wheels front & rear, radial tires and what would become a VFR trademark — the Honda/ELF single-sided swingarm. This example shows 31,900 miles, has managed to stay original and was obviously pampered throughout its life. The seller notes, "in very good original condition and ready to ride." This appears to be a great rider at a fair price. Good luck to seller and buyer.  Click on image for the Cycle Trader link Click on image for the Cycle Trader link What: 1986 VF500F Interceptor Why: Nice survivor, mostly original Where: Neenah, Wisconsin Price: $3695 For all the folks who write to ask me if I know of a nice 500 Interceptor available for sale, well, here ya' go! This example appears to be a very complete example — aftermarket mirrors the only non-original bits to catch my eye — with just enough patina to show its originality. Showing 32,785 miles, the black chrome mufflers are intact, the steel frame doesn't show the usual rust areas, the black engine area gleams, the paint looks very good with some scuff marks, and the windscreen shows fading. The selling dealer notes, "...purrs like new, no leaks and does not smoke. Drives and shifts perfectly." Overall, I would rate this a #2 or 3 rider-grade bike, which puts the asking price somewhat high, but I'm assuming there's some negotiating room built in. Longtime reader Dale E. from Arizona has his own small collection of Gen-2 Interceptors, and while at least two of them are still in the project stage, he also has a matched set of gorgeous red, white & blue examples. Below, he's shared a few photos of them, including a great pic of he and his son ready for a ride. I immediately envision matching 1986 VFRs twisting up Hwy 88 to Tortilla Flat for lunch at the Superstition Saloon on a sunny 70° December afternoon. I don't have all the particulars, but both bikes are sporting 17" wheel conversions, one with a what looks like a CBR fork, slip-on mufflers, tail eliminators and even a preserved Bubba Shobert signature! Both are mint-looking, highly detailed examples. Nice work, guys. The second phase of my carburetor rescue regimen is cleaning. While it's tempting to throw everything into the ultrasonic cleaner and hope for the best, I've found that a more detailed, hands-on cleaning will deliver the best results. Completely disassembling/reassembling a set of four carburetors is no small task and we don't want to be doing it a second time due to cutting corners in the cleaning phase. (Below) I begin with a "pre-cleaning" of these very dirty and soot-blackened carb bodies, using purple water-based degreaser and a few sizes of brushes. I just want to get the majority of this dirt so the ultrasonic cleaner has an easier job and its solution stays cleaner, longer. The second photo shows a comparison after a minute or two of scrubbing and a quick rinse. Next, I take a piece of 1200-grit wet/dry sandpaper and scuff clean the slide bores and bowl gasket surfaces. If there's tough gasket cement residue I switch to something more aggressive, like 600-grit. (click on an image to enlarge) (Below) Before entering the ultrasonic cleaner, I take a moment to clean the fuel and vent tube inlets using a brass brush on the Dremel tool. This will ensure a clean and smooth surface for the tubes' o-rings to make a good seal, especially important for the fuel supply tubes. Then it's into the warm ultrasonic solution for a 20-minute clean followed by a 20-minute soak and a second 20-minute cleaning. I'll also add in the brass jet collection to begin their cleaning process. When finished I blow the carb bodies clear with 80-100psi compressed air, paying particular attention to the various orifices and passages. This is often, but definitely not always, enough to clear everything out, so, using two sizes of vacuum hose, I verify every passage is clear by blowing by mouth pressure, listening for the escaping air in the appropriate place — this took years of experience to know where the air is supposed to be exiting and how much air resistance each passageway should have.  (Right) In this case one of the carbs had a clogged passage in the choke jet. This is the second most common place to find a clog, right after the pilot jets. Both of those jets can be cleared with a very fine wire, shown here. This tiny passage can be stubborn, so I soak it for a bit in Gum Cutter, or a similar solvent, then carefully probe the orifice, being especially careful to avoid stressing the wire to the point of it breaking off in the opening, which would create a real problem as the choke jets are not removable — at least I've never been able to do so. This clog cleared after a few minutes of effort. I then blow Gum Cutter through the entire circuit by mouth pressure, followed immediately by hitting it with compressed air. It's difficult to see in this photo, but the arrow points to a small drain port which is connected to the jet, so that port needs to be plugged with a spare fingertip when blowing through the circuit to ensure the entire circuit is clear. All the rest of these carbs' passages were clear — YAY! (Below) While the carb bodies and other metal parts are enjoying their ultrasonic bath I tackle the remaining parts, like the slide/diaphragms shown here. These were coated in this unknown white crusty residue which, fortunately, cleaned up well with Zep degreaser and gentle finger rubbing. I use the same cleaner on the plastic slides along with a blue non-scuff kitchen pad. I always remove the needle from the slide, but not really necessary if the needle can be cleaned sufficiently while installed, your call. (Below) Some of the smaller parts get attention too. From left to right: The float bowl covers are hand washed, the gasket grooves scraped of residual gunk, and their new Viton gaskets fitted. The floats are cleaned as necessary, sometimes requiring a degreaser soak and scuff pad to remove varnished gas, but these cleaned easily. I also submerge the floats for several hours to test for leaks — I've never found one. I gently clean the air cut valves and coat with a thin layer of red rubber grease (Gen-3 & -4). In the center photo these parts are cleaned with fine sandpaper, like 2000-grit, and/or a brass rotary brush. Finally the aluminum velocity funnels are washed, then scuffed to a satin finish with an auto painter's scuff pad, used wet or dry. (Below) I found upon disassembly that one of the choke rods was bent, so I quickly straighten it using a straightedge for reference. Gently tapping as necessary with a brass mallet on a flat surface makes quick work of this task. Raising each end a bit helps get things nice and flat — here I'm using the rods' end brackets as shims. (Below) Here's a collection of many of the auxilliary parts, all hand-washed. Every one of these individual parts are inspected during the cleaning process, with repairs or replacement made. This allows an easy flow into the next phase of the process — assembly.  Back in April, I happened upon this forlorn set of Gen-3 carburetors on eBay. For whatever reason, they spoke to me like the last puppy left in the litter, so I purchased them, ostensibly for "parts." They had experienced a bike fire, as evidenced by the layer of soot and melted plastic bits on the bottom of the set. I did, in fact, appropriate a few parts in the ensuing months, needed for more "deserving" carb sets. Last week I finally dragged them from the back of the shelf and did a full breakdown to examine what lay beneath the blackened carcass. Here is what I began with: (click on images to enlarge) (Below) My first step is the remove the jets & floats — the interior was surprisingly clean and everything removed easily. Next, I remove the mixture screw caps by first adding heat. One screw was firmly stuck in its bore, more on that later. I then remove the choke rods by loosening the bracket screw and sliding the shaft outward. I found one of the two slightly bent, but it can be straightened (more on that in Part 2). A bent rod will prevent all four enrichment shafts from operating. Then the two shaft springs are removed, looking pretty sorry. (Below) The metal plenum is removed by breaking loose the eight top screws — these can be stubborn and may require a hammer impact tool. If so, proceed carefully and use the correct (large) phillips-head bit. With the plenum removed we have a first look at the various fuel & vent tubes, showing two of the vent tubes deformed by heat. Take photos at this point for assembly reference. NOTE: Remove the small plenum locating dowels only if they're willing to come free with finger pressure. If they're stuck in their bores just leave them in place; they're easily deformed if forced. They may also fall free during the cleaning process; just set them aside till assembly. (Below) Next, I'll separate #2 & 3 from one another by removing the throttle and choke linkages from #2, which allows the enrichment valves to be removed (here's a detailed post on this procedure). This is optional; if the enrichment valves are clean and free moving, they can be left in place and the carbs remain joined by the linkages, your call. (Below) The air cut valves are next: I'm very careful with these assemblies, as they're often reusable if not damaged during removal — don't forget the oval o-ring, noting its orientation (there's a top & bottom). Here, I'm lifting the valve with a small magnet while gently releasing the rubber membrane. These are in great shape and will be cleaned and lightly coated with red rubber grease to prepare for reassembly. (Below) Again, this carb set is probably the cleanest I've ever encountered — note the shiny brass butterfly. This leads me to believe these carbs have seen very few miles and never stored with fuel left in the bowls.  (Right) This slide was stuck in its bore, though it wasn't the plastic slide, but rather the jet needle. I soaked it with Kroil and added some heat to the area and it eventually popped loose with gentle persuasion. (Below) Here, I'm running hot water over the fuel tubes to loosen the rubber hose connection. Note the burned-through fuel line. Then I lever off the fuel tube o-rings. (Below) Remove the four fuel mixture (pilot) screws along with their spring, metal washer and o-ring. You'll likely need to dig a little for the washer or o-ring. One of the mixture screws was stuck in its bore and, of course, it easily broke off the soft brass tip, rendering a screwdriver useless. To get it out I soaked it in Kroil for a few hours, added heat and gently worked it loose with a small vise grip. Success. (Below) I want to save this damaged mixture screw — I just need a new screwdriver slot. So, I grind the face flat and very carefully cut a new slot with a very thin light-duty Dremel cut-off disc. Success. With all the bits and bobs removed the next step will be cleaning. There's a handful of parts I'll need to complete this carb set: I've already sourced one missing jet needle, plus 4 large brass plenum "washers" and, finally, I need to source the unique to this generation carb-to-plenum o-rings. Part 2 will deal with the cleaning process.  |
THE SHOP BLOG
|
||


 RSS Feed