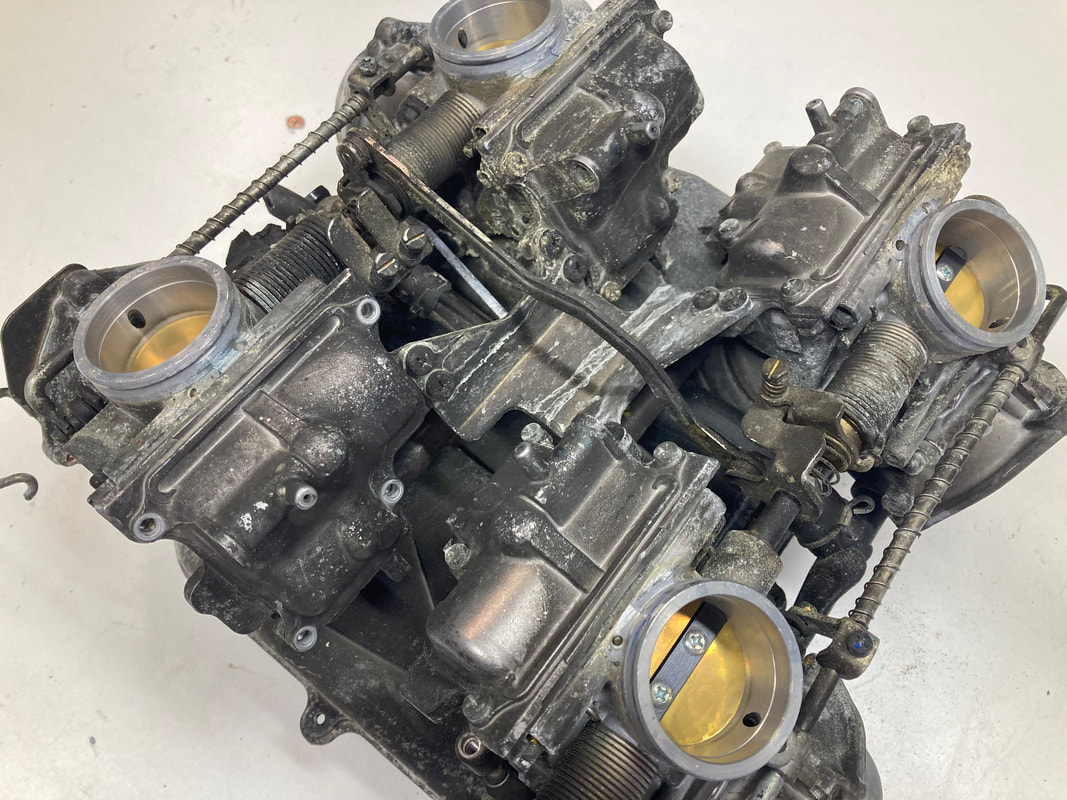
Back in April, I happened upon this forlorn set of Gen-3 carburetors on eBay. For whatever reason, they spoke to me like the last puppy left in the litter, so I purchased them, ostensibly for "parts." They had experienced a bike fire, as evidenced by the layer of soot and melted plastic bits on the bottom of the set. I did, in fact, appropriate a few parts in the ensuing months, needed for more "deserving" carb sets. Last week I finally dragged them from the back of the shelf and did a full breakdown to examine what lay beneath the blackened carcass. Here is what I began with:
(click on images to enlarge)
(click on images to enlarge)


(Below) My first step is the remove the jets & floats — the interior was surprisingly clean and everything removed easily. Next, I remove the mixture screw caps by first adding heat. One screw was firmly stuck in its bore, more on that later. I then remove the choke rods by loosening the bracket screw and sliding the shaft outward. I found one of the two slightly bent, but it can be straightened (more on that in Part 2). A bent rod will prevent all four enrichment shafts from operating. Then the two shaft springs are removed, looking pretty sorry.


(Below) The metal plenum is removed by breaking loose the eight top screws — these can be stubborn and may require a hammer impact tool. If so, proceed carefully and use the correct (large) phillips-head bit. With the plenum removed we have a first look at the various fuel & vent tubes, showing two of the vent tubes deformed by heat. Take photos at this point for assembly reference.
NOTE: Remove the small plenum locating dowels only if they're willing to come free with finger pressure. If they're stuck in their bores just leave them in place; they're easily deformed if forced. They may also fall free during the cleaning process; just set them aside till assembly.
NOTE: Remove the small plenum locating dowels only if they're willing to come free with finger pressure. If they're stuck in their bores just leave them in place; they're easily deformed if forced. They may also fall free during the cleaning process; just set them aside till assembly.


(Below) Next, I'll separate #2 & 3 from one another by removing the throttle and choke linkages from #2, which allows the enrichment valves to be removed (here's a detailed post on this procedure). This is optional; if the enrichment valves are clean and free moving, they can be left in place and the carbs remain joined by the linkages, your call.


(Below) The air cut valves are next: I'm very careful with these assemblies, as they're often reusable if not damaged during removal — don't forget the oval o-ring, noting its orientation (there's a top & bottom). Here, I'm lifting the valve with a small magnet while gently releasing the rubber membrane. These are in great shape and will be cleaned and lightly coated with red rubber grease to prepare for reassembly.


(Below) Again, this carb set is probably the cleanest I've ever encountered — note the shiny brass butterfly. This leads me to believe these carbs have seen very few miles and never stored with fuel left in the bowls.


(Right) This slide was stuck in its bore, though it wasn't the plastic slide, but rather the jet needle. I soaked it with Kroil and added some heat to the area and it eventually popped loose with gentle persuasion.
(Below) Here, I'm running hot water over the fuel tubes to loosen the rubber hose connection. Note the burned-through fuel line. Then I lever off the fuel tube o-rings.
(Below) Here, I'm running hot water over the fuel tubes to loosen the rubber hose connection. Note the burned-through fuel line. Then I lever off the fuel tube o-rings.


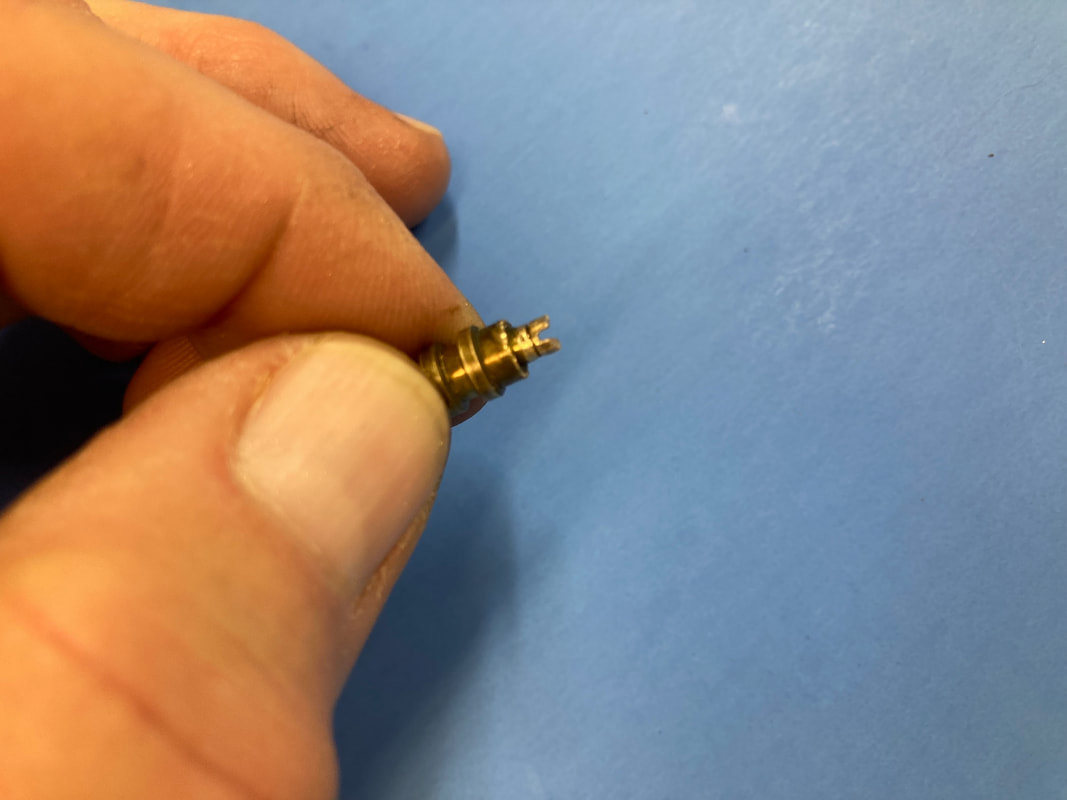
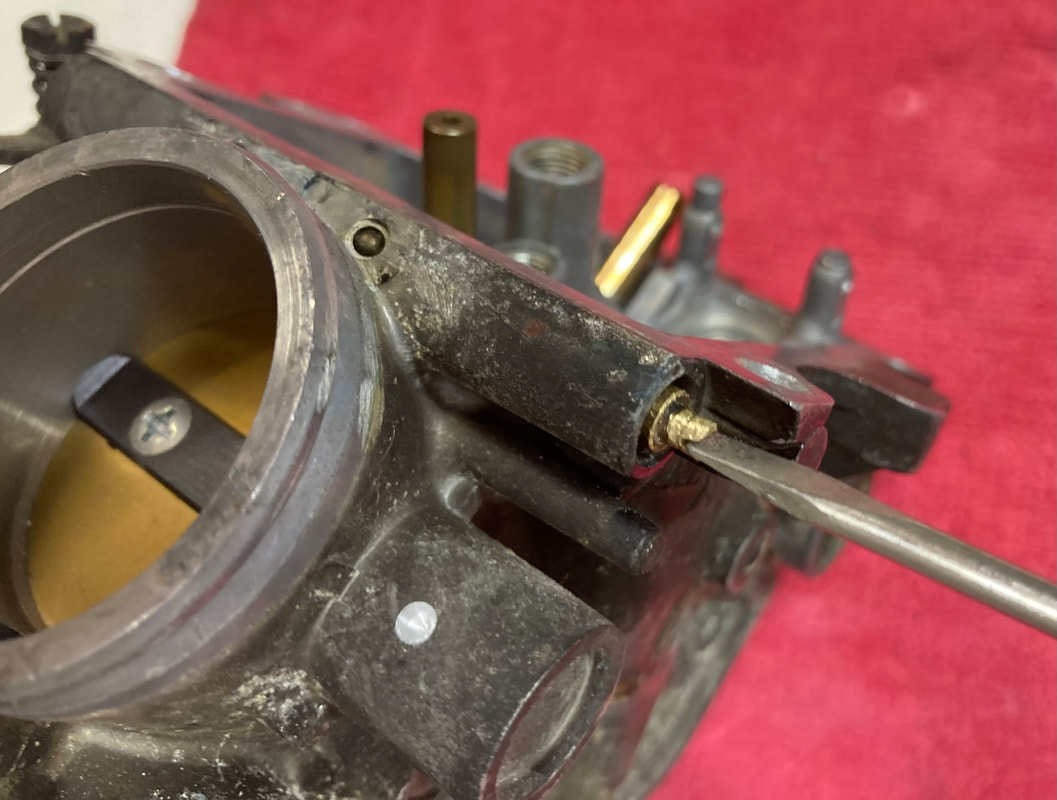
(Below) Remove the four fuel mixture (pilot) screws along with their spring, metal washer and o-ring. You'll likely need to dig a little for the washer or o-ring. One of the mixture screws was stuck in its bore and, of course, it easily broke off the soft brass tip, rendering a screwdriver useless. To get it out I soaked it in Kroil for a few hours, added heat and gently worked it loose with a small vise grip. Success.


(Below) I want to save this damaged mixture screw — I just need a new screwdriver slot. So, I grind the face flat and very carefully cut a new slot with a very thin light-duty Dremel cut-off disc. Success.


With all the bits and bobs removed the next step will be cleaning. There's a handful of parts I'll need to complete this carb set: I've already sourced one missing jet needle, plus 4 large brass plenum "washers" and, finally, I need to source the unique to this generation carb-to-plenum o-rings.
Part 2 will deal with the cleaning process.
Part 2 will deal with the cleaning process.

 RSS Feed