 Click on image for a link to the dealer's website
 What: 1991 (?) VFR750F
Why: Clean, original, low miles
Where: Xenia, Ohio
Price: $6500
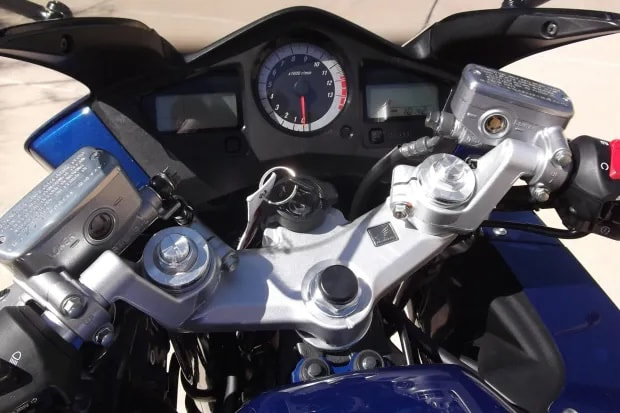
Williams Vintage Cycle Company in central Ohio is offering this very original-looking Gen-3 VFR. The ad lists the bike as a 1991, but the white wheels would indicate a 1990 model. Showing only 16,086 miles, this one includes the passenger seat cowl, a hard-to-find item if missing. The dealer indicates recent maintenance is completed, the bike starts well cold or hot, everything "works as it should" and the tool kit and Haynes manual are included. I'm a little surprised to not see a center stand, as I've always assumed it was standard on all Gen-3s.
A little hyperbole may be in play when the phrase "collector quality condition" is used, as there's a few imperfections visible in the photos, including what appears to be a chip on the tank's left side. That's not to take away from the bike's overall condition, which is pretty stunning, as evidenced by the beautiful original windscreen and perfect-fitting mirror covers, two common wear indicators. This example appears to be a genuine survivor, right down to the unmolested rear fender, almost never found intact after 30+ years. Taken altogether, the asking price of $6500 is at the top of the market, but so is the bike. Any classic bike enthusiast should be proud to roll up on this beauty.
Why: Clean, original, low miles
Where: Xenia, Ohio
Price: $6500
Williams Vintage Cycle Company in central Ohio is offering this very original-looking Gen-3 VFR. The ad lists the bike as a 1991, but the white wheels would indicate a 1990 model. Showing only 16,086 miles, this one includes the passenger seat cowl, a hard-to-find item if missing. The dealer indicates recent maintenance is completed, the bike starts well cold or hot, everything "works as it should" and the tool kit and Haynes manual are included. I'm a little surprised to not see a center stand, as I've always assumed it was standard on all Gen-3s.
A little hyperbole may be in play when the phrase "collector quality condition" is used, as there's a few imperfections visible in the photos, including what appears to be a chip on the tank's left side. That's not to take away from the bike's overall condition, which is pretty stunning, as evidenced by the beautiful original windscreen and perfect-fitting mirror covers, two common wear indicators. This example appears to be a genuine survivor, right down to the unmolested rear fender, almost never found intact after 30+ years. Taken altogether, the asking price of $6500 is at the top of the market, but so is the bike. Any classic bike enthusiast should be proud to roll up on this beauty.


 RSS Feed